


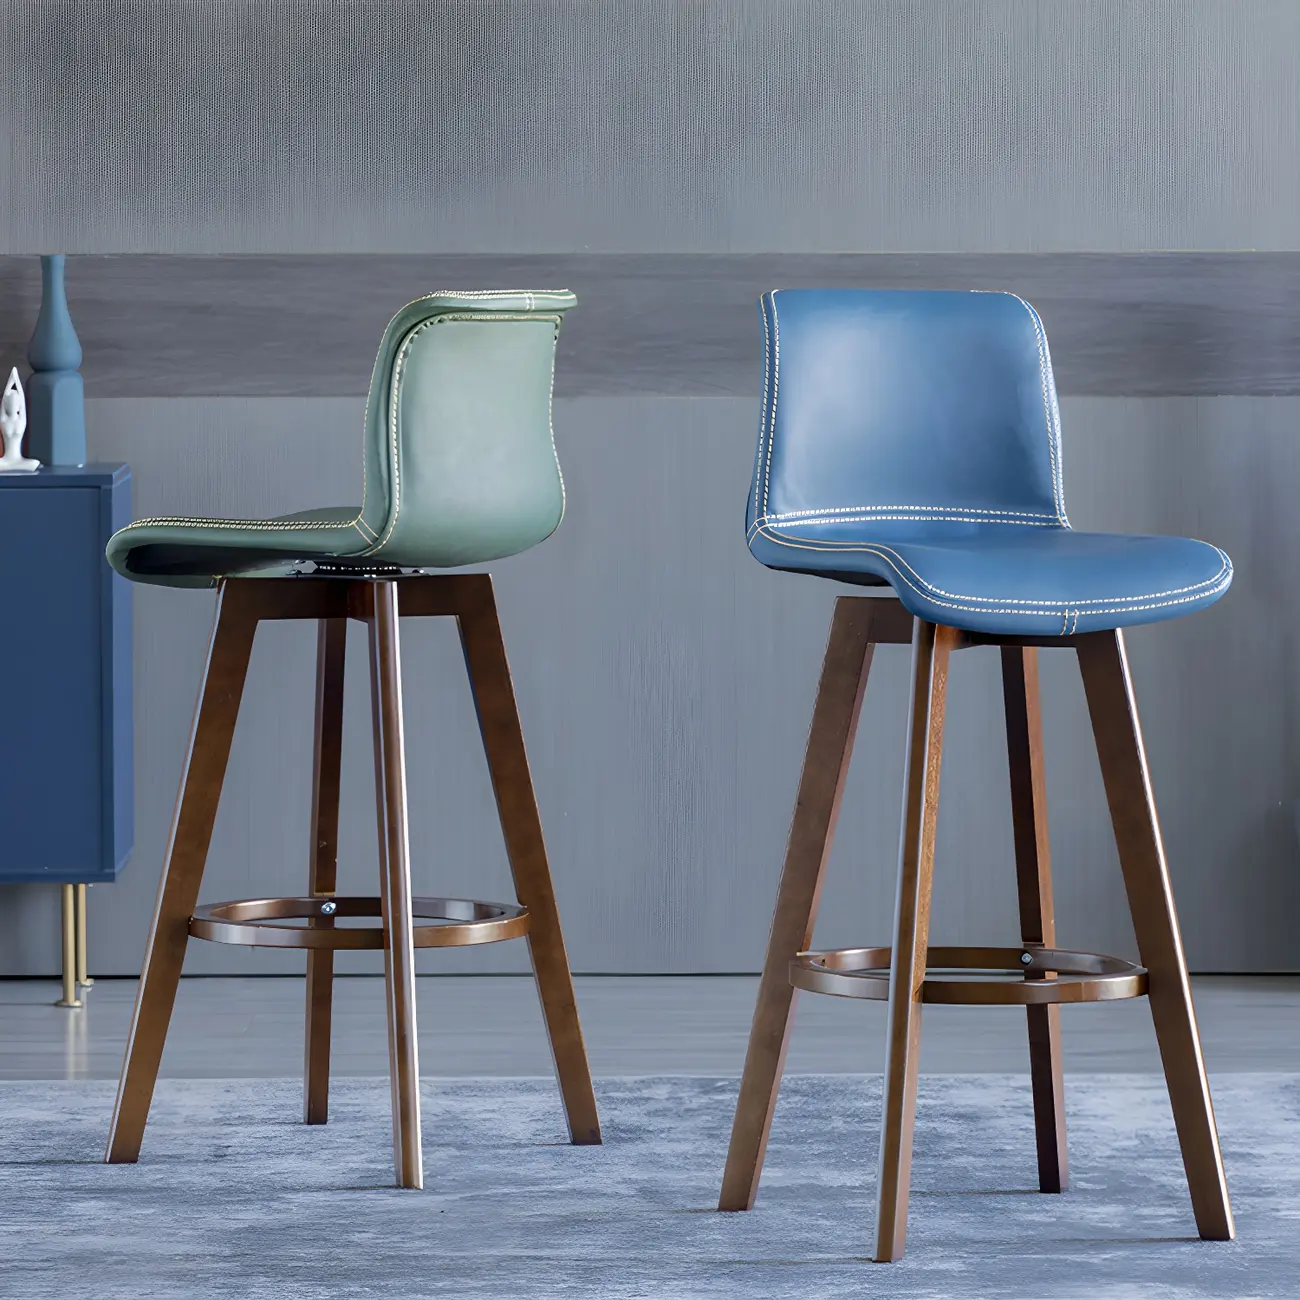


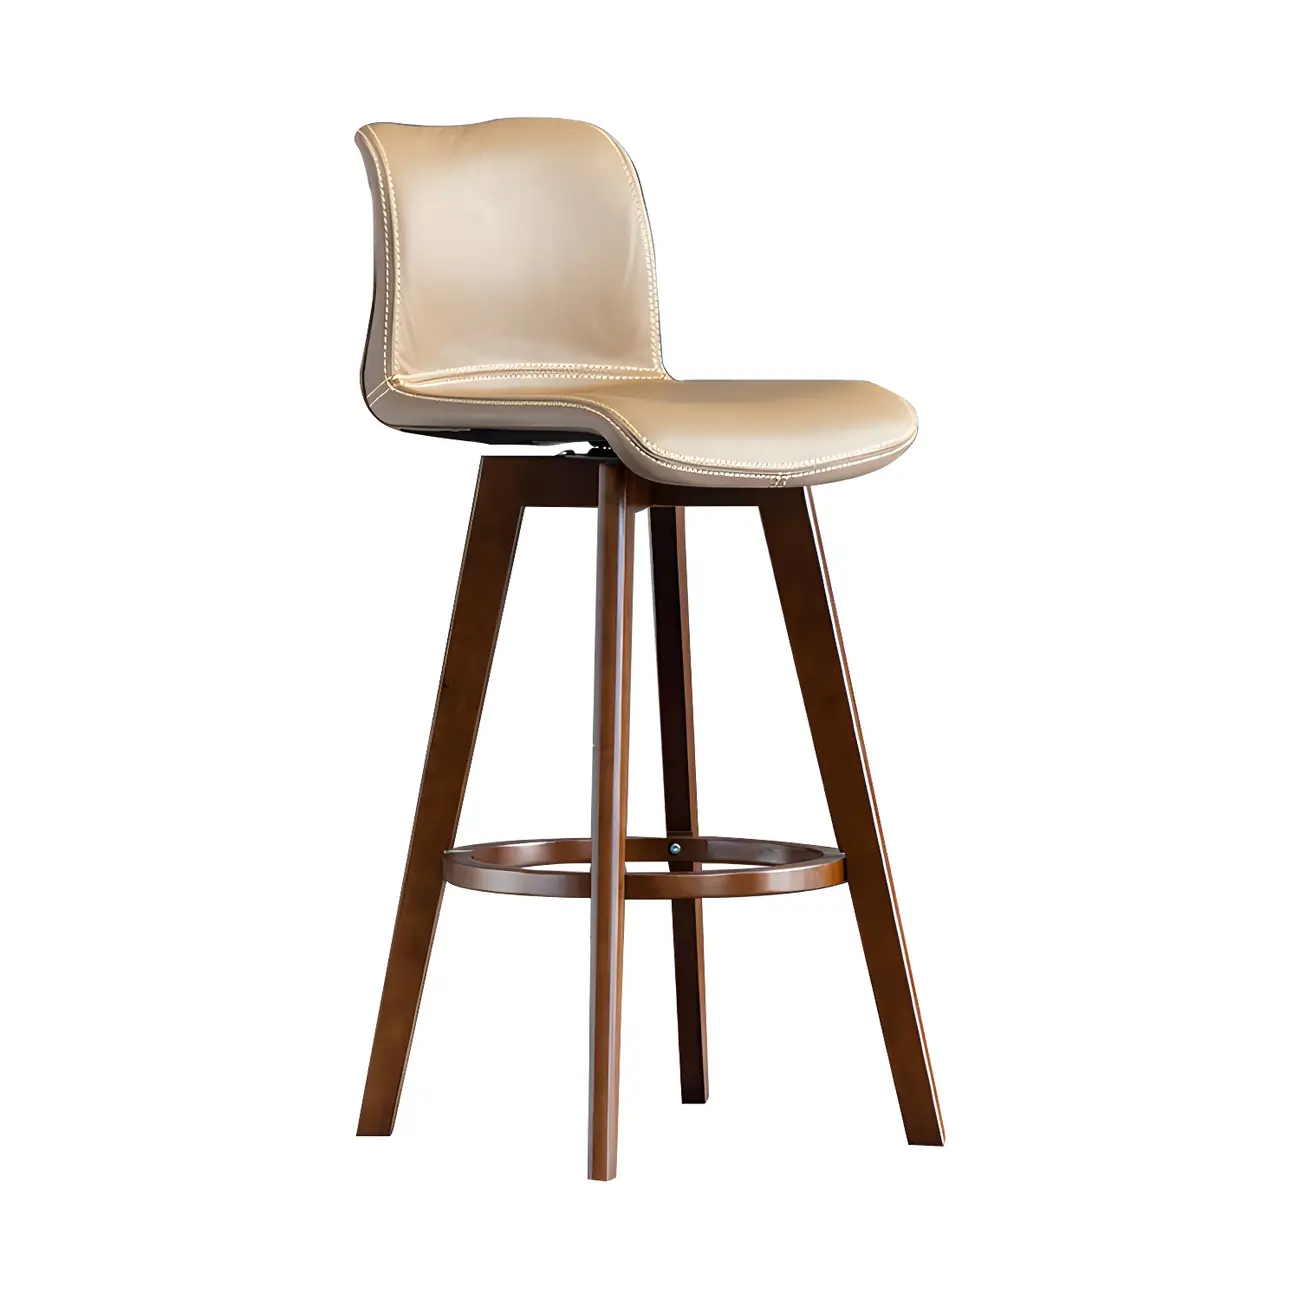
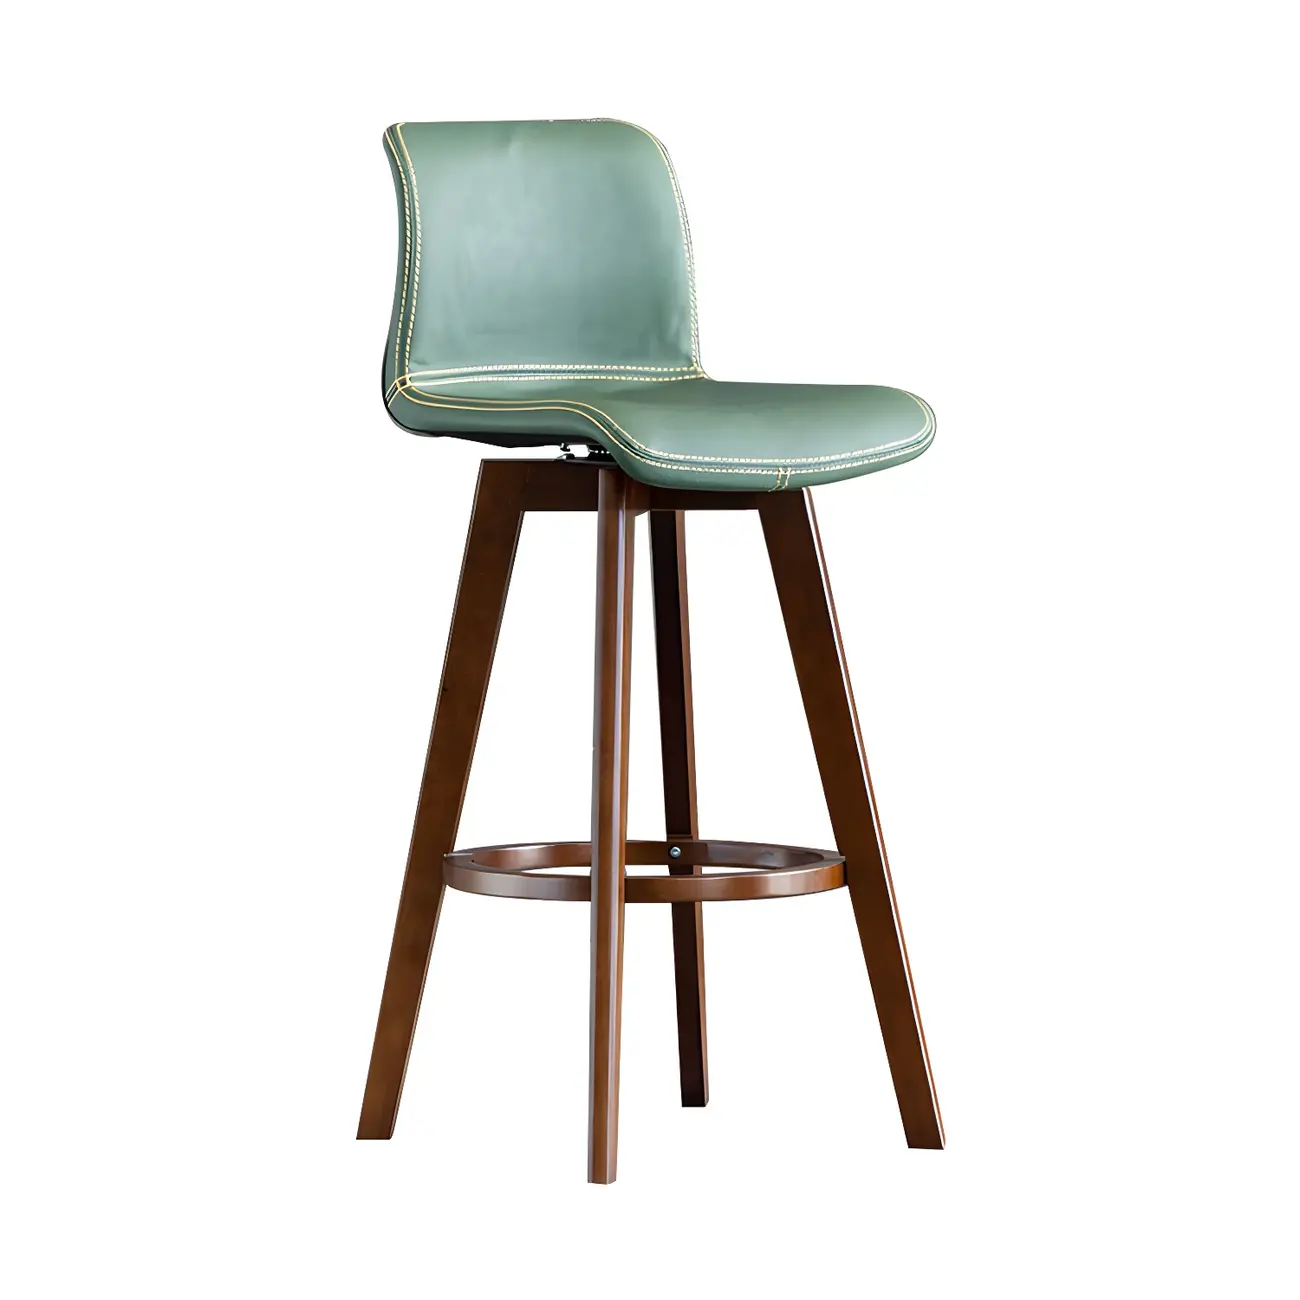
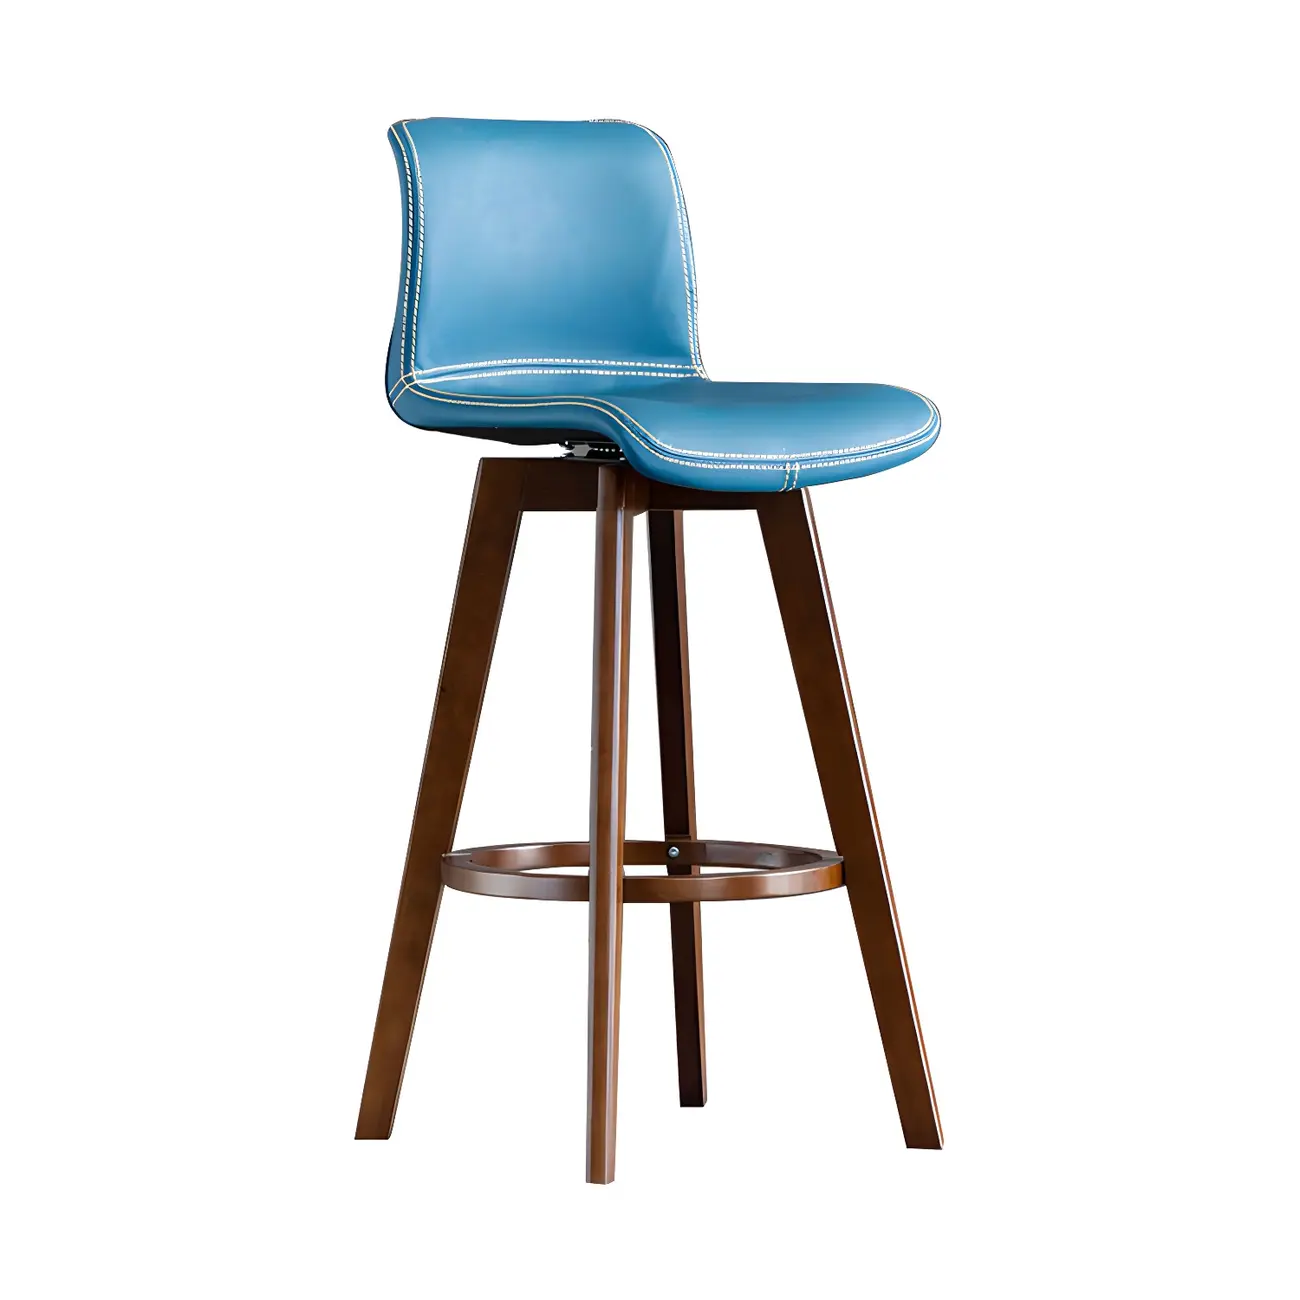


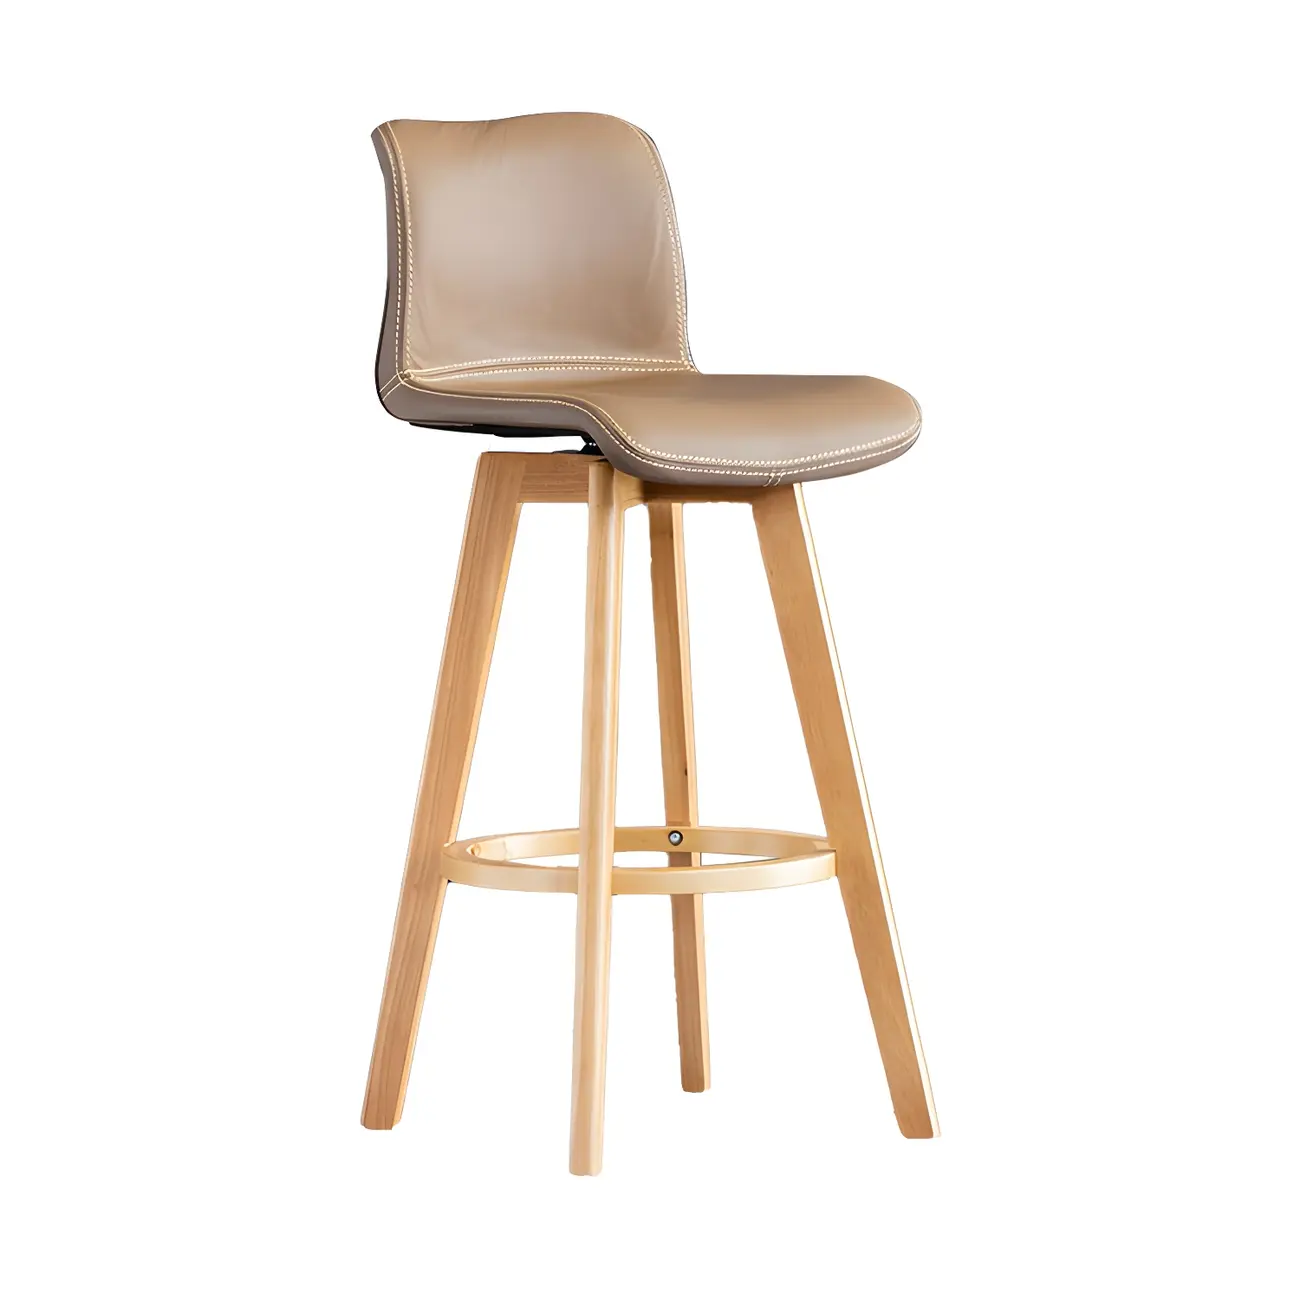
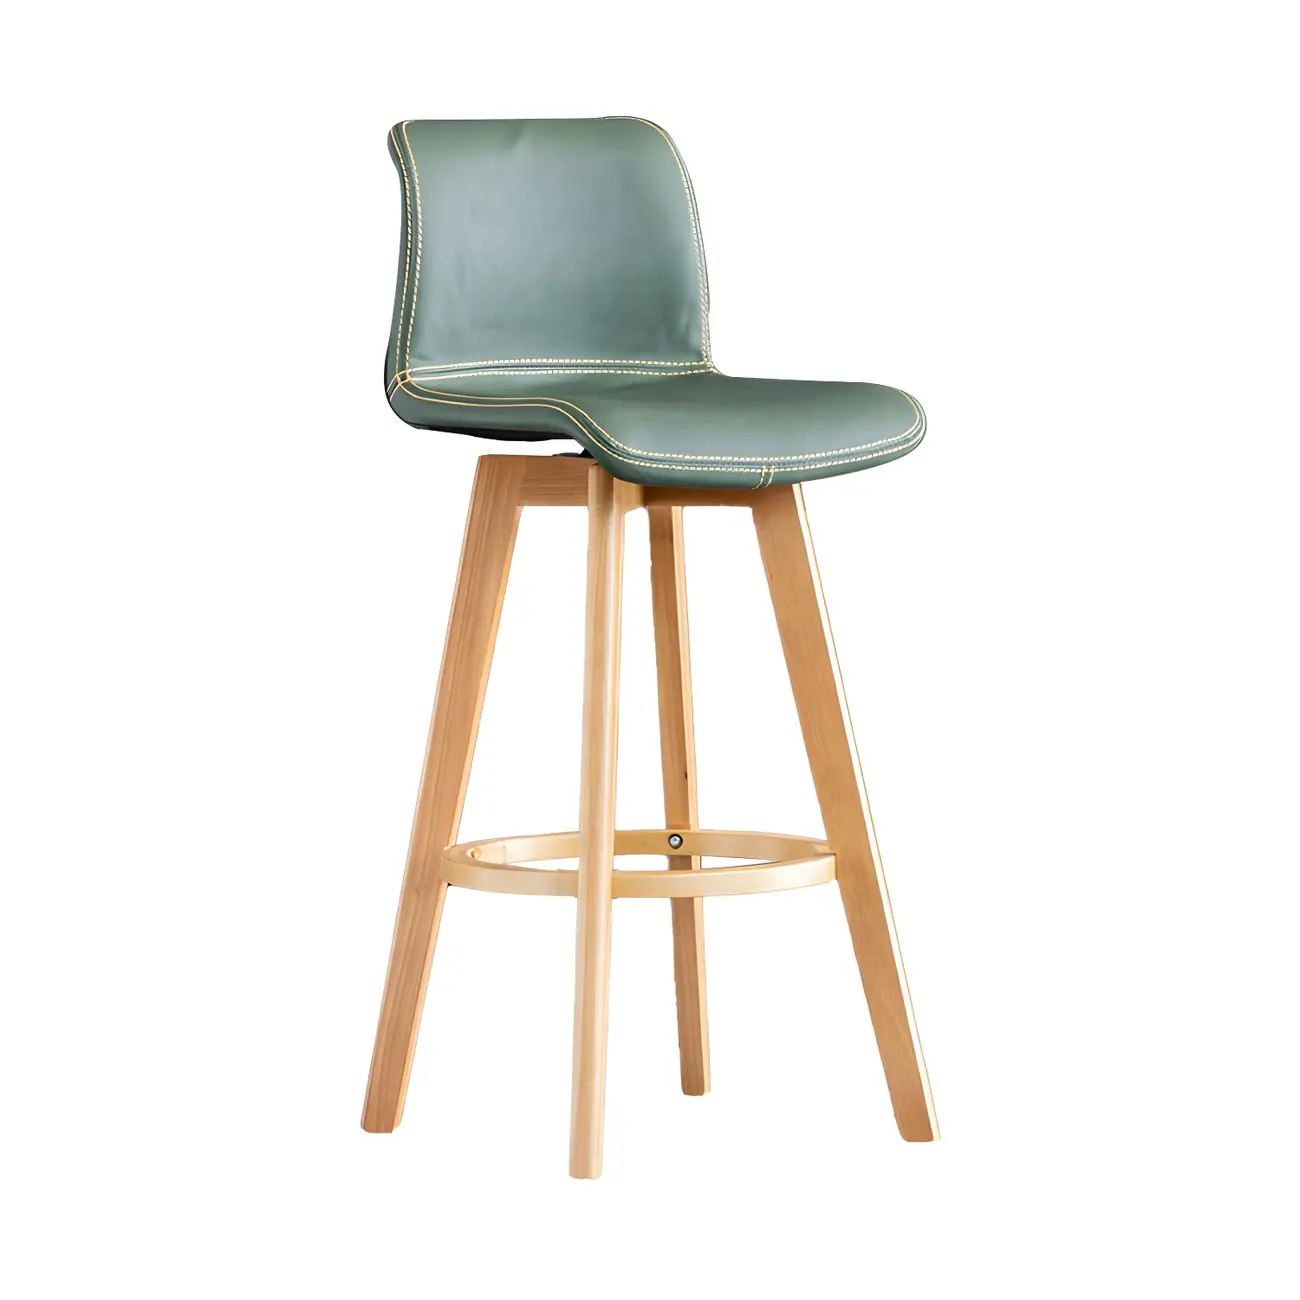


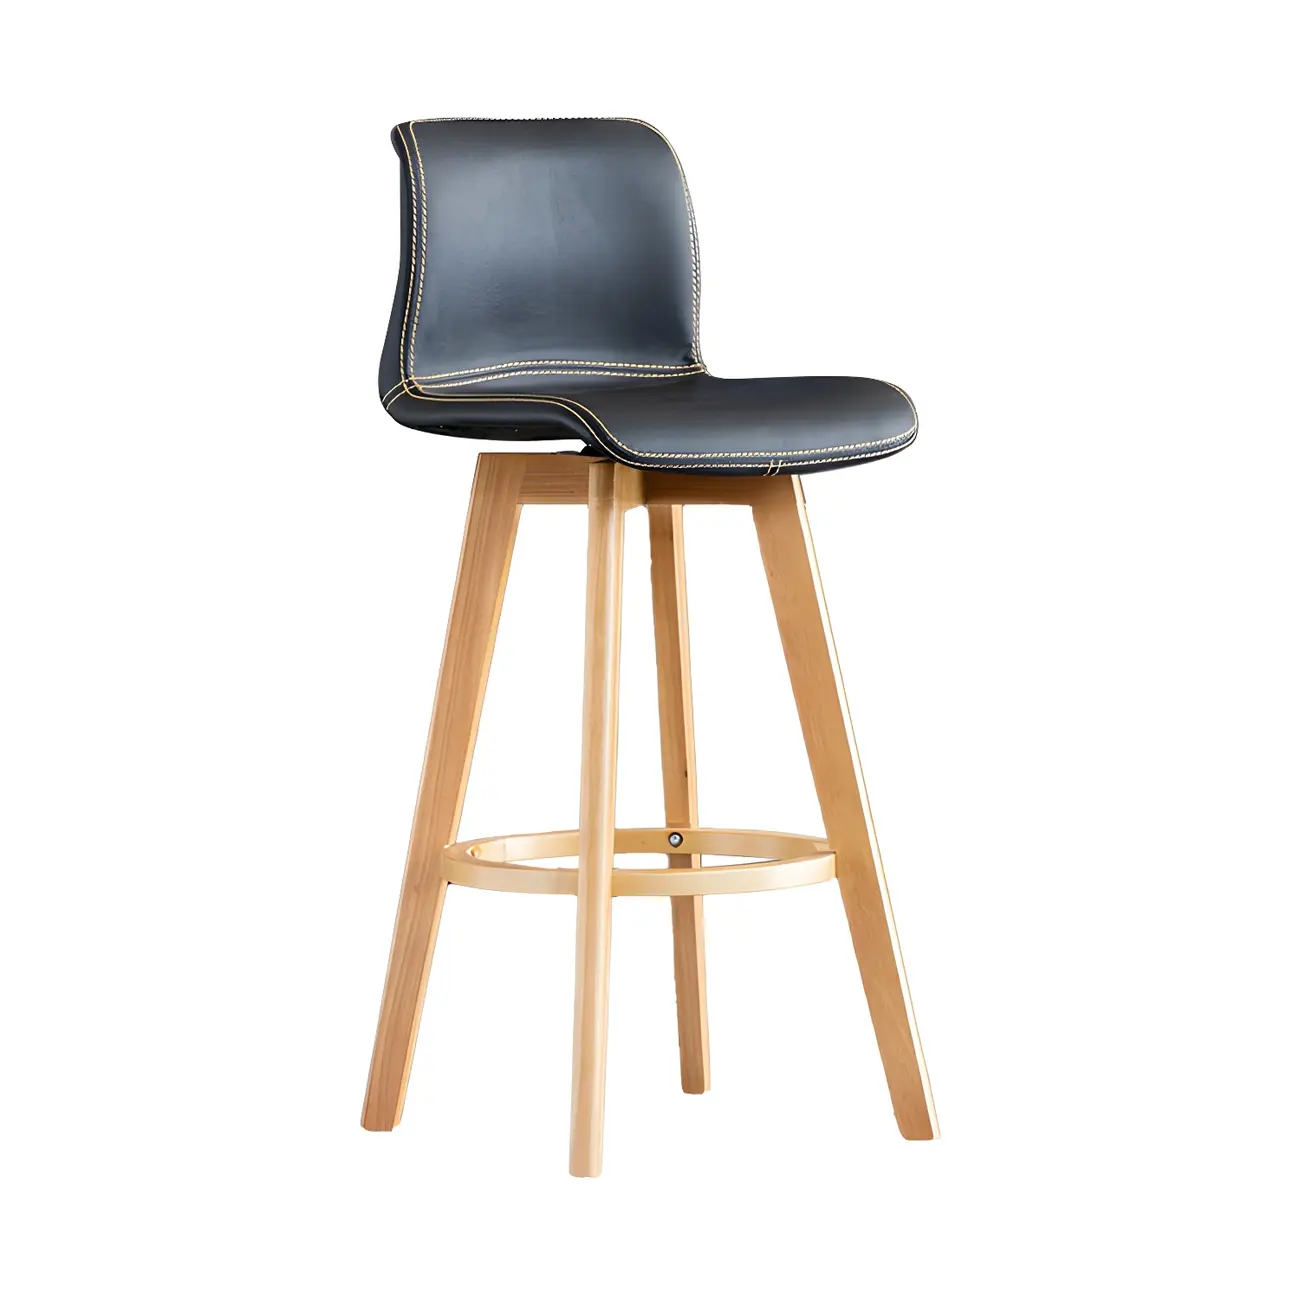
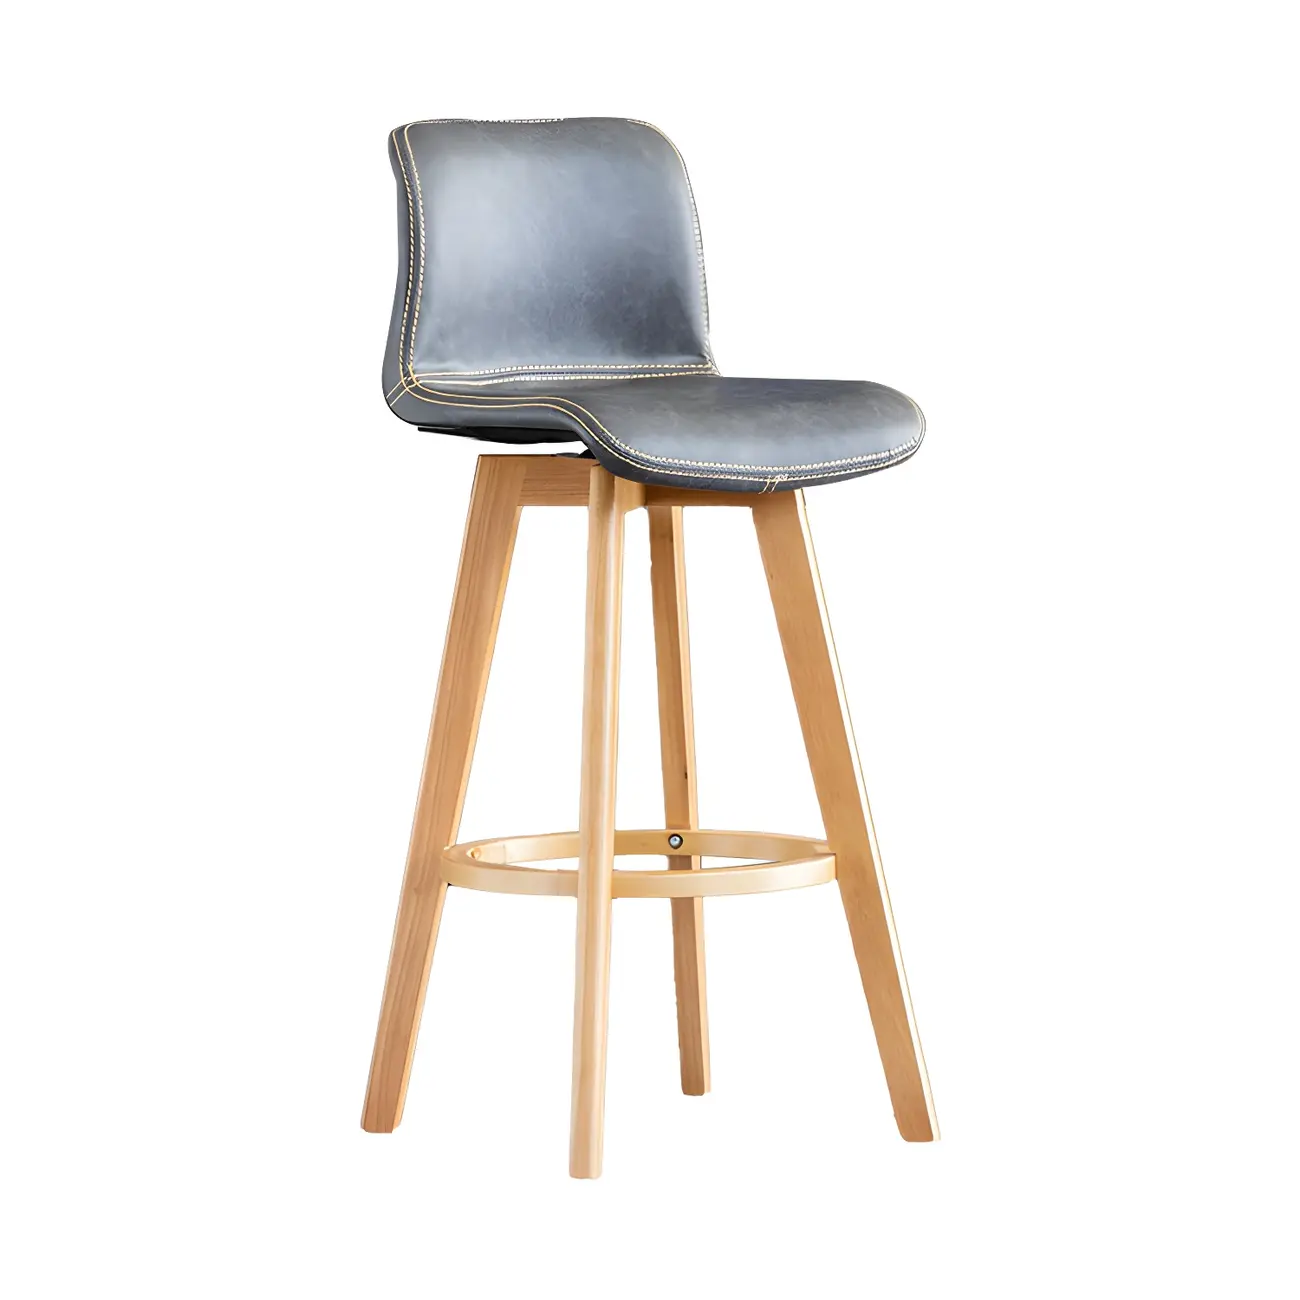

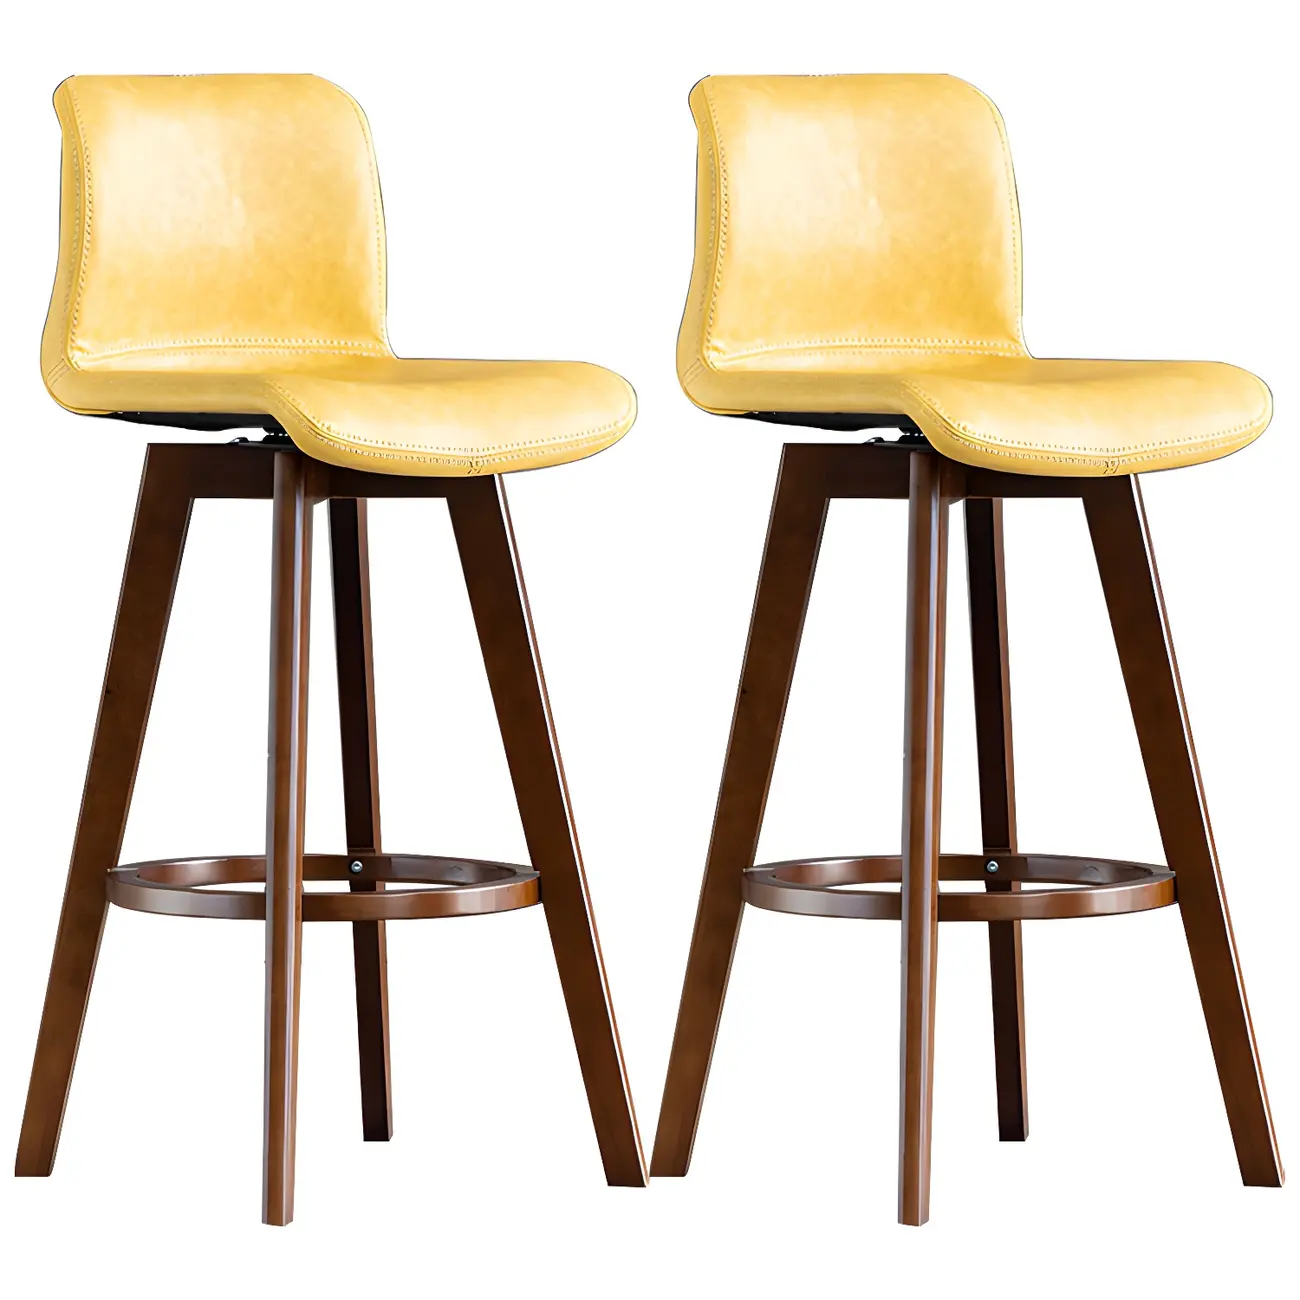


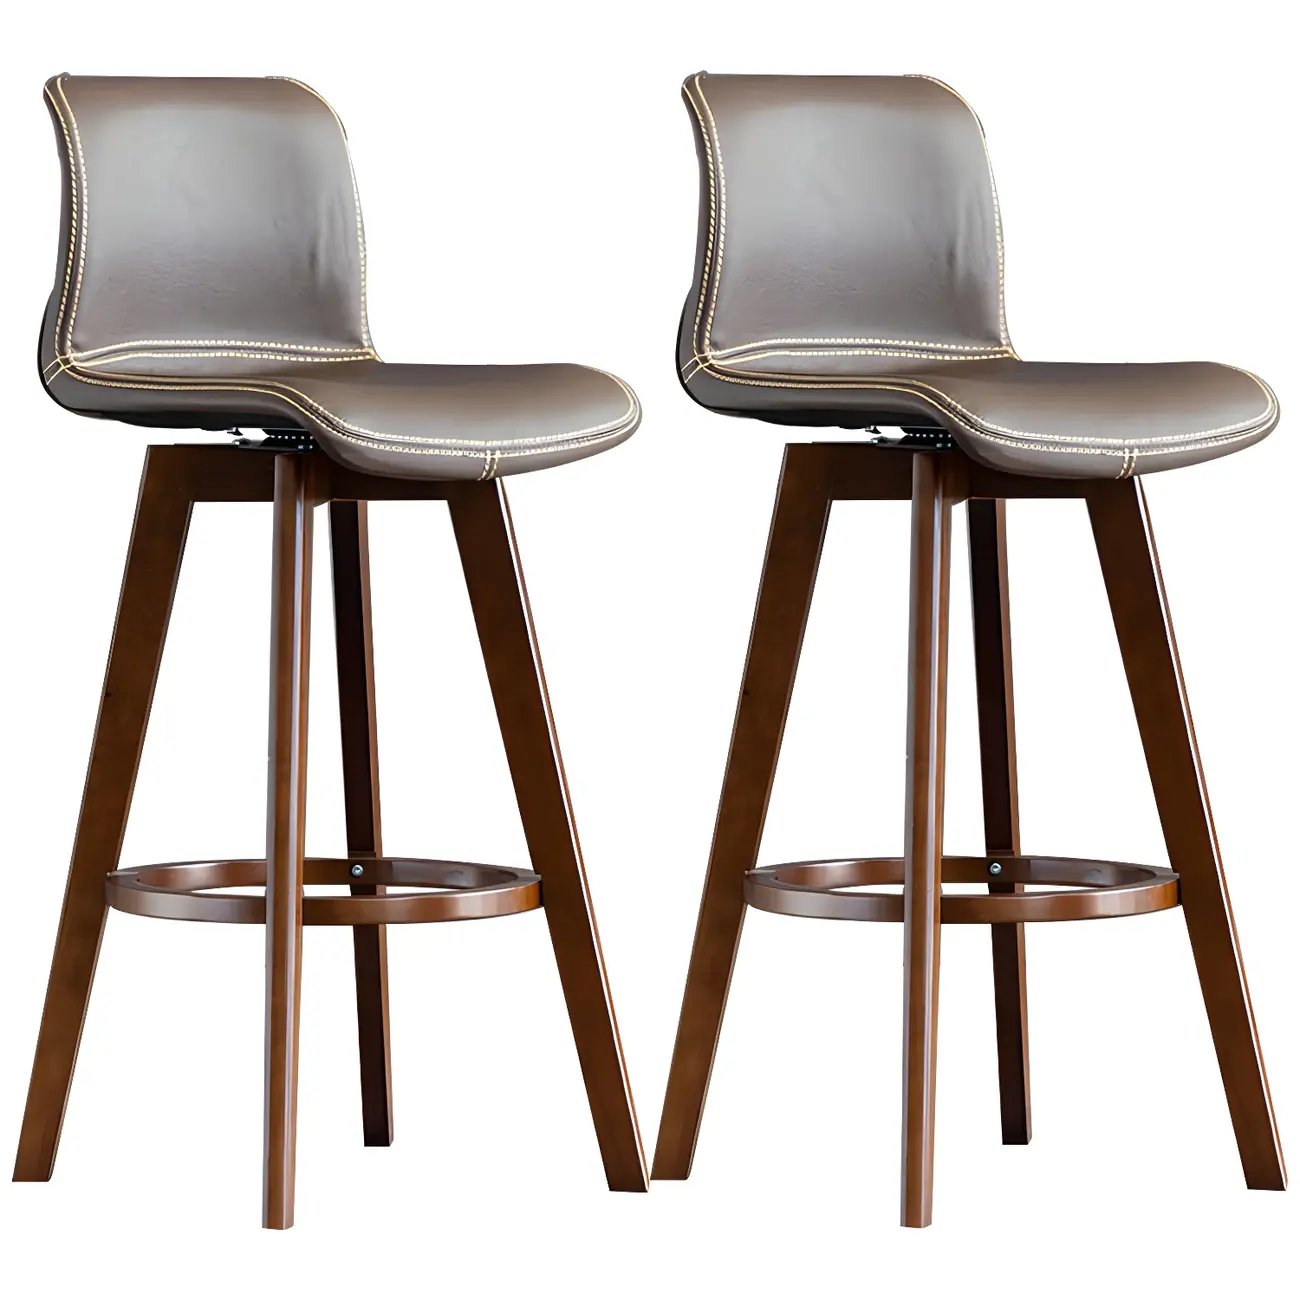

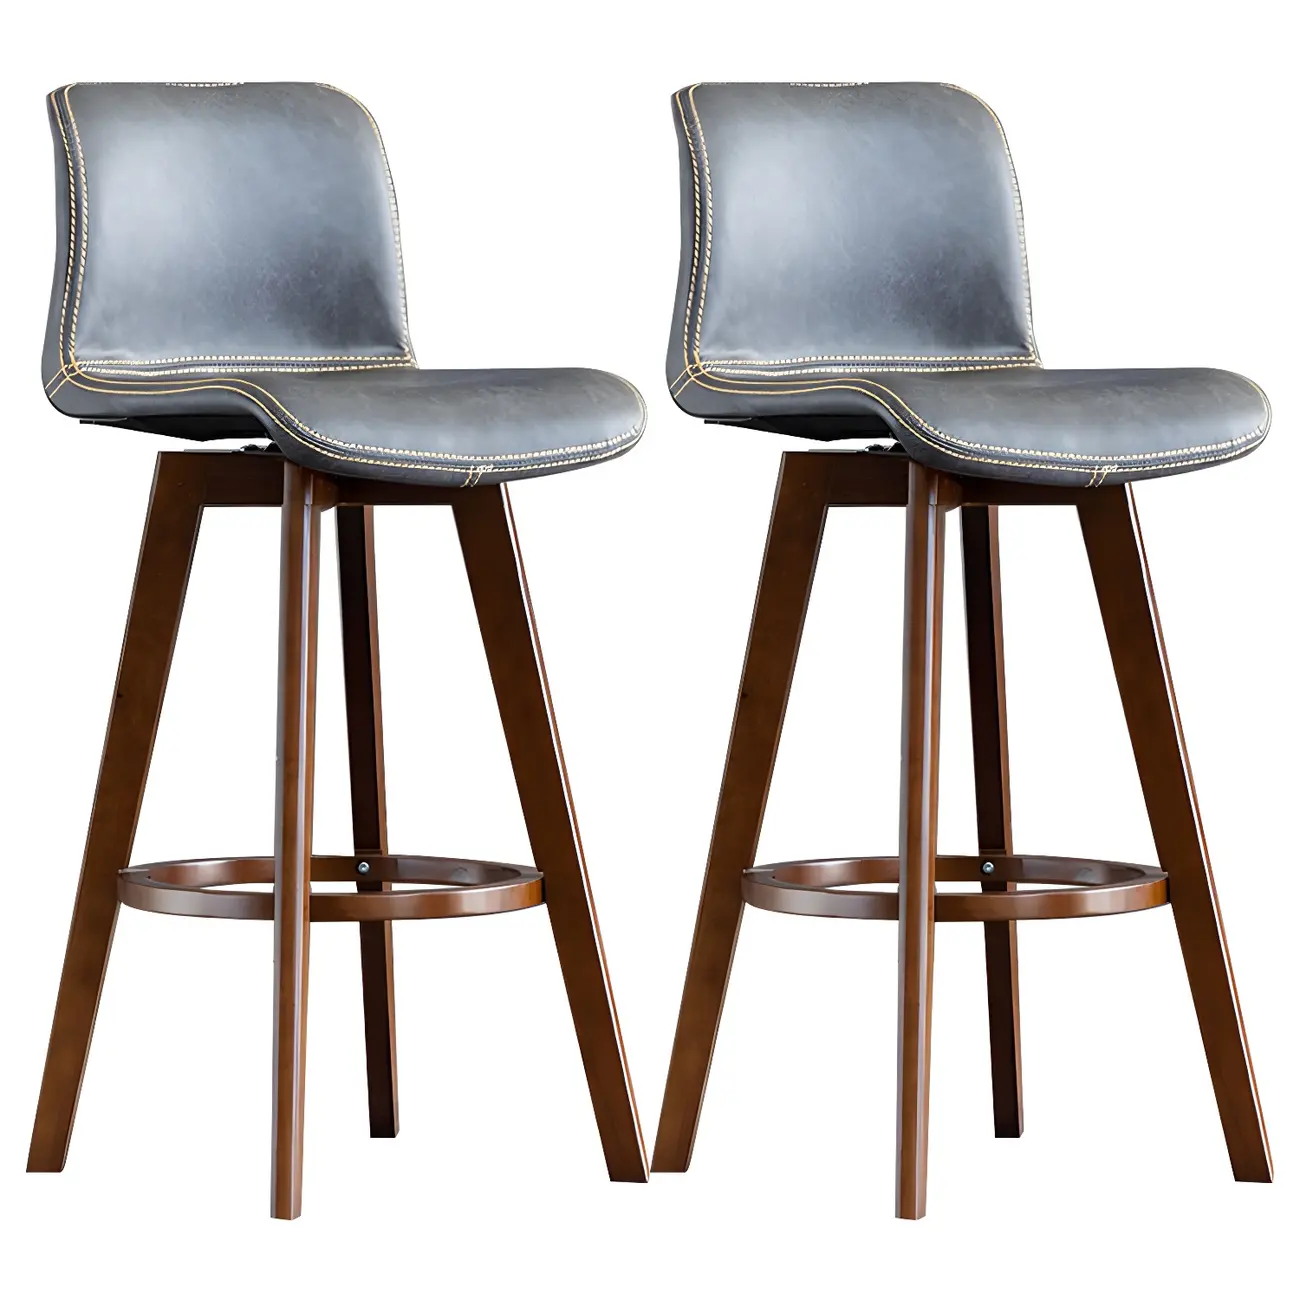


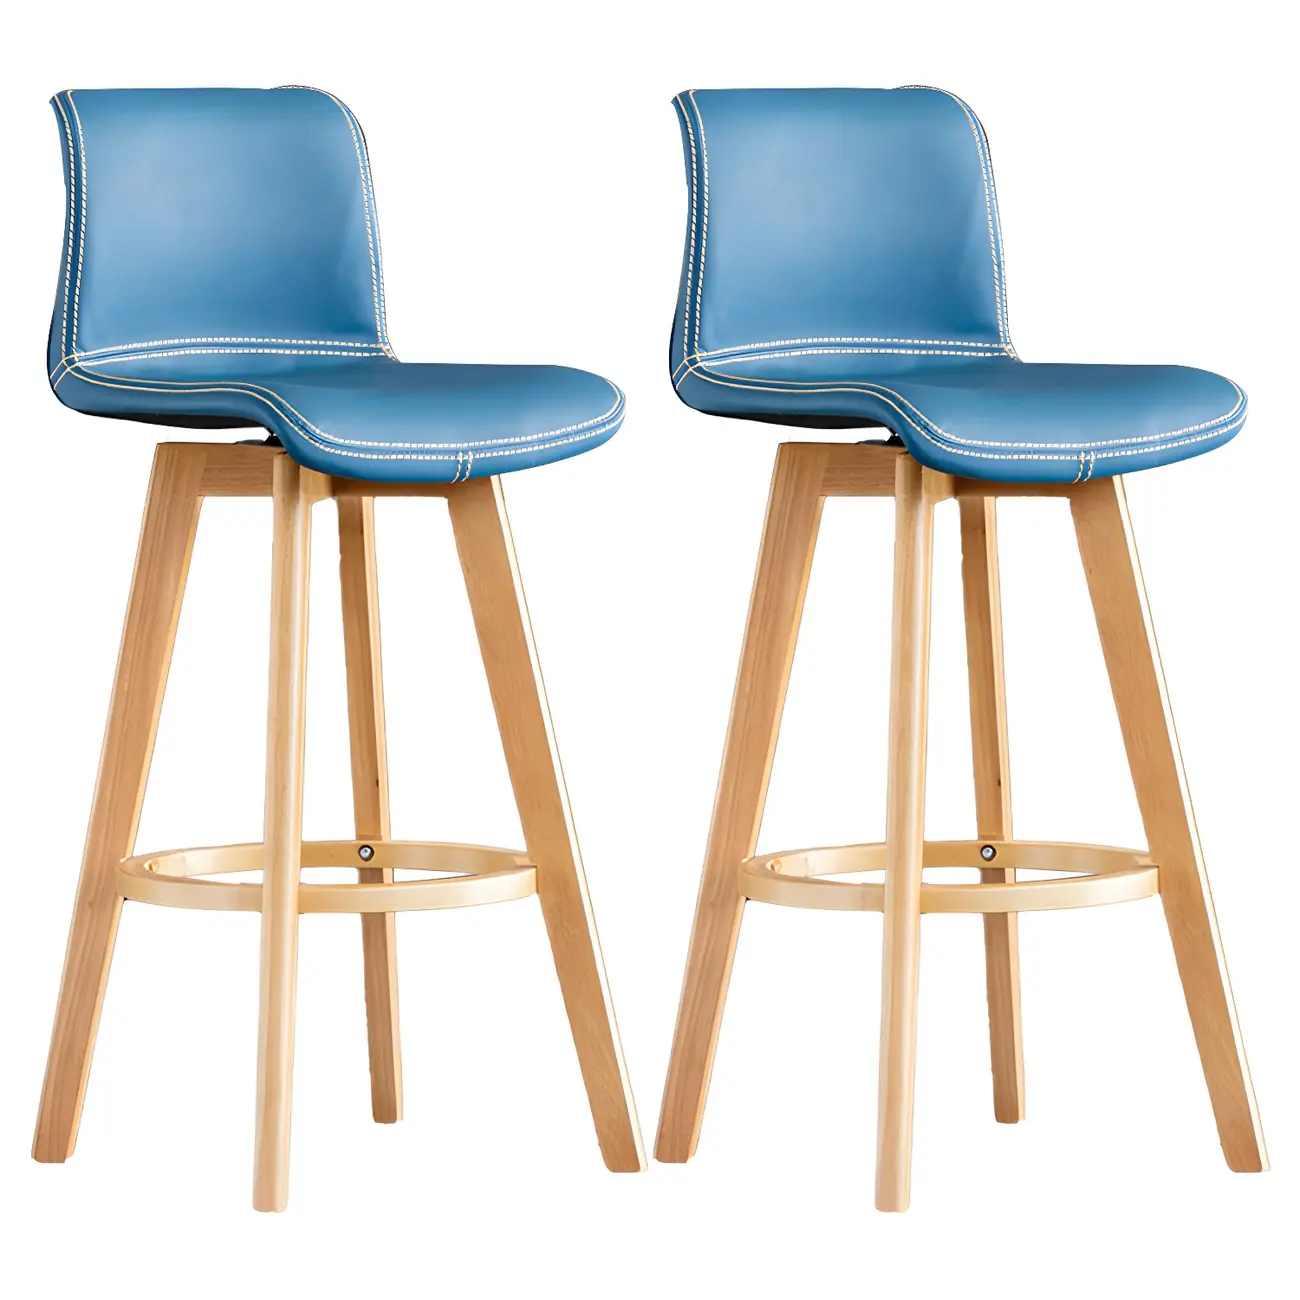

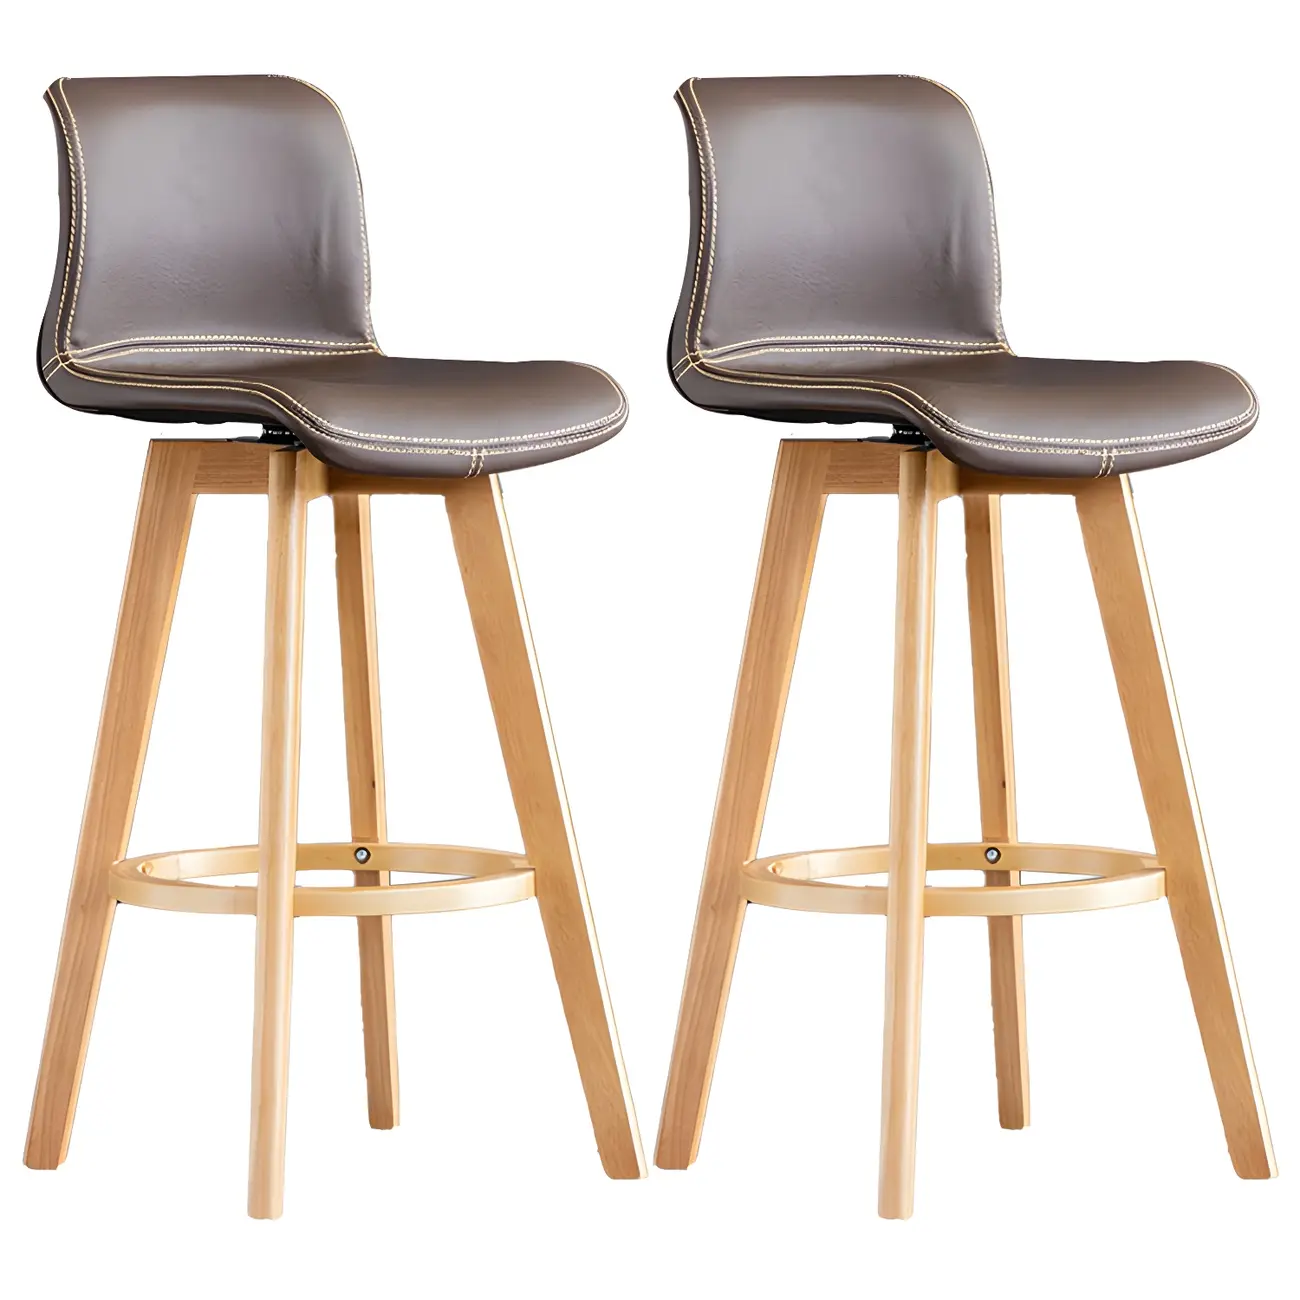
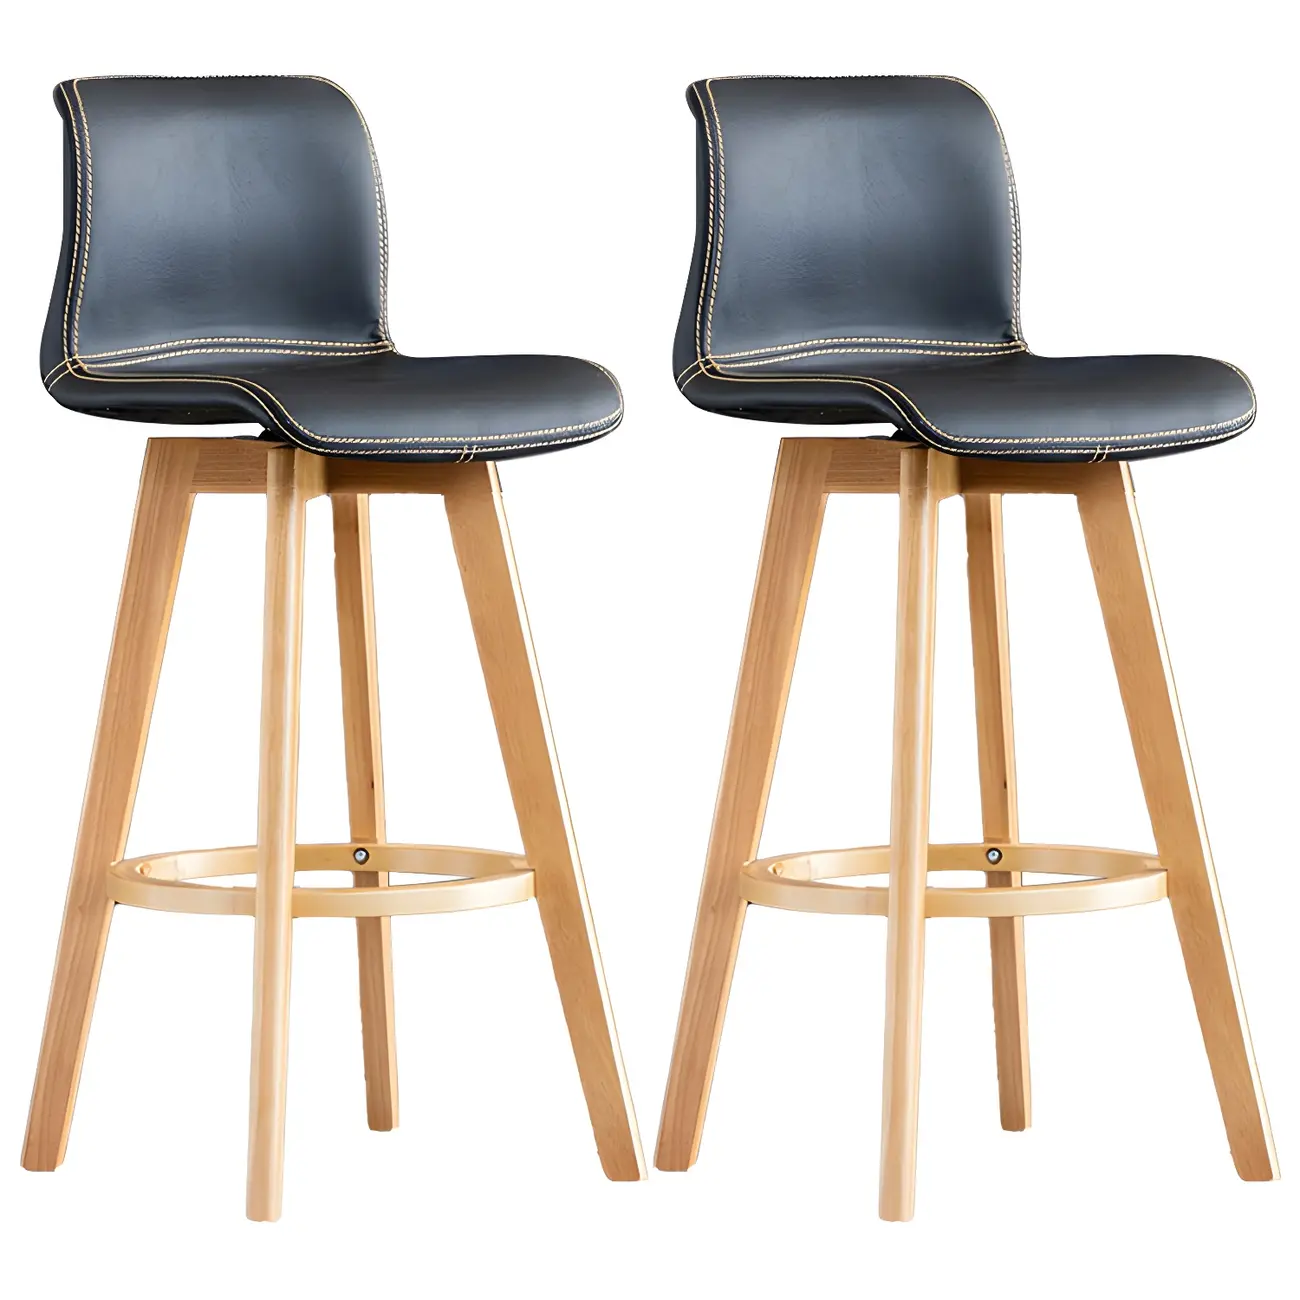


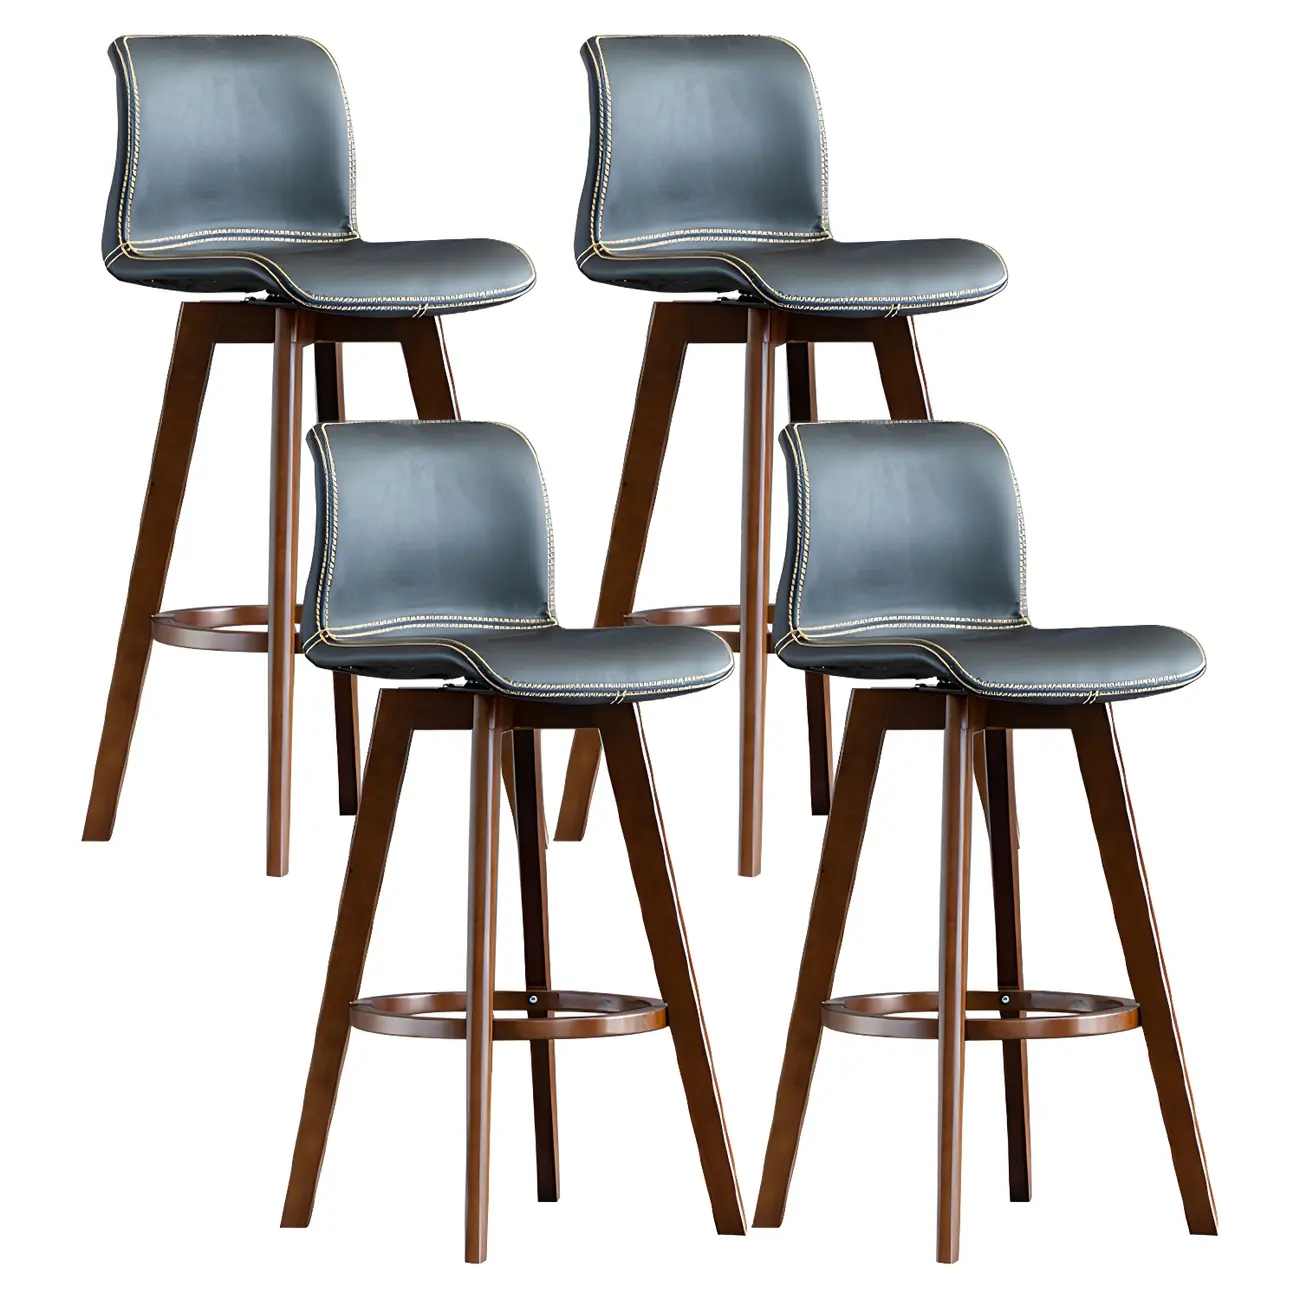


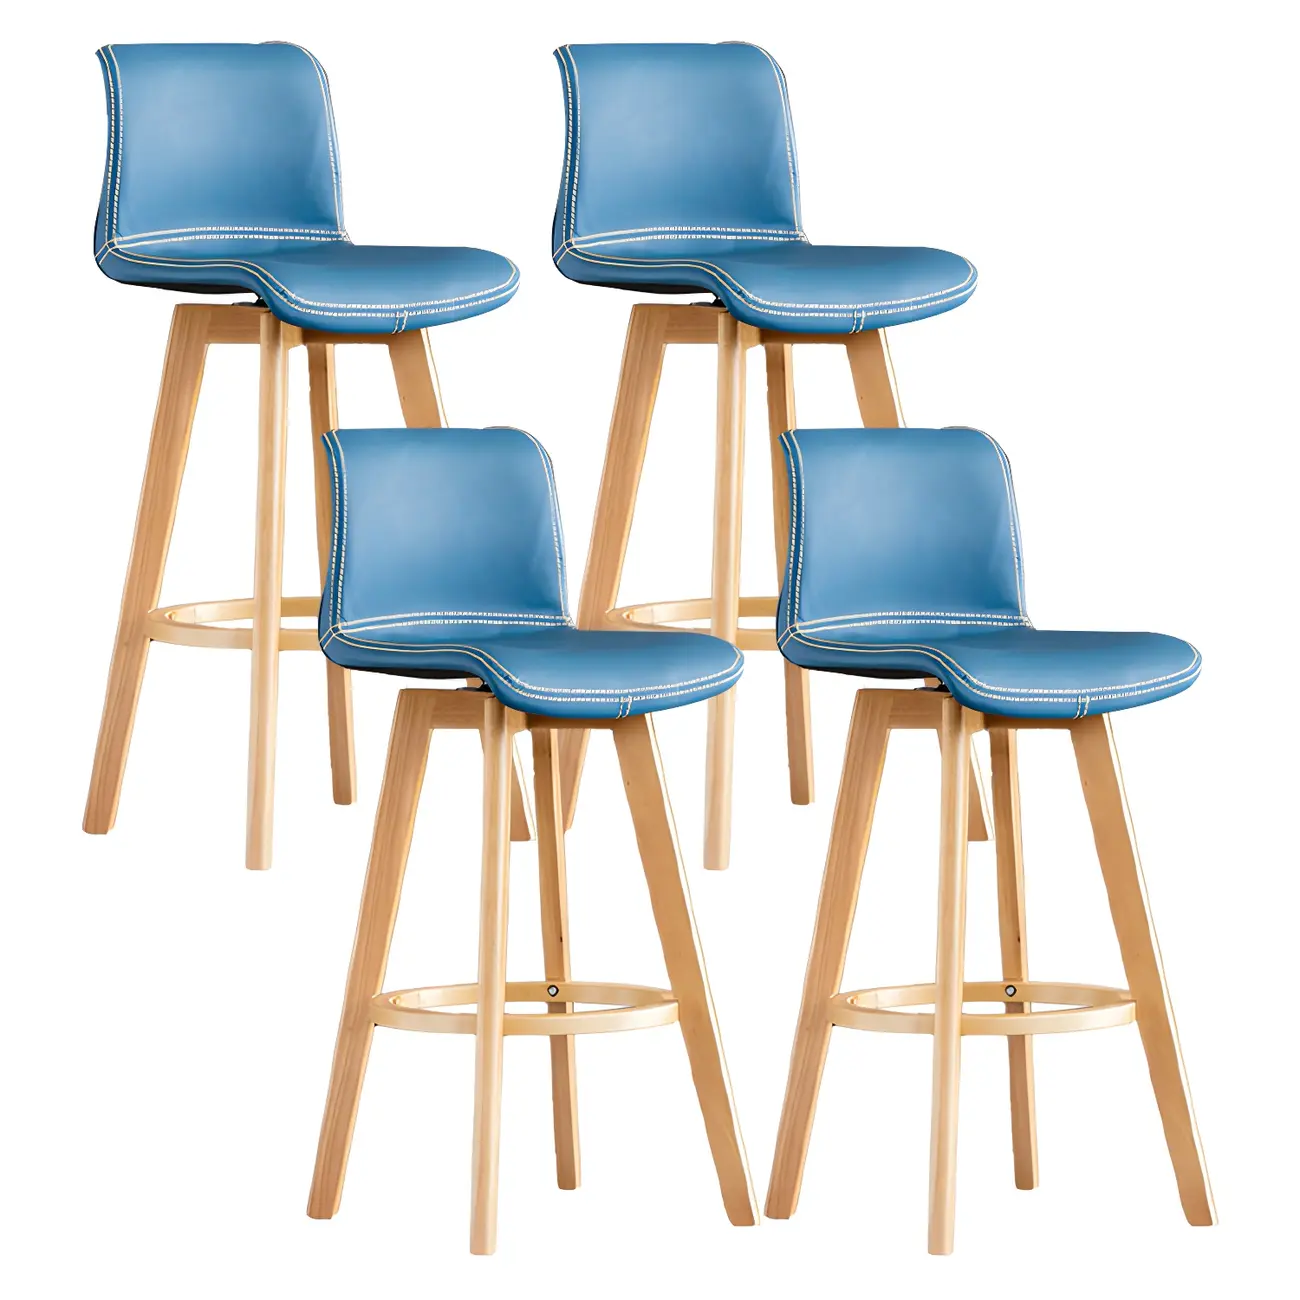


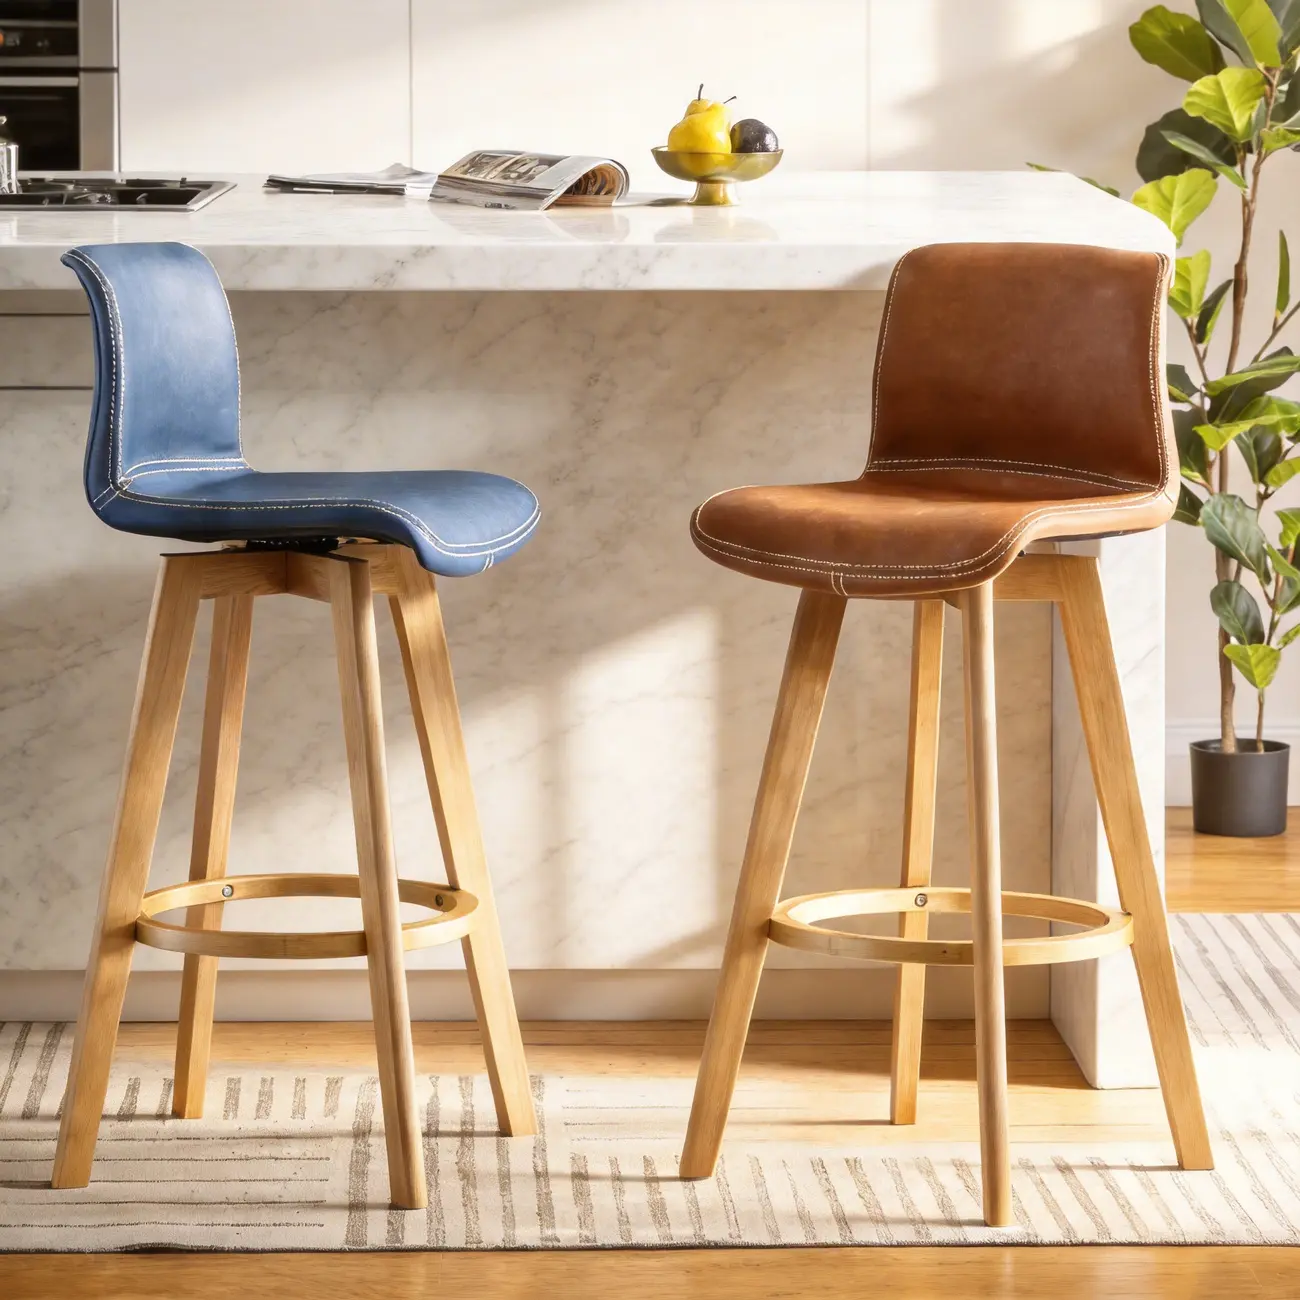
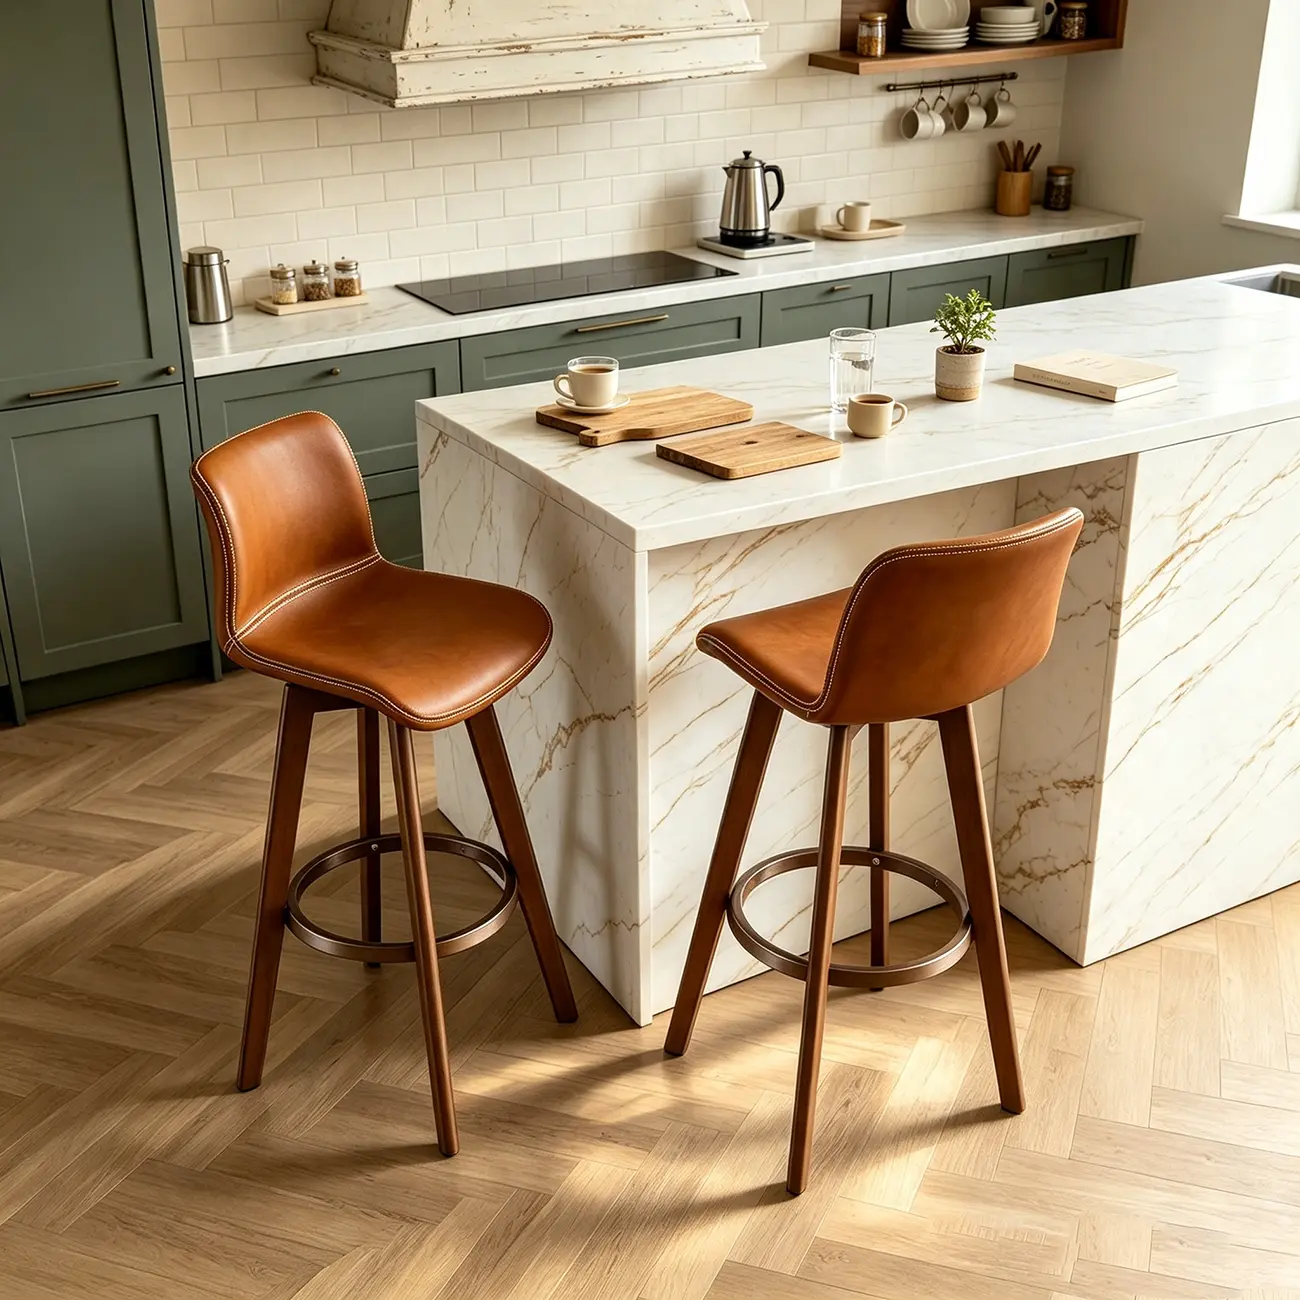
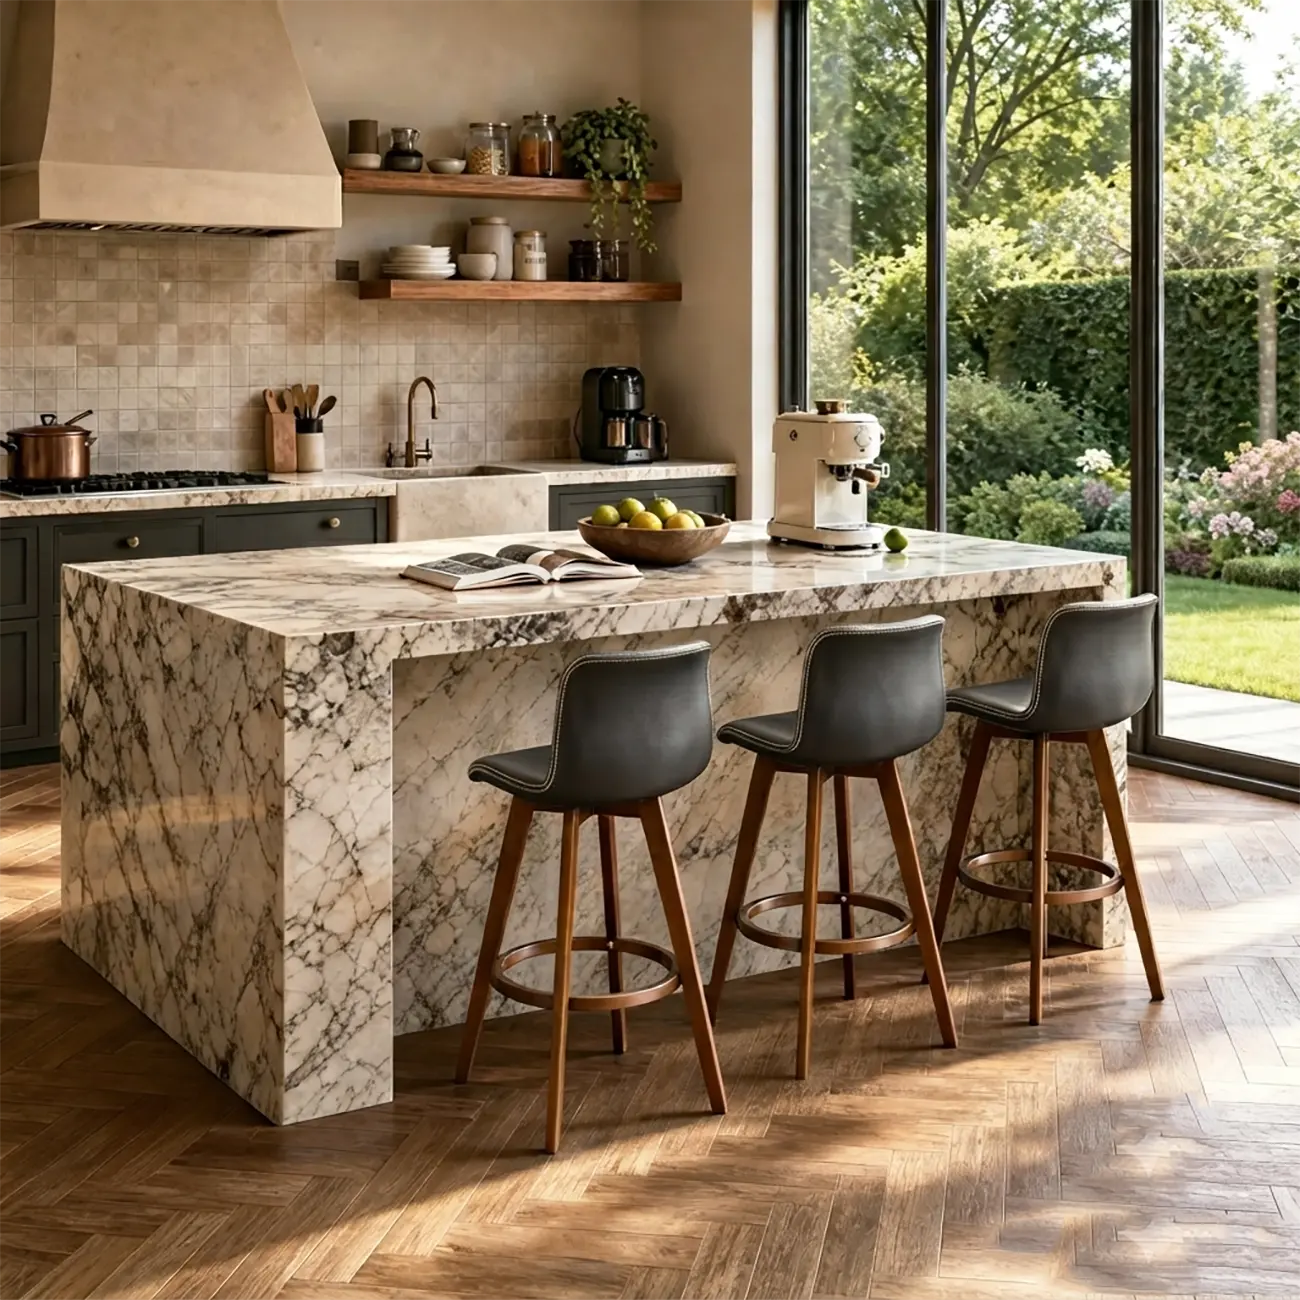
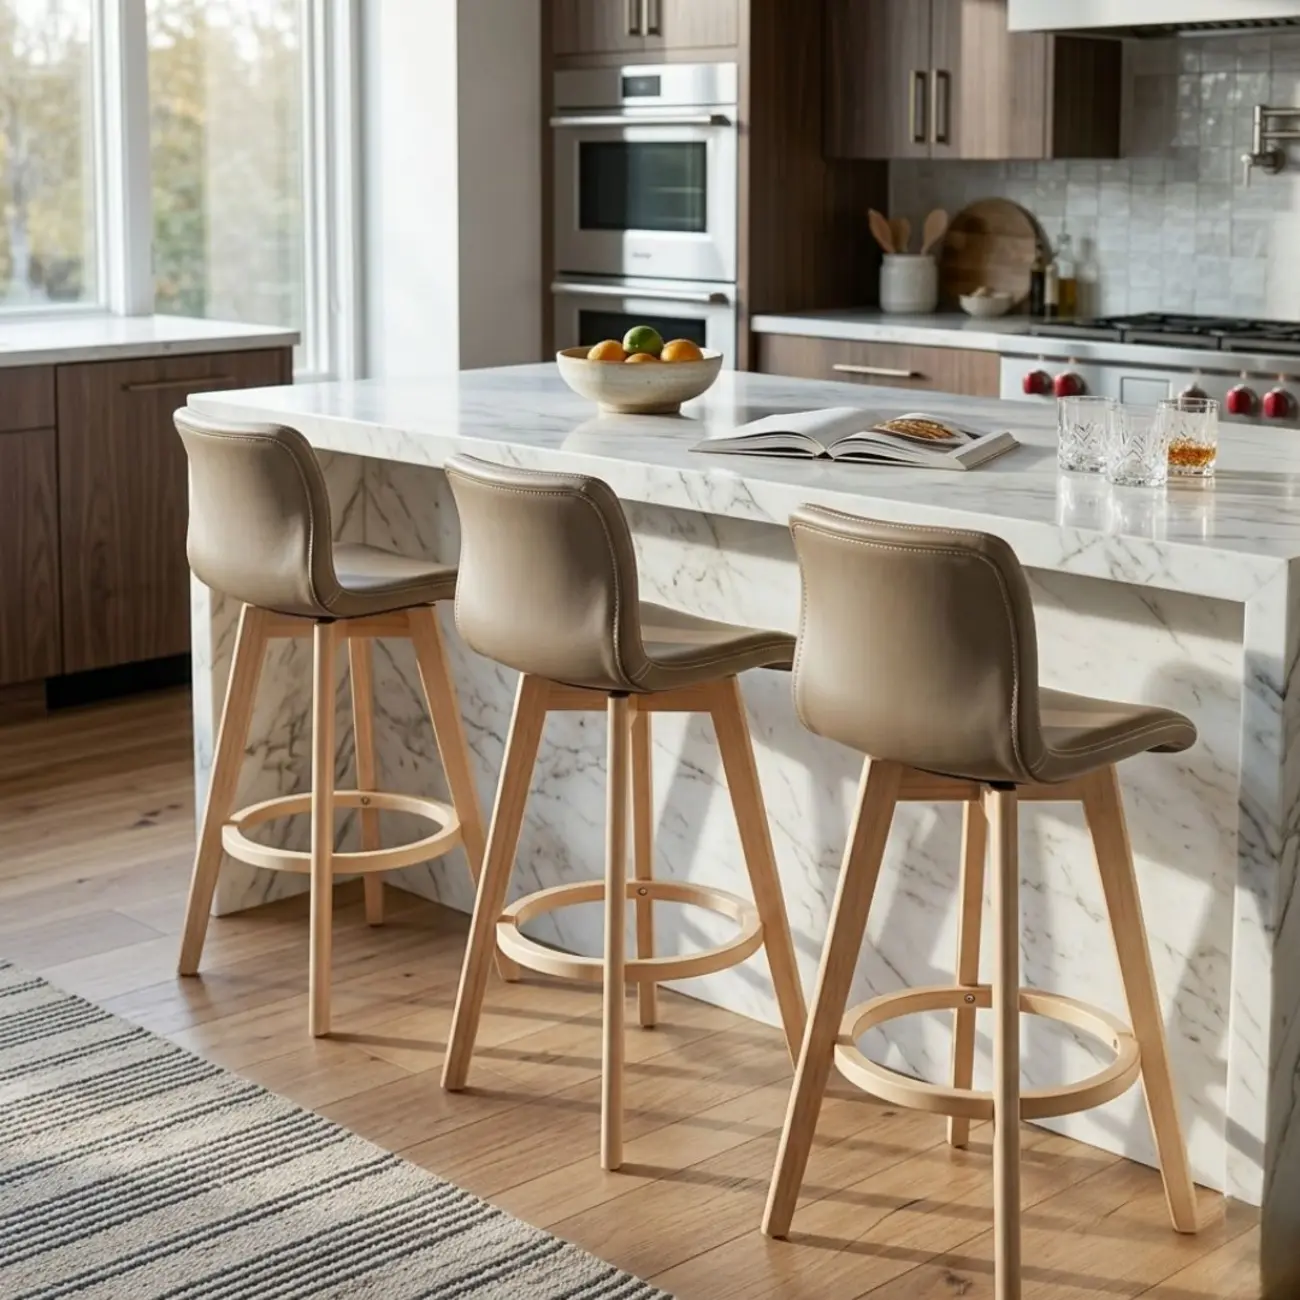
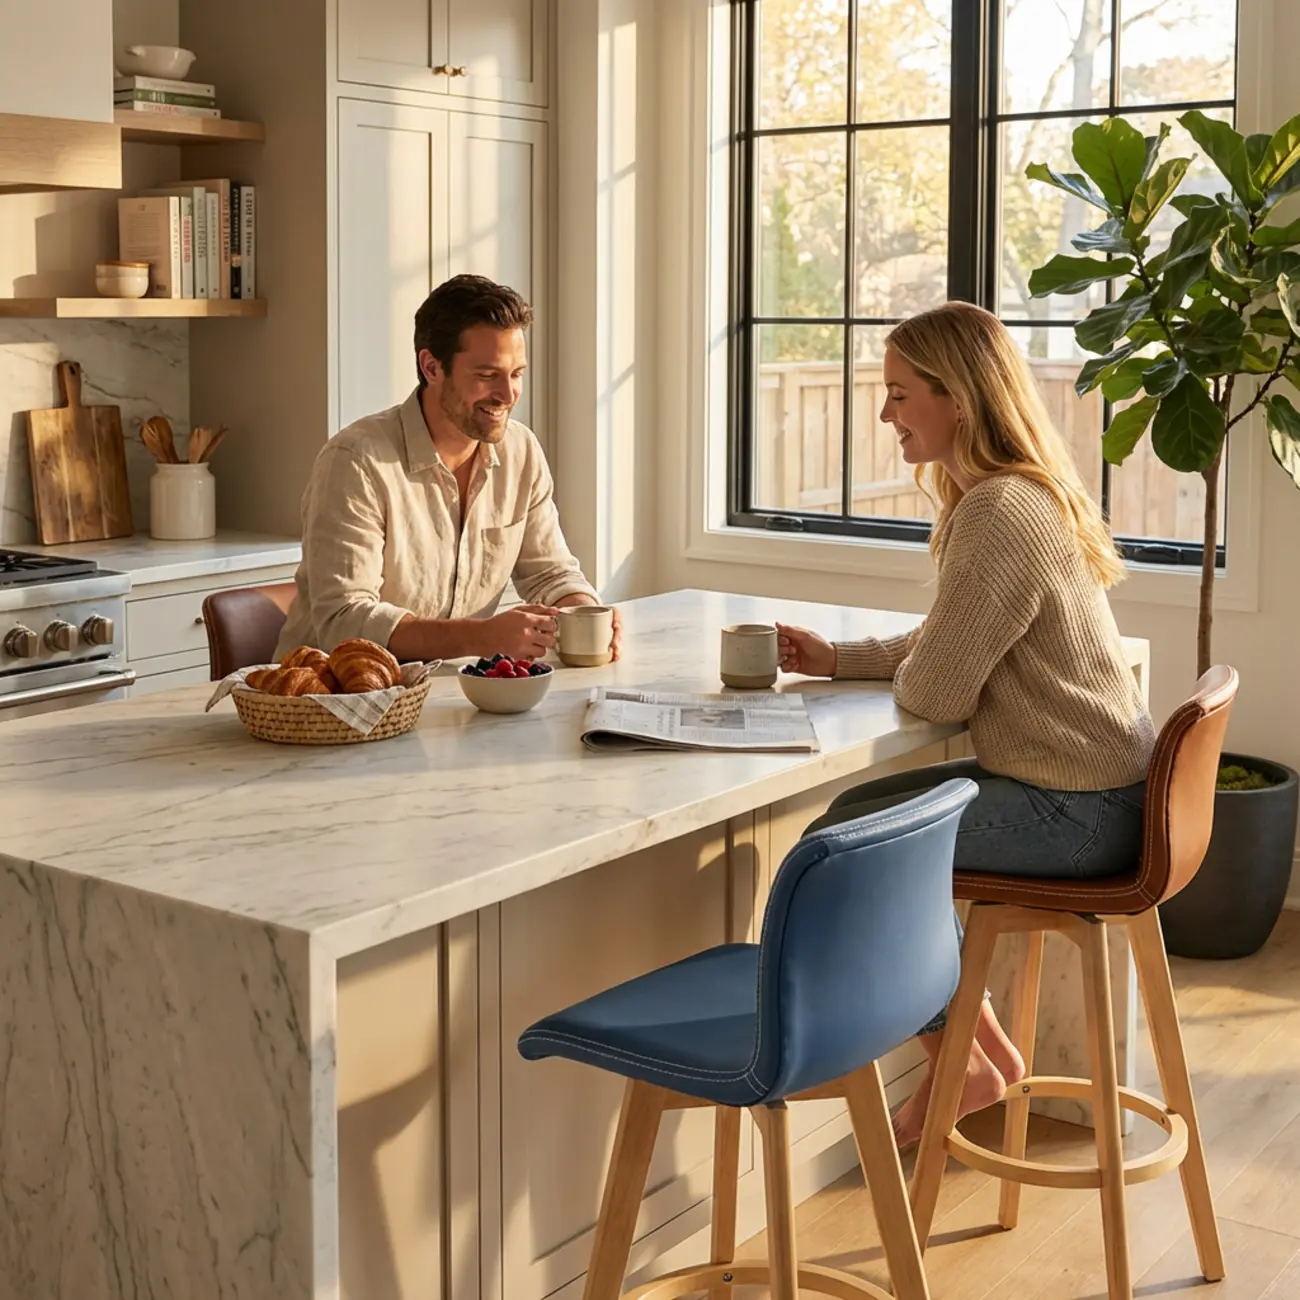
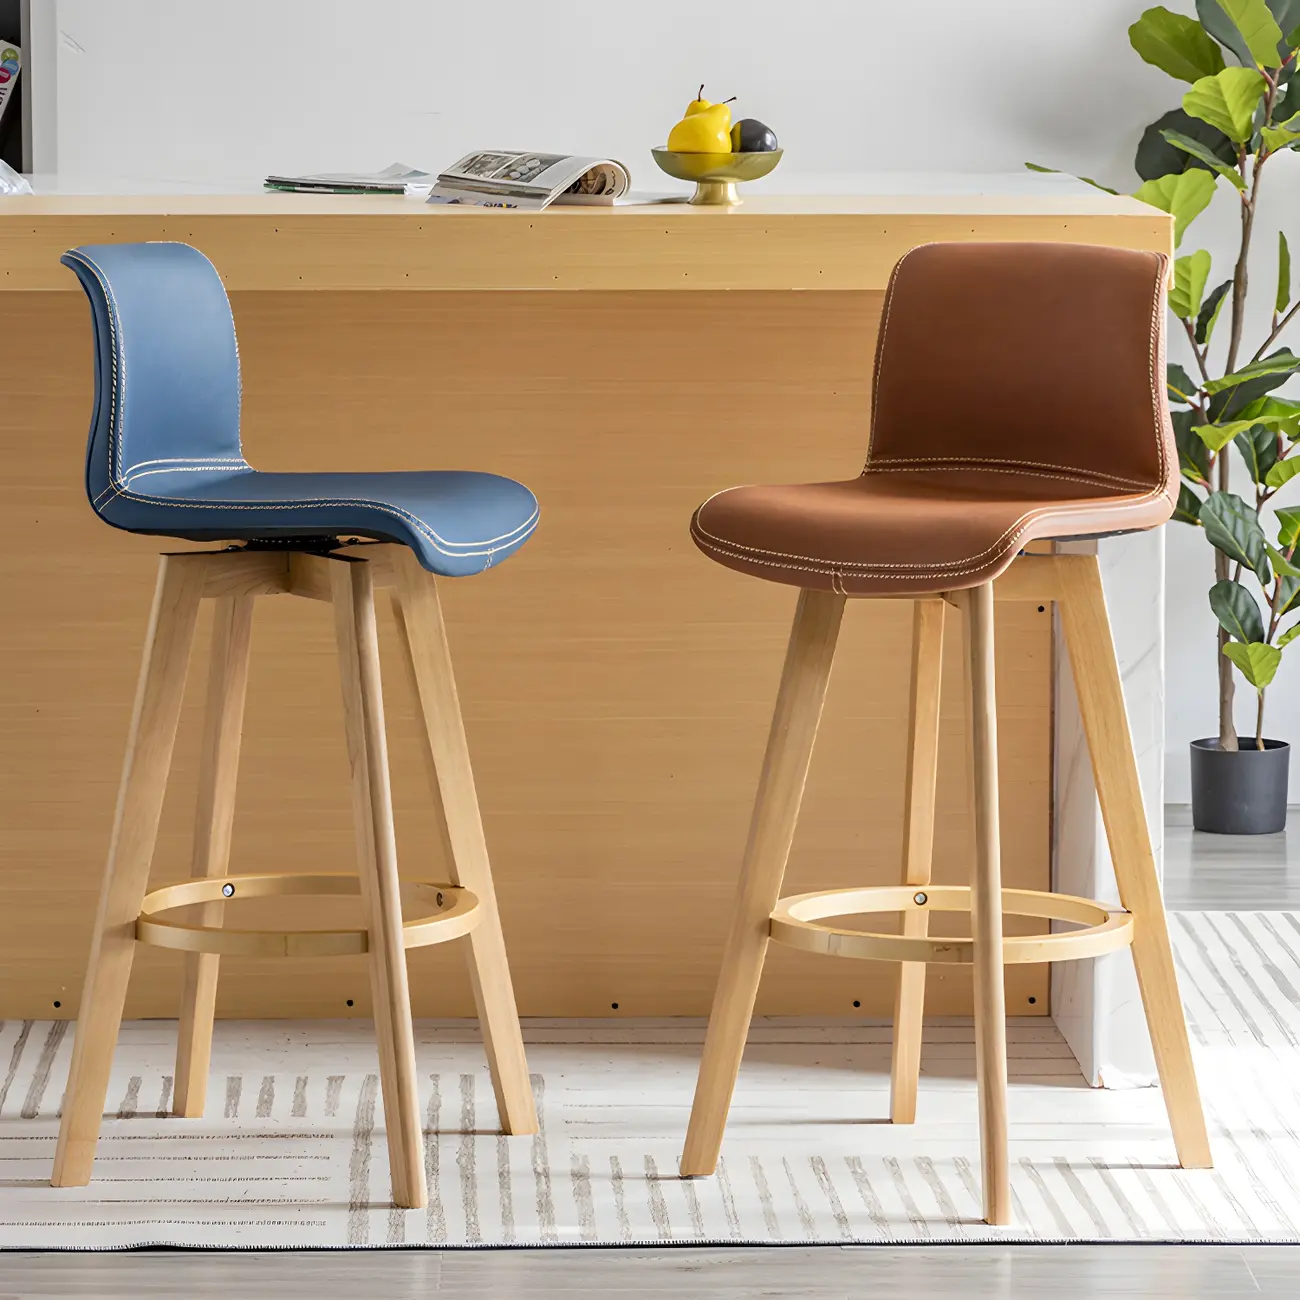
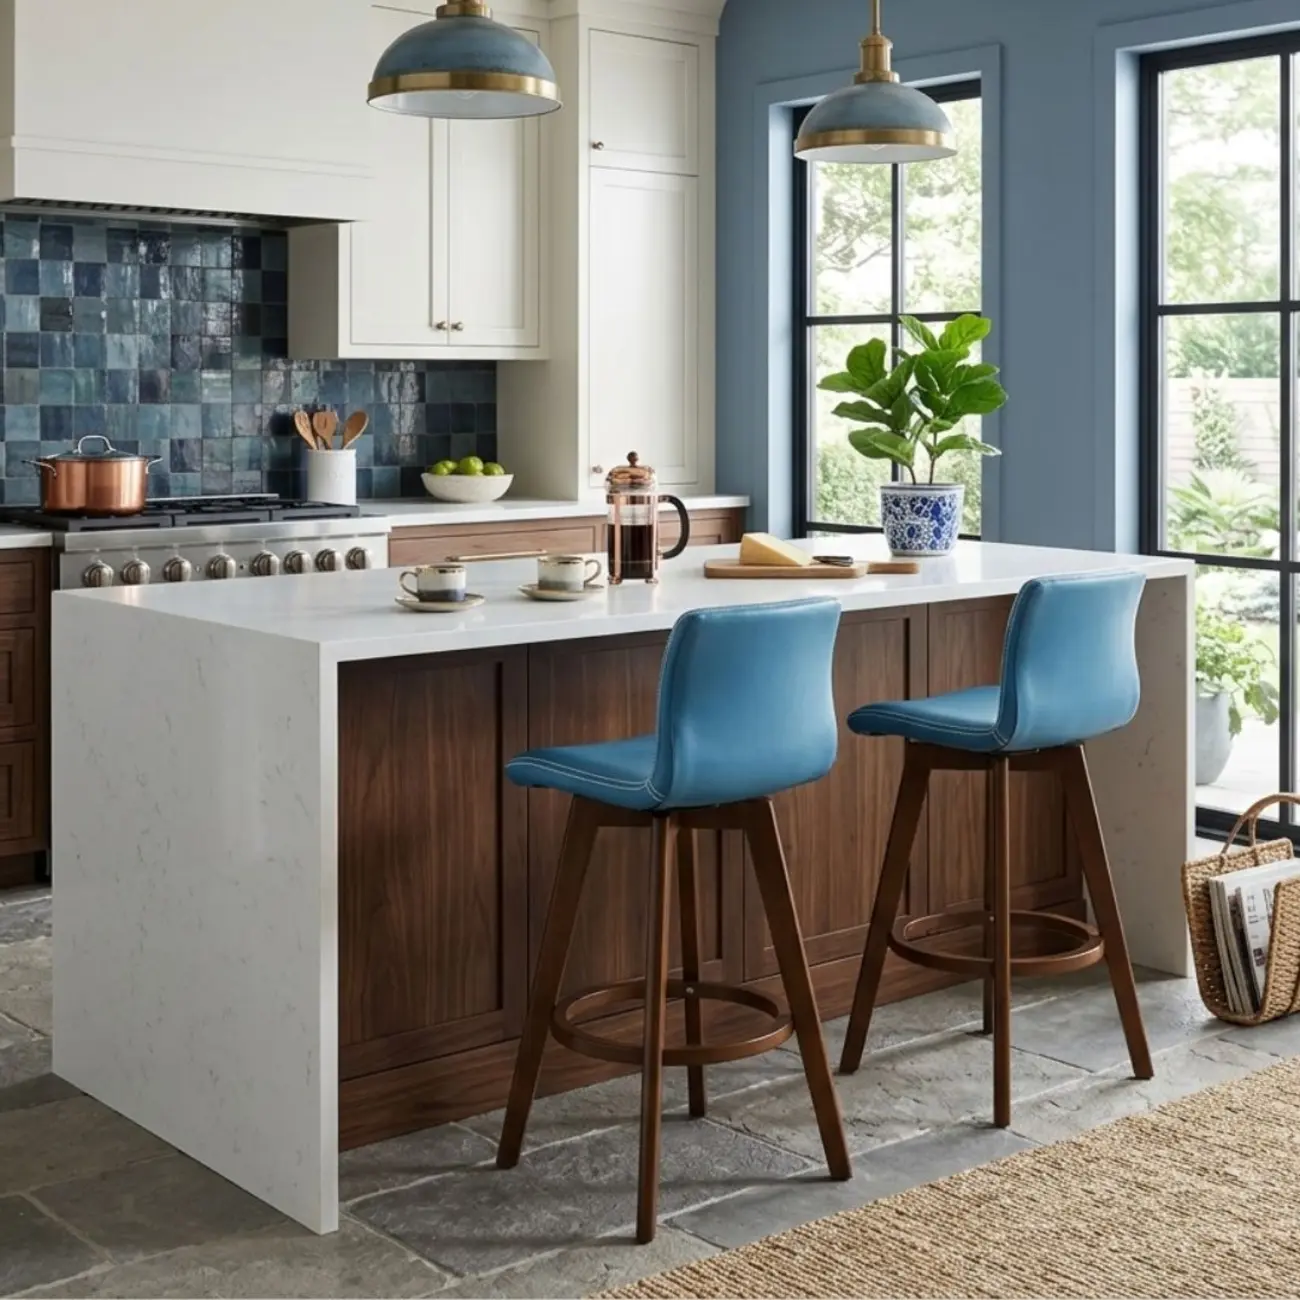
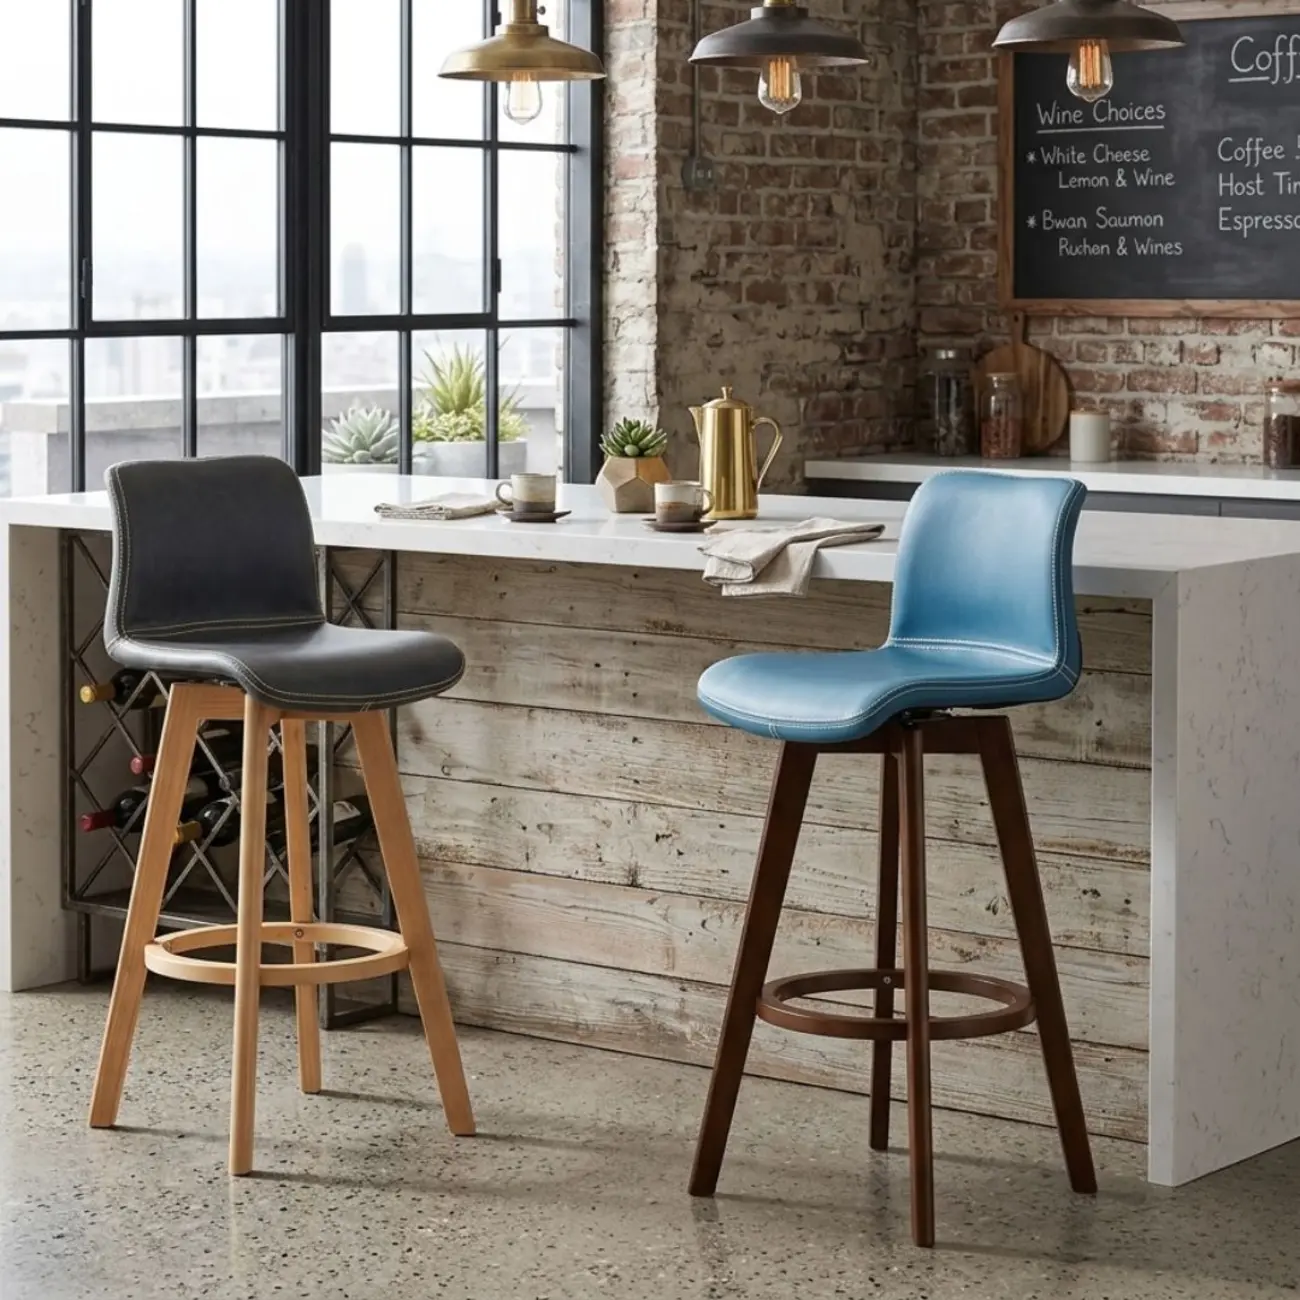

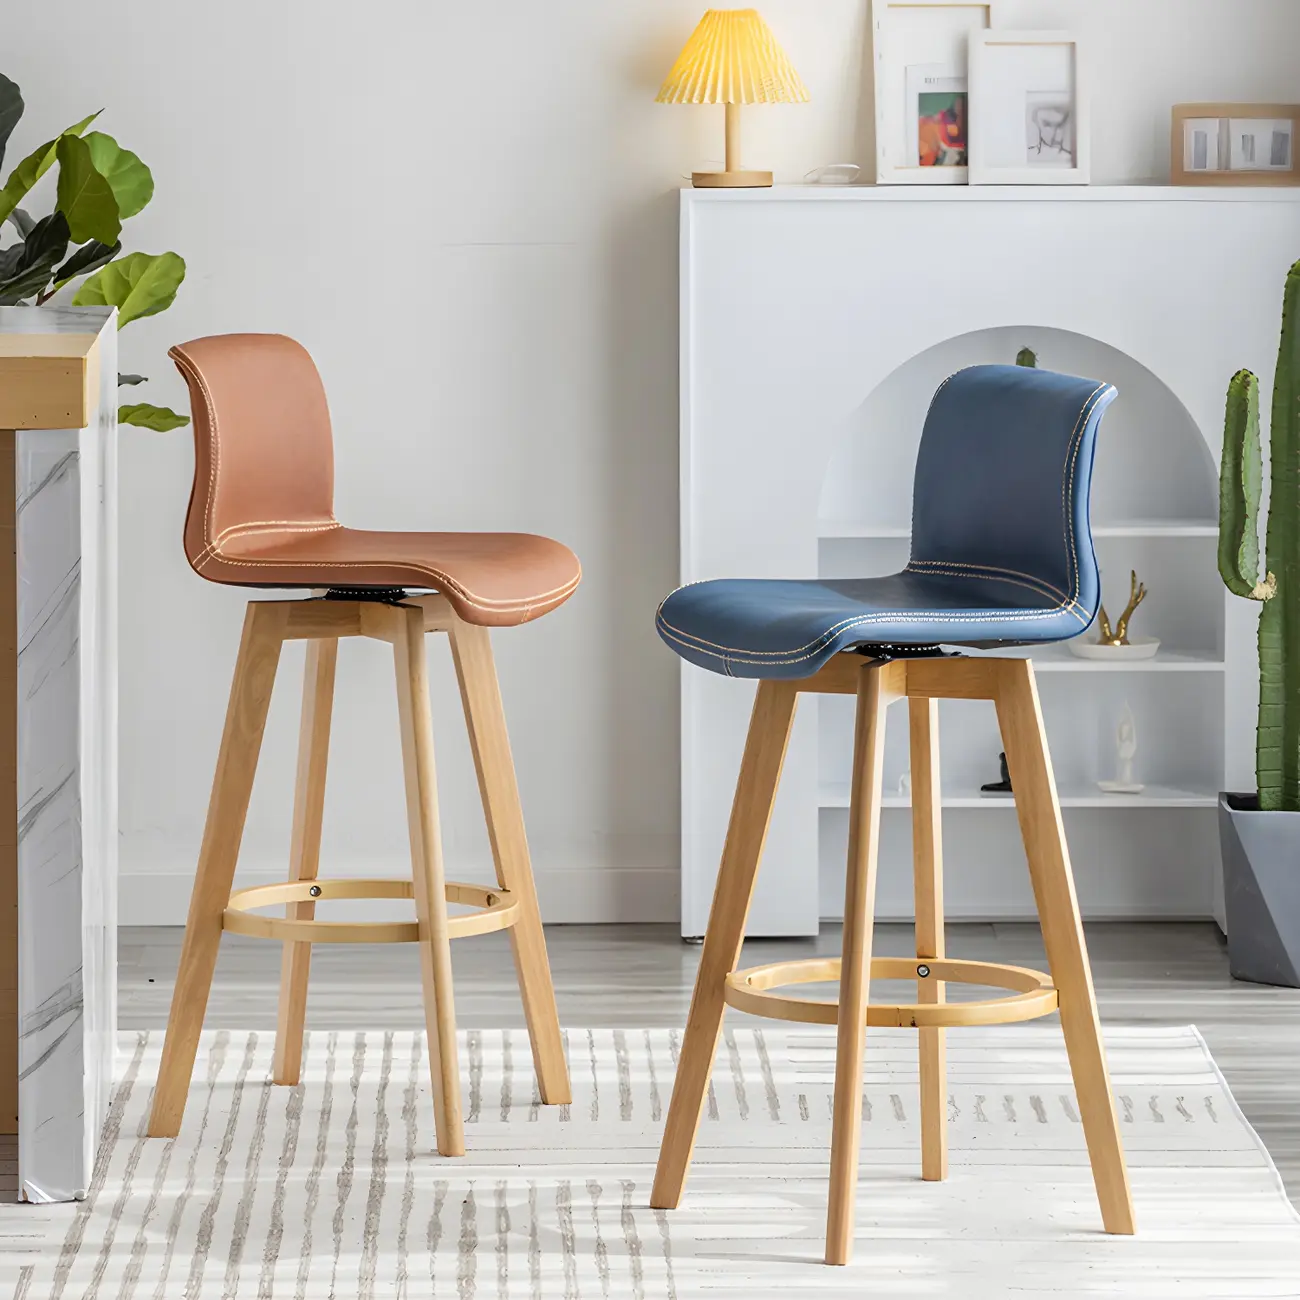
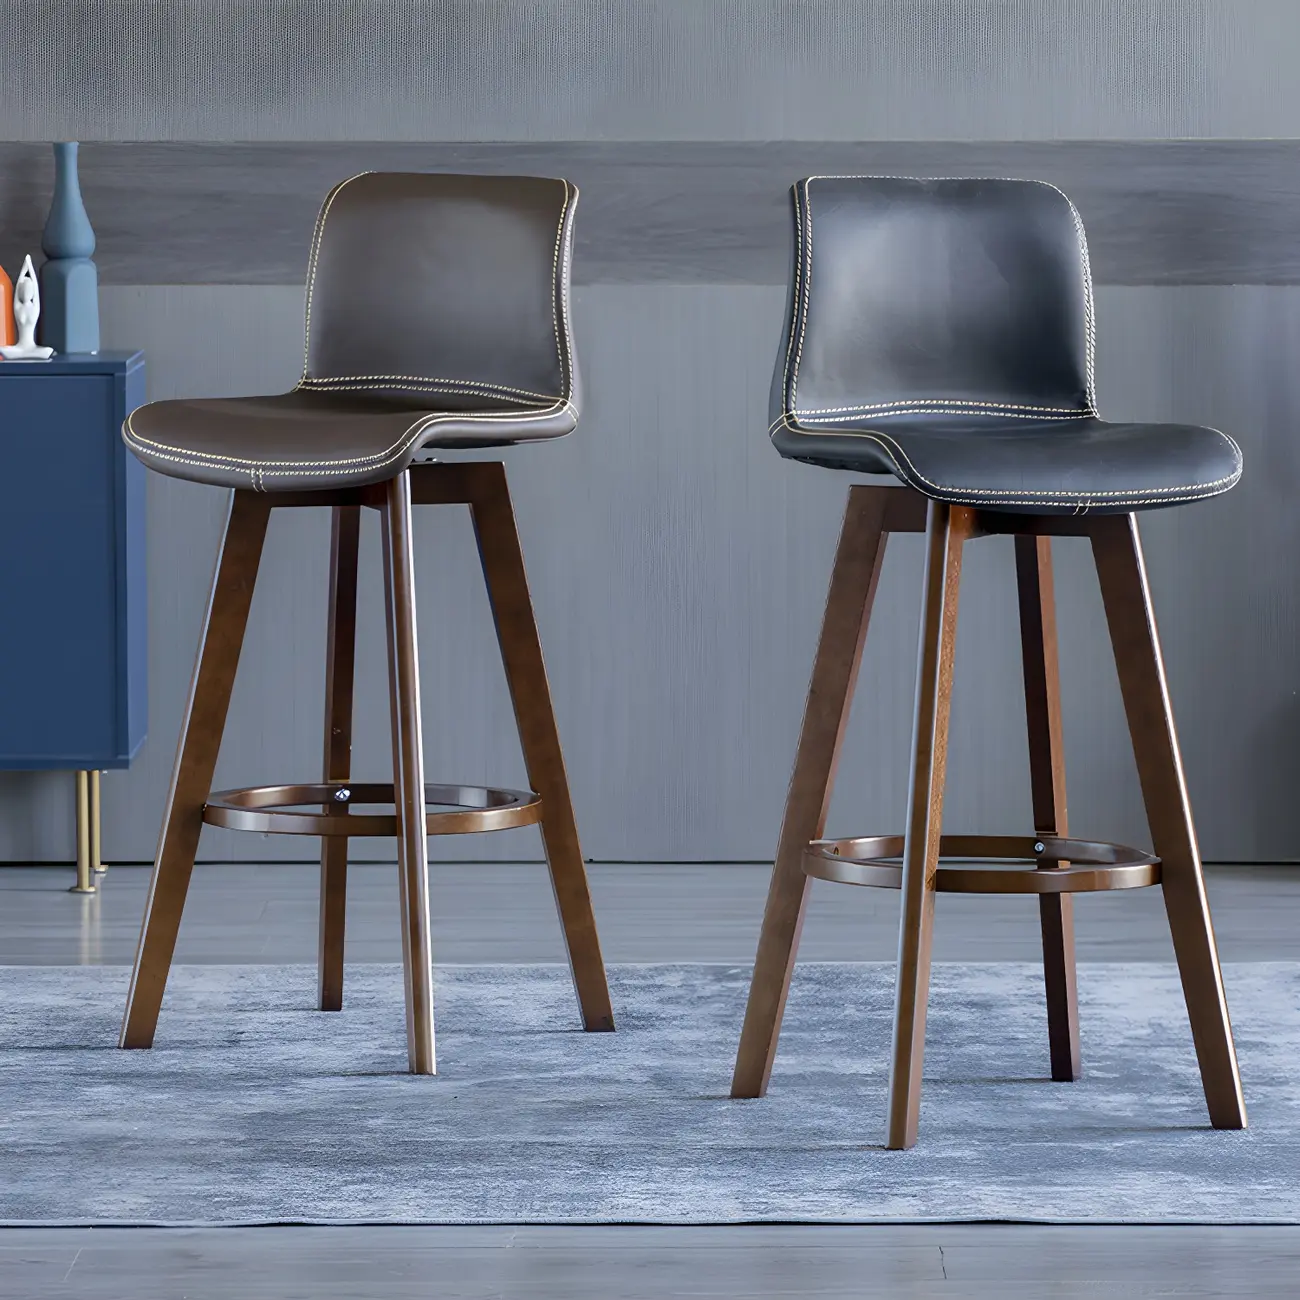
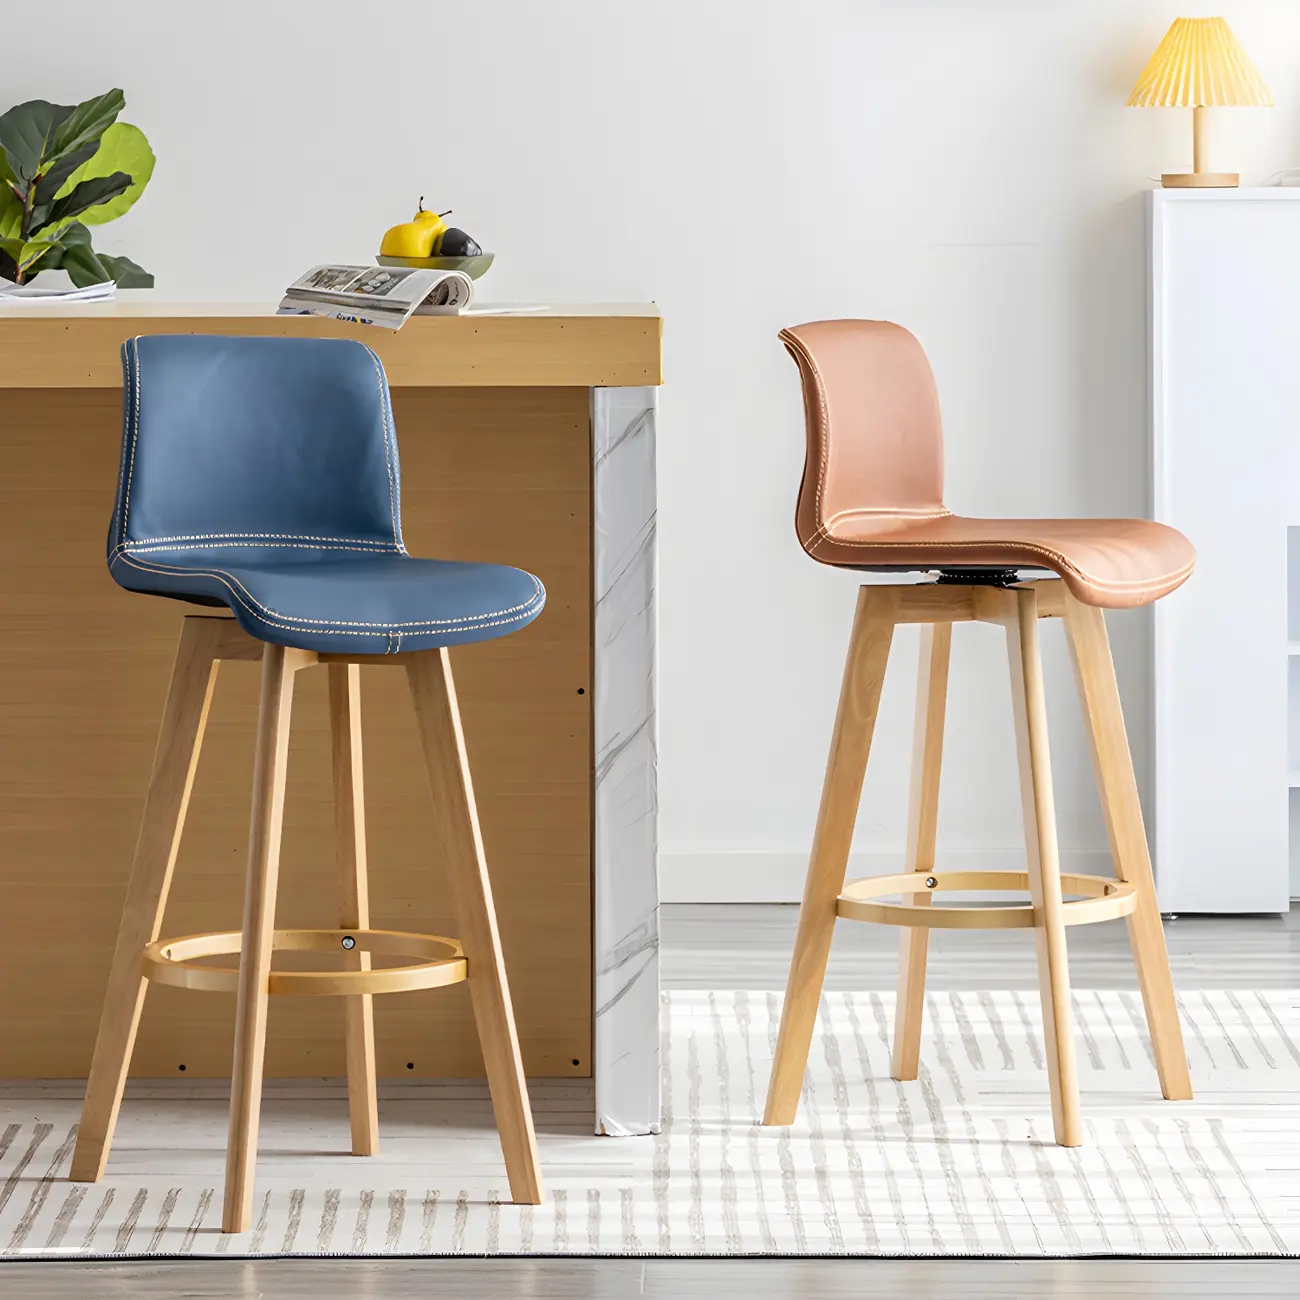
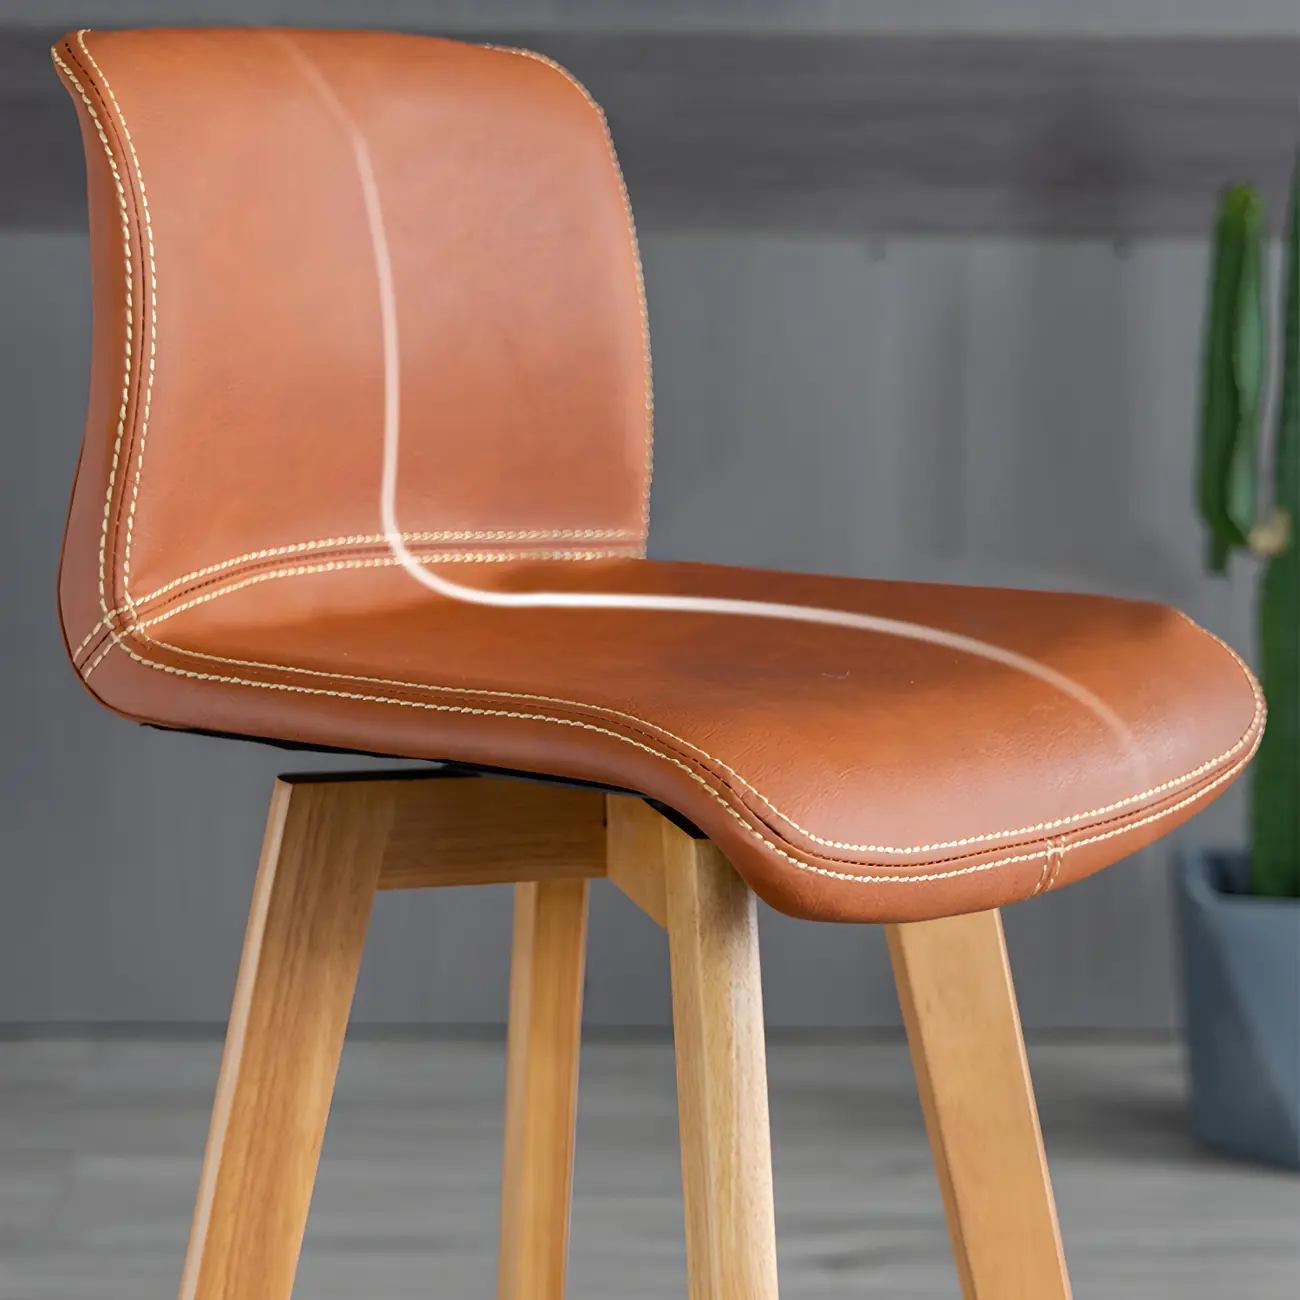


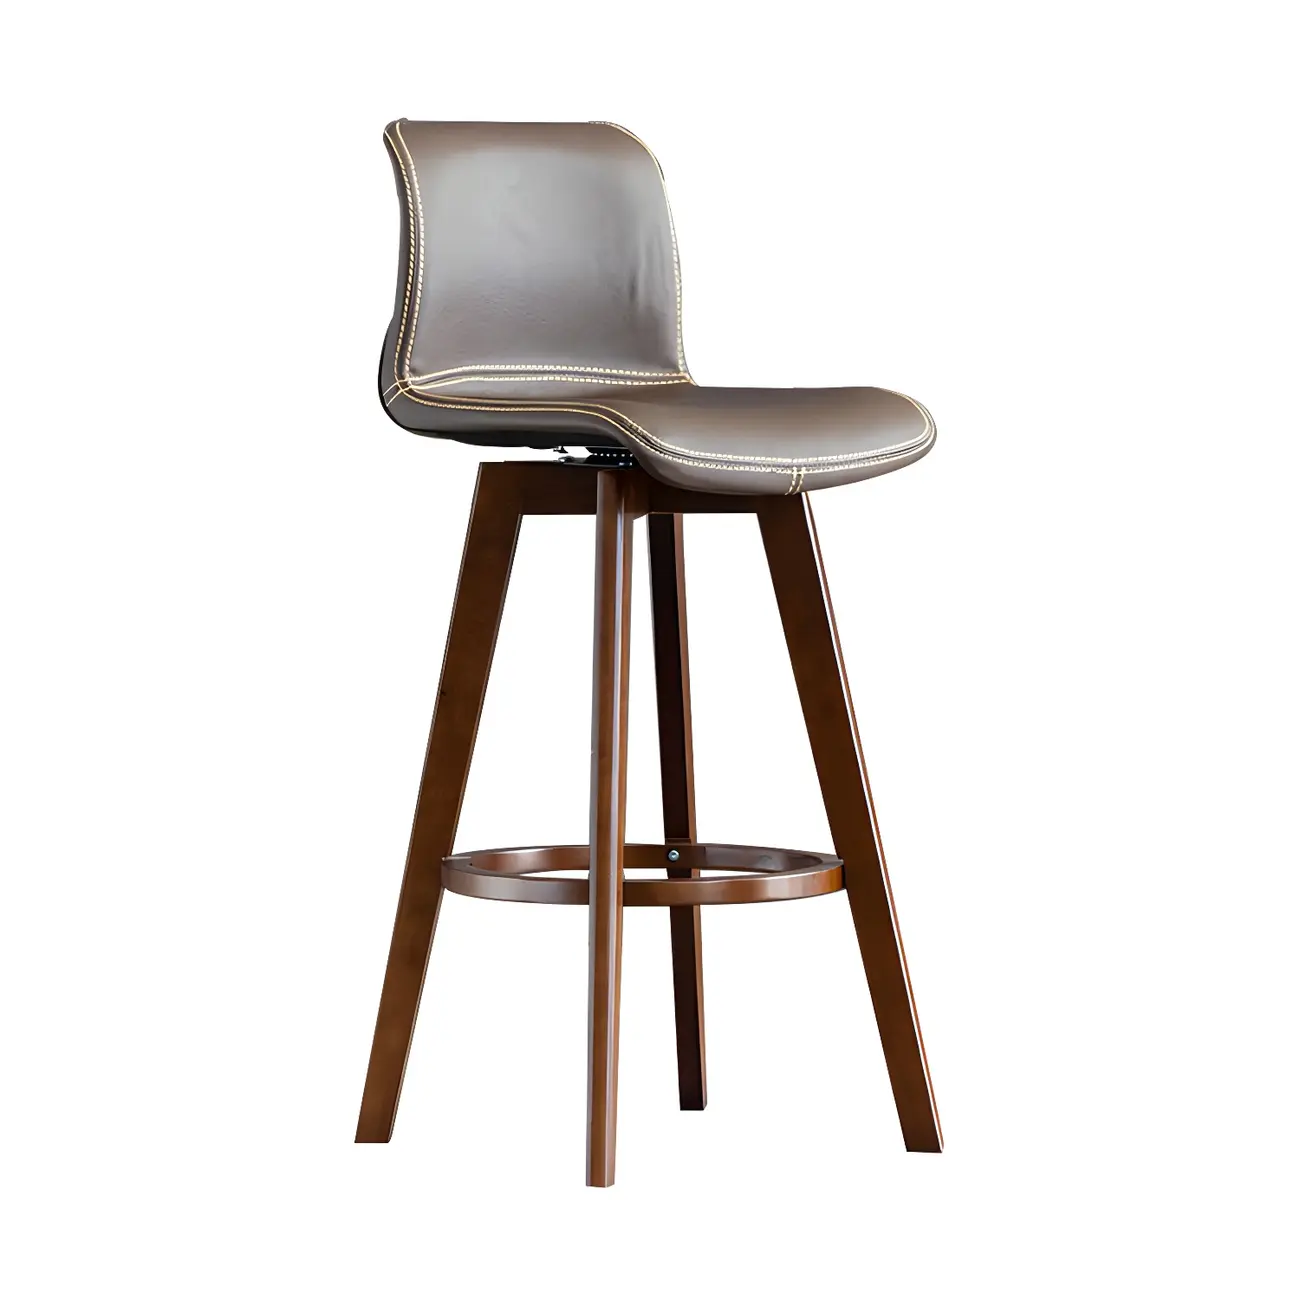
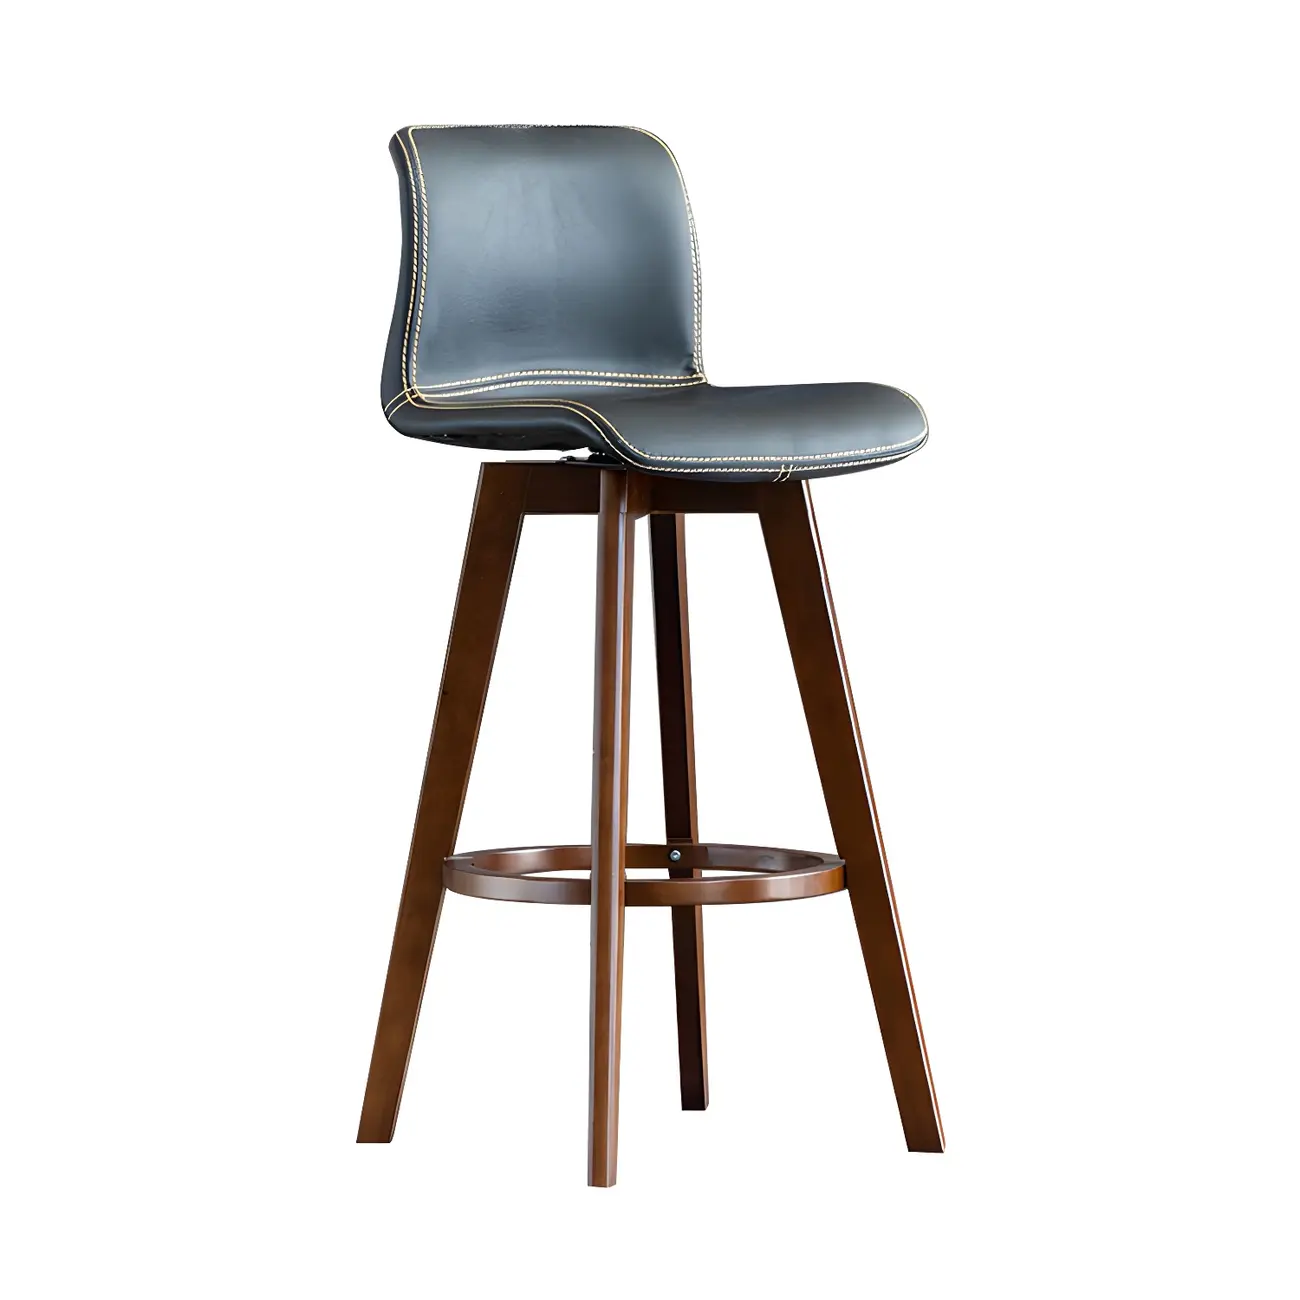
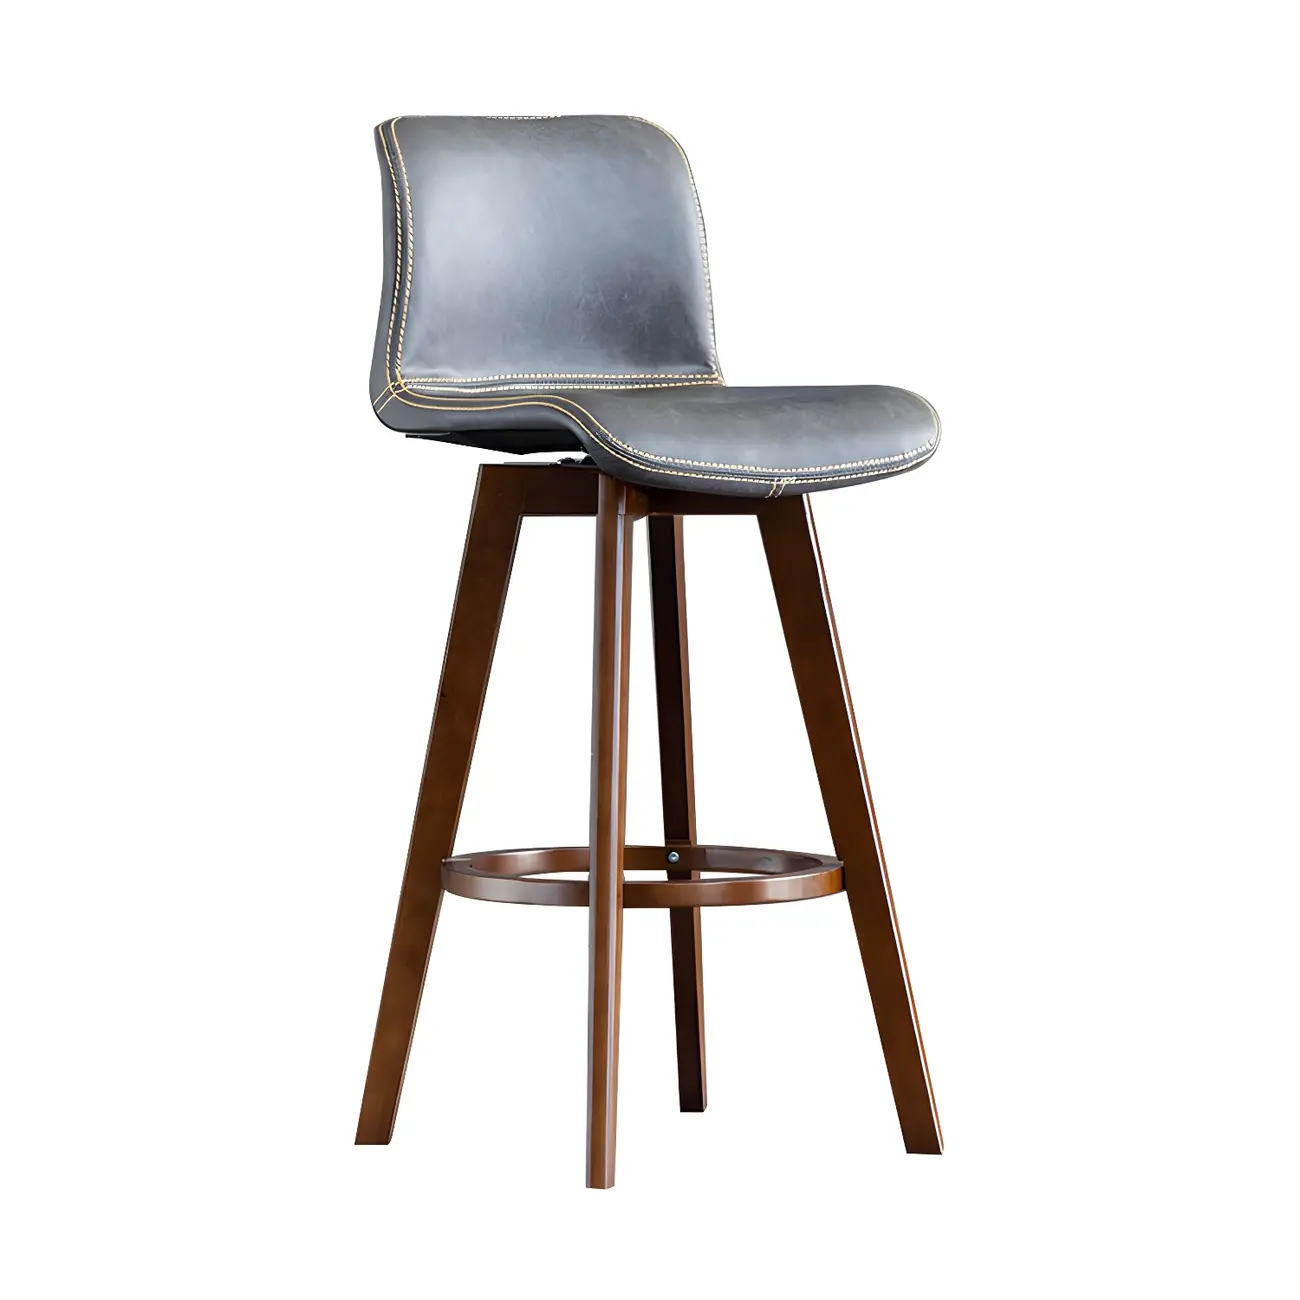
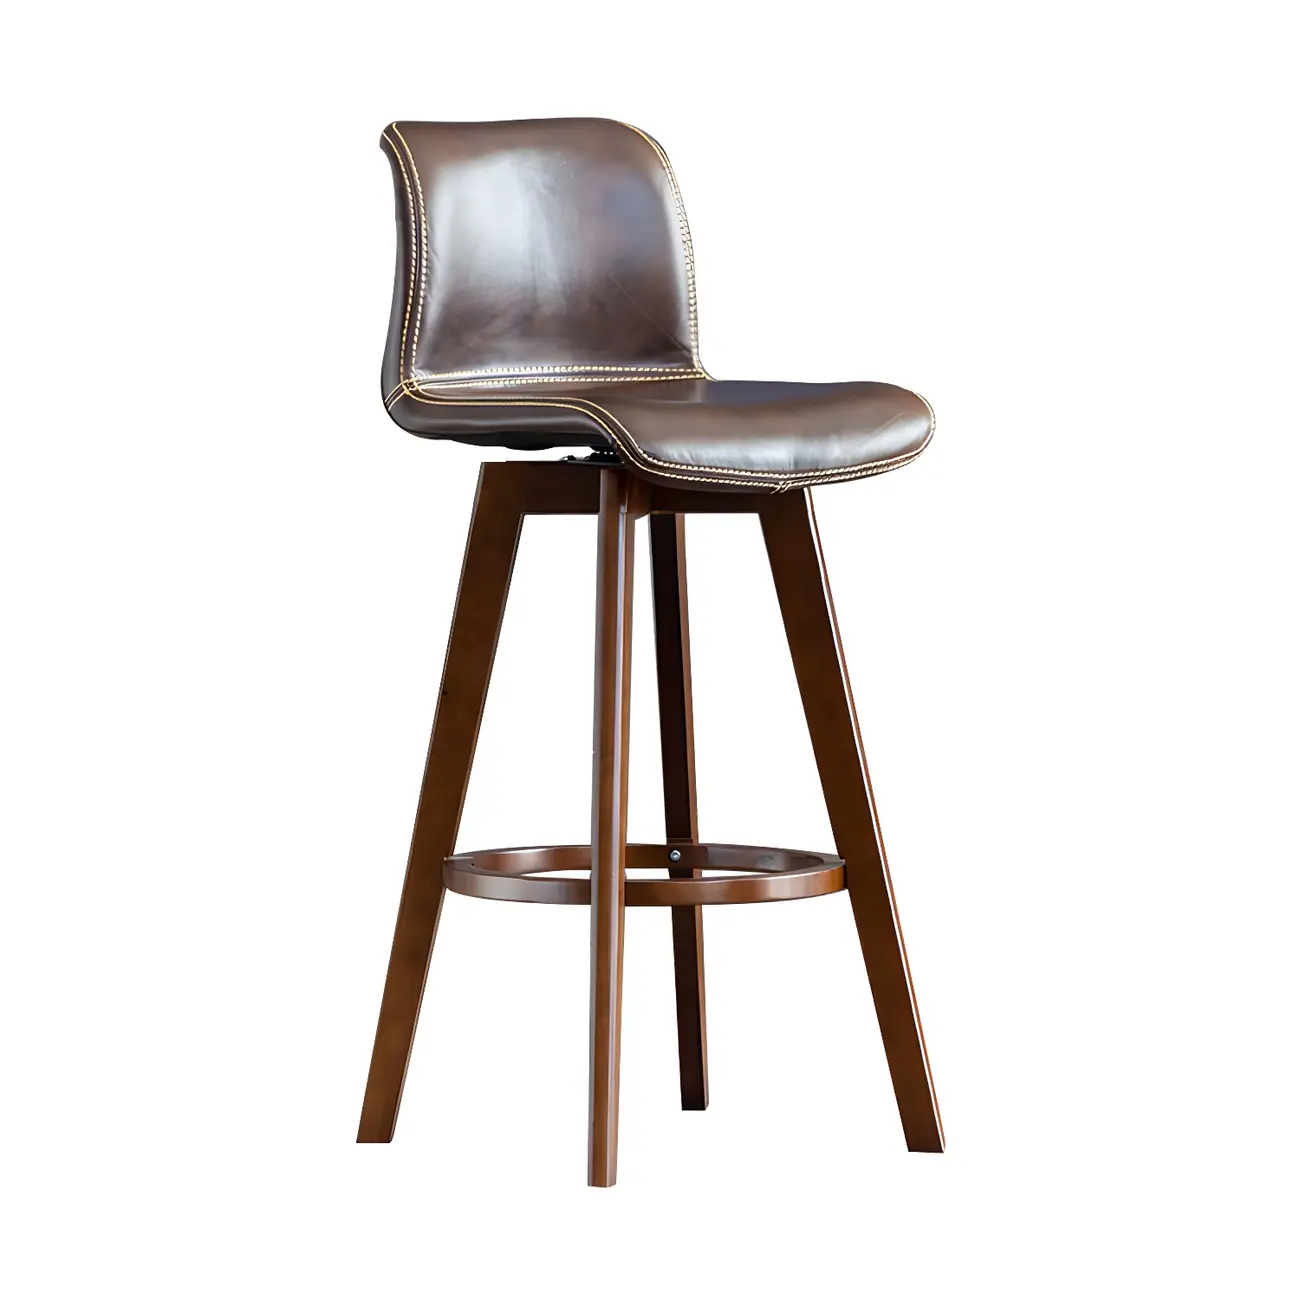
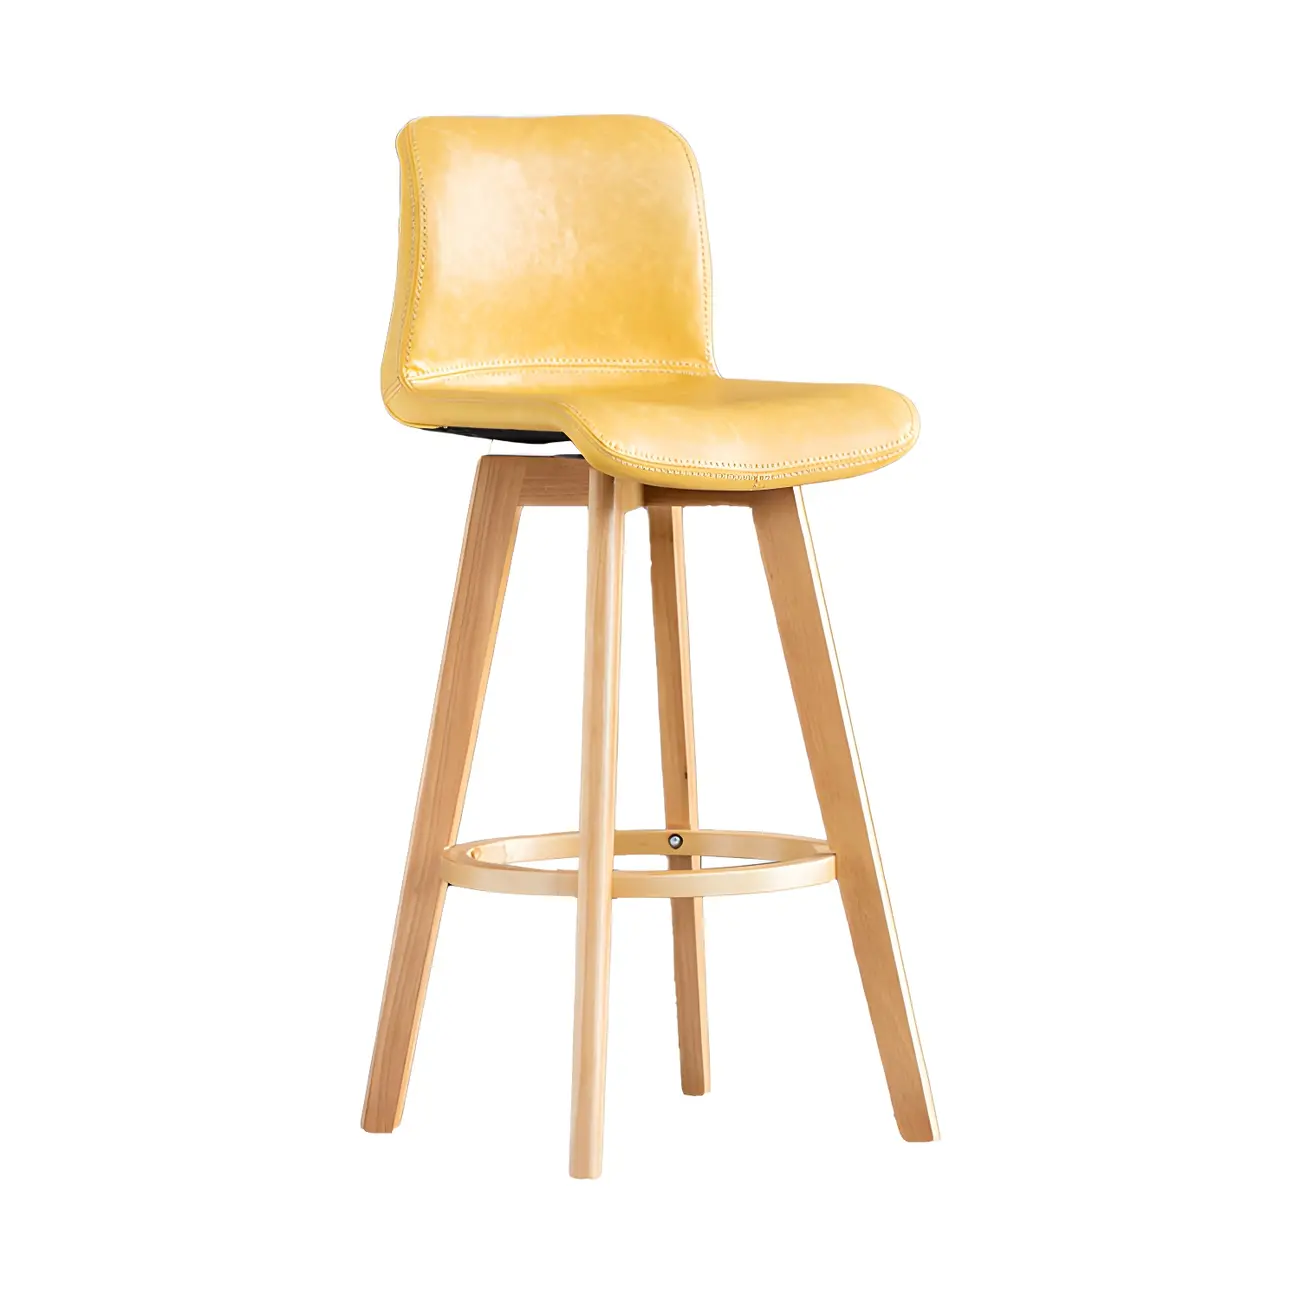


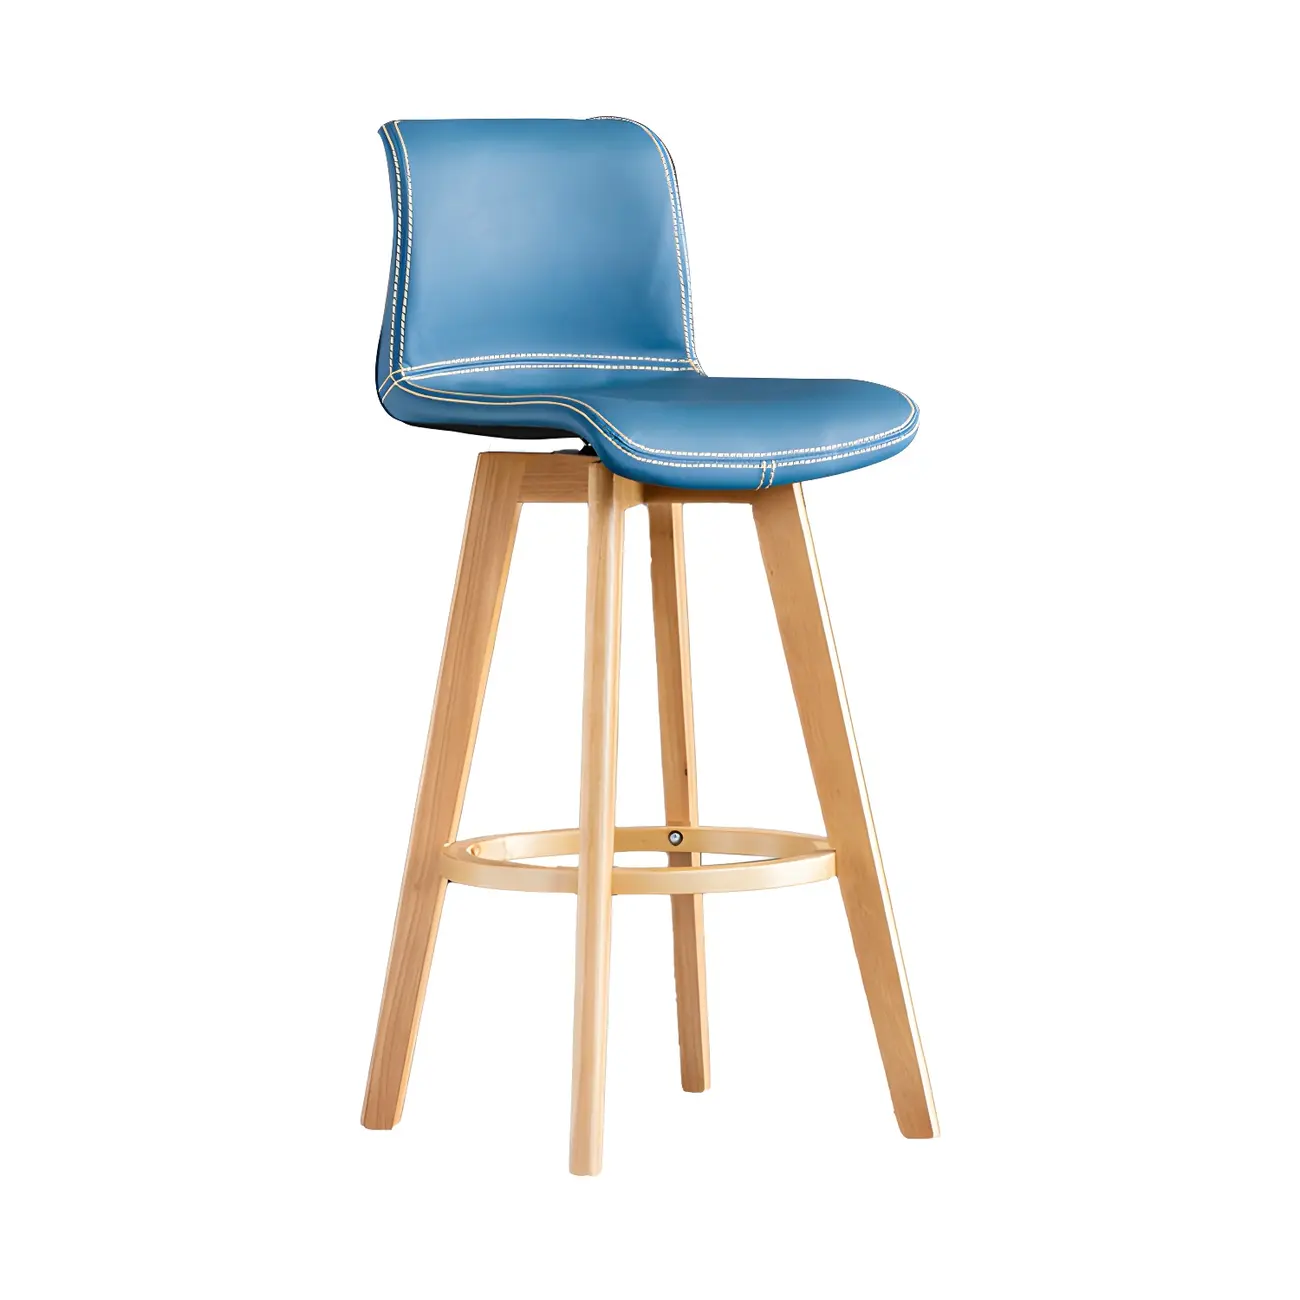
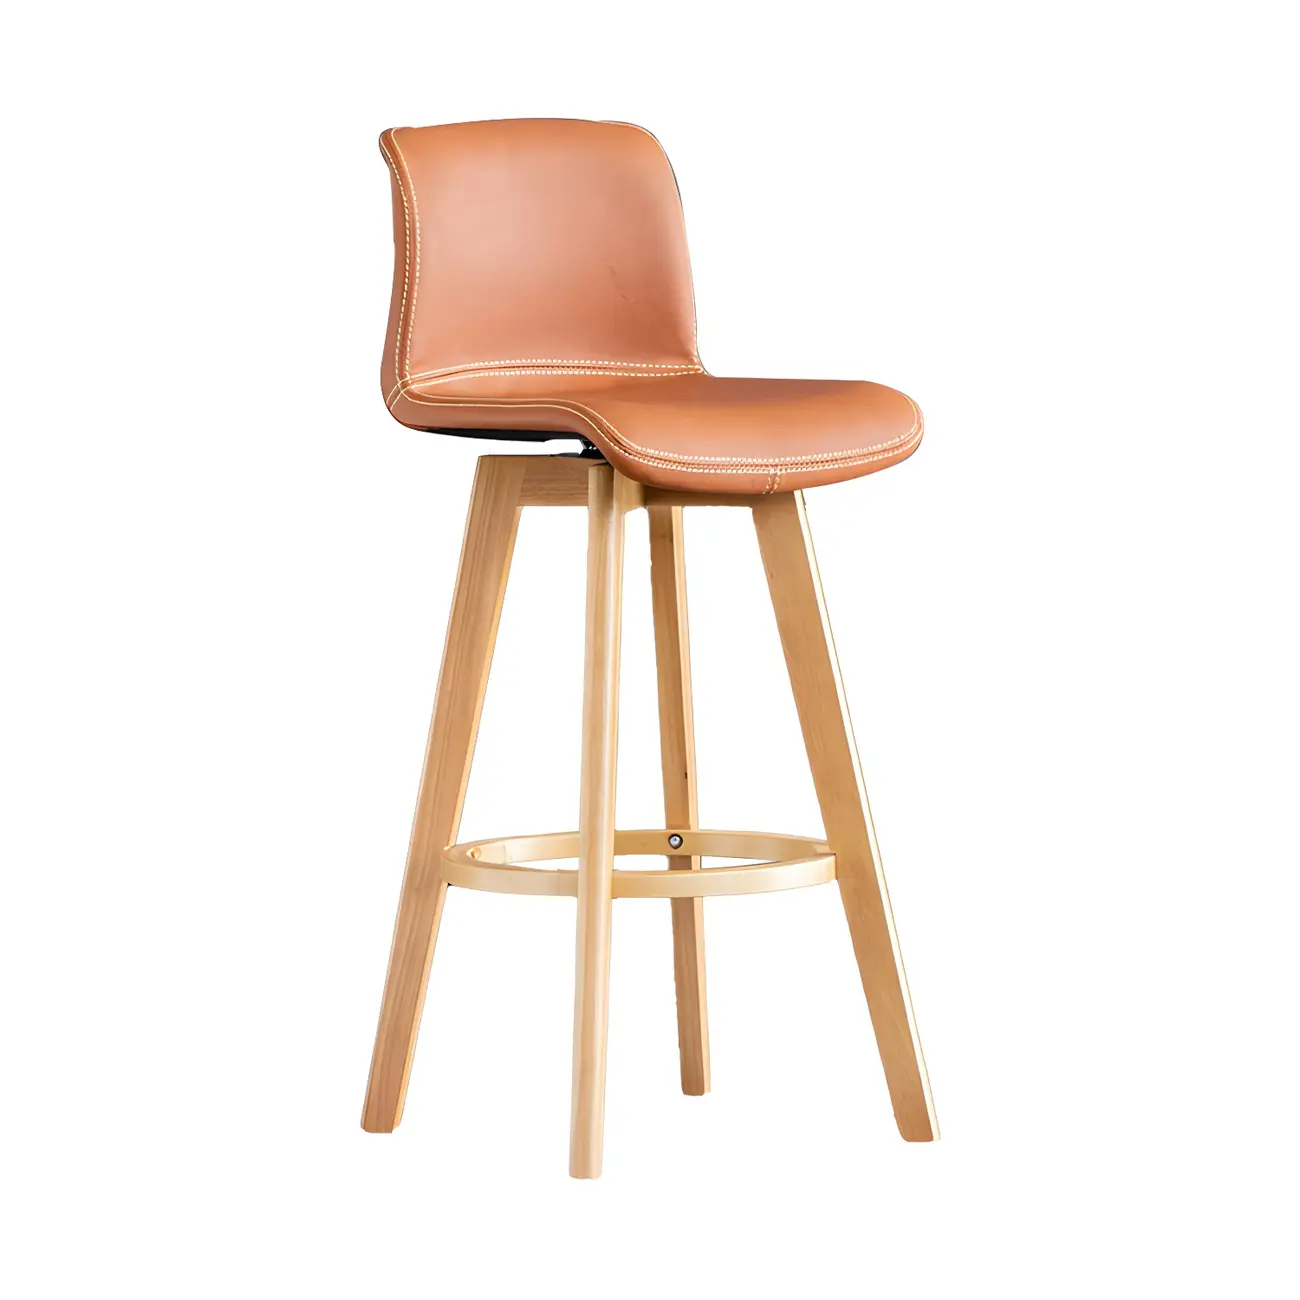
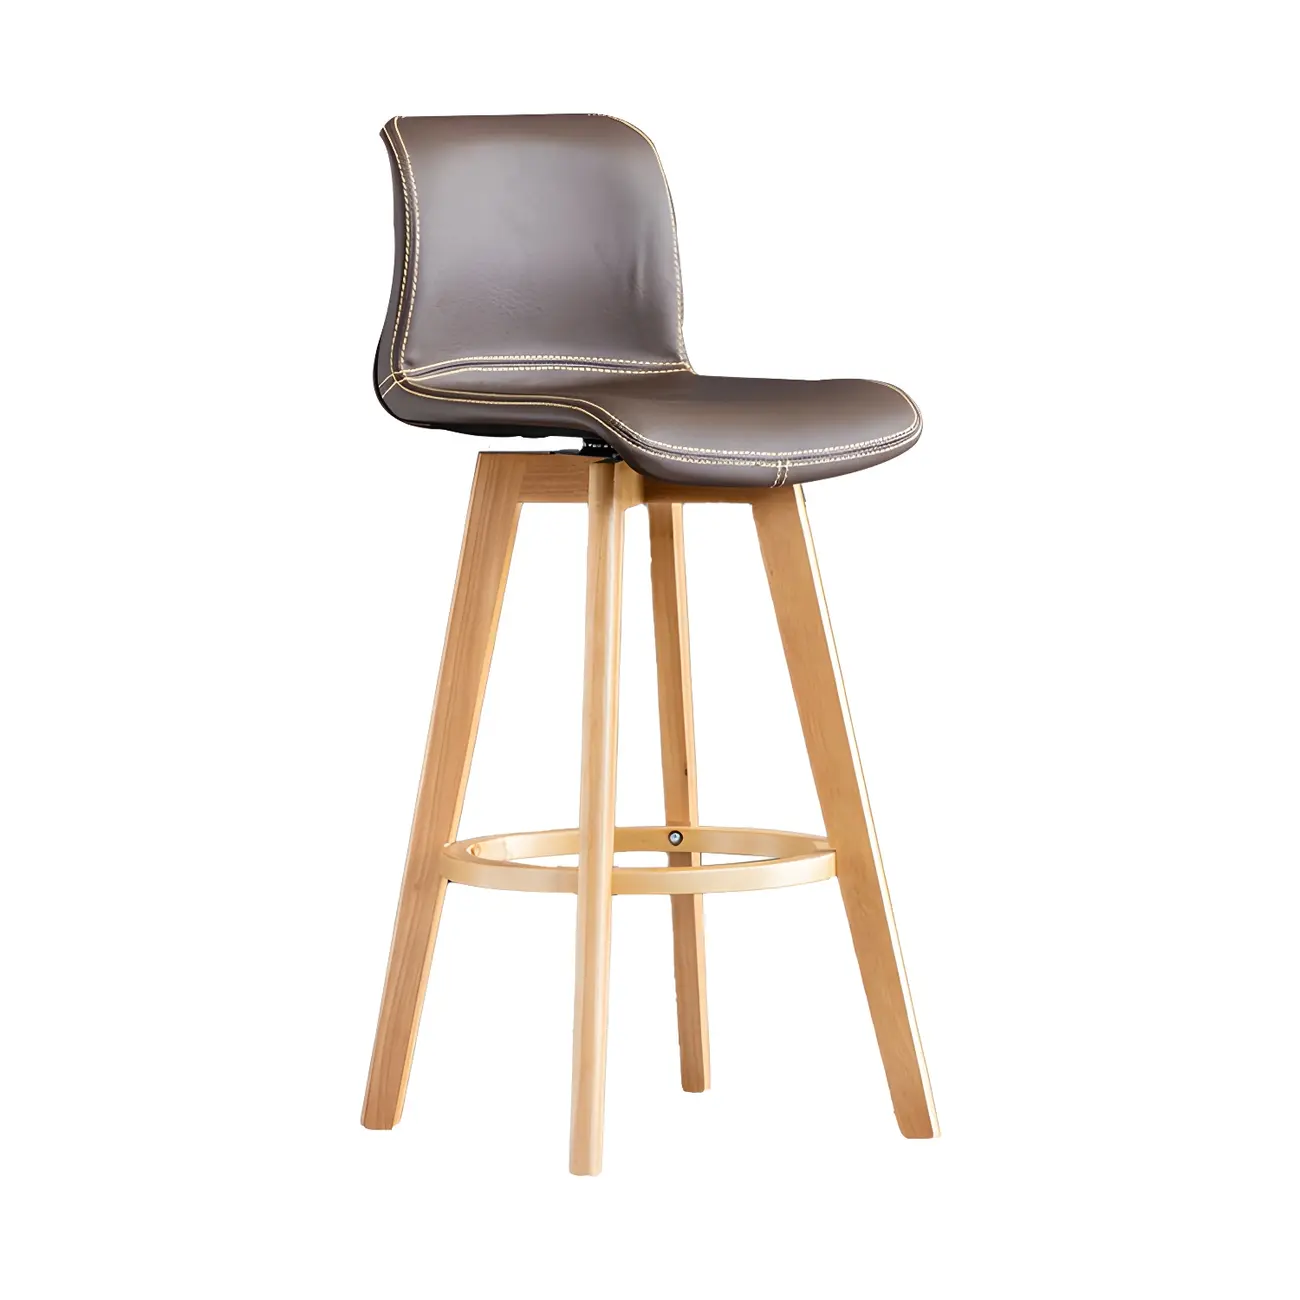


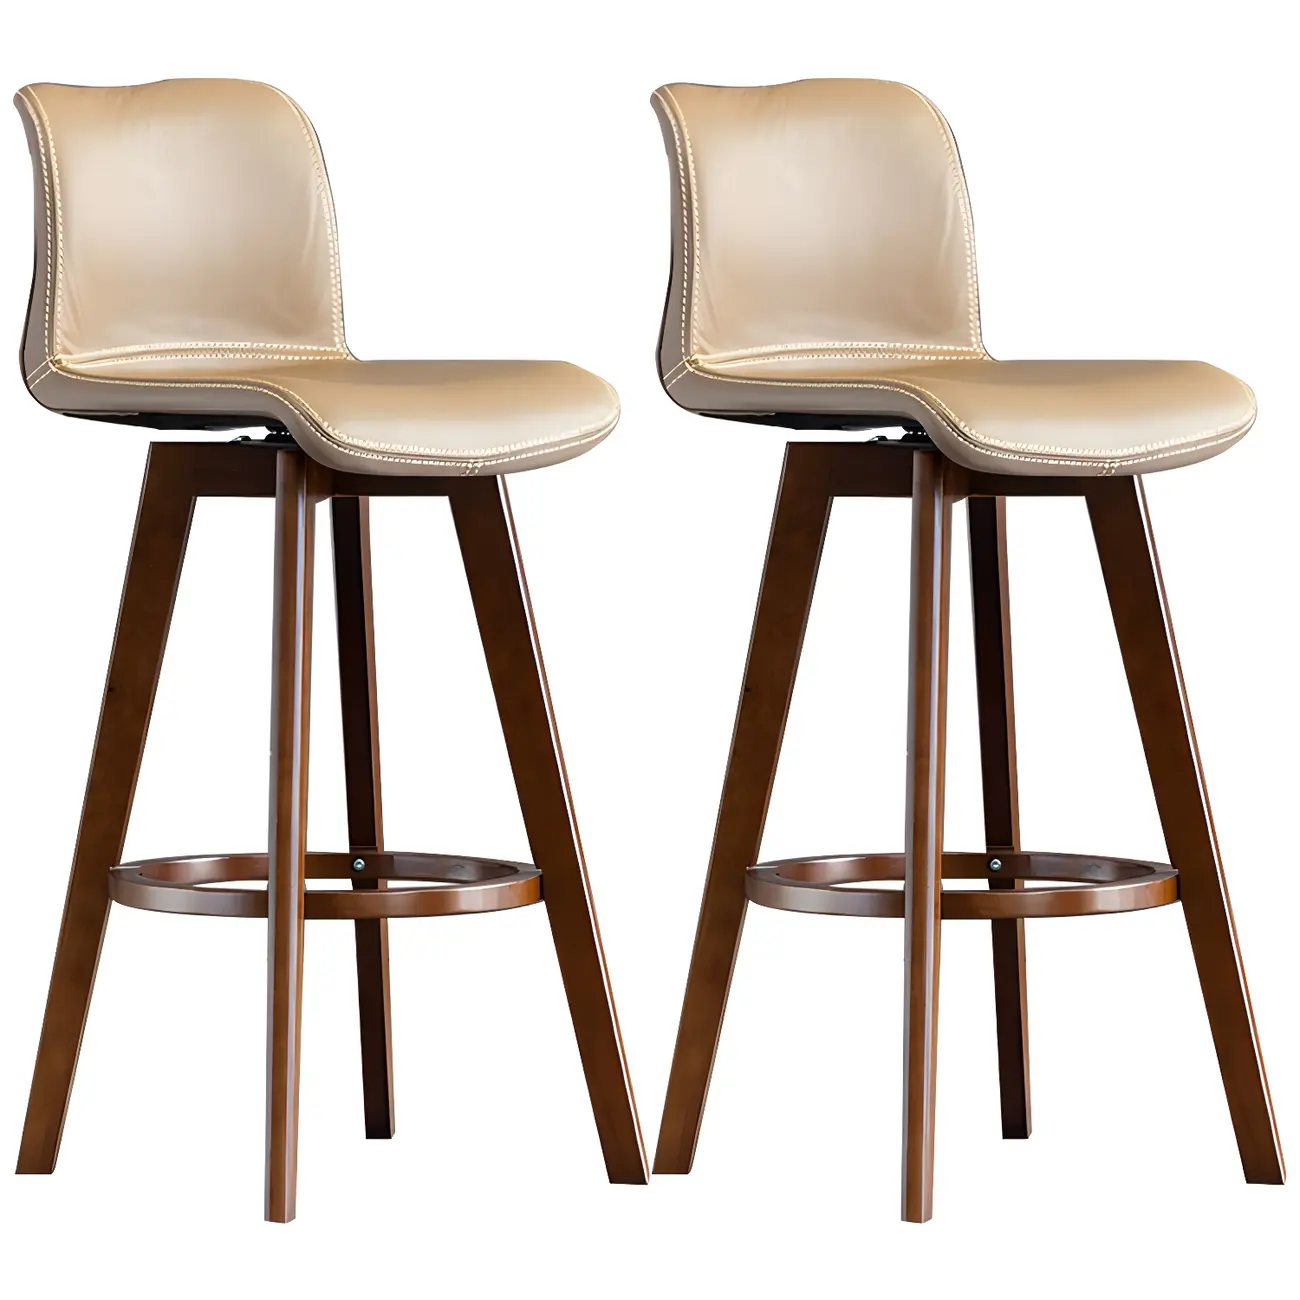
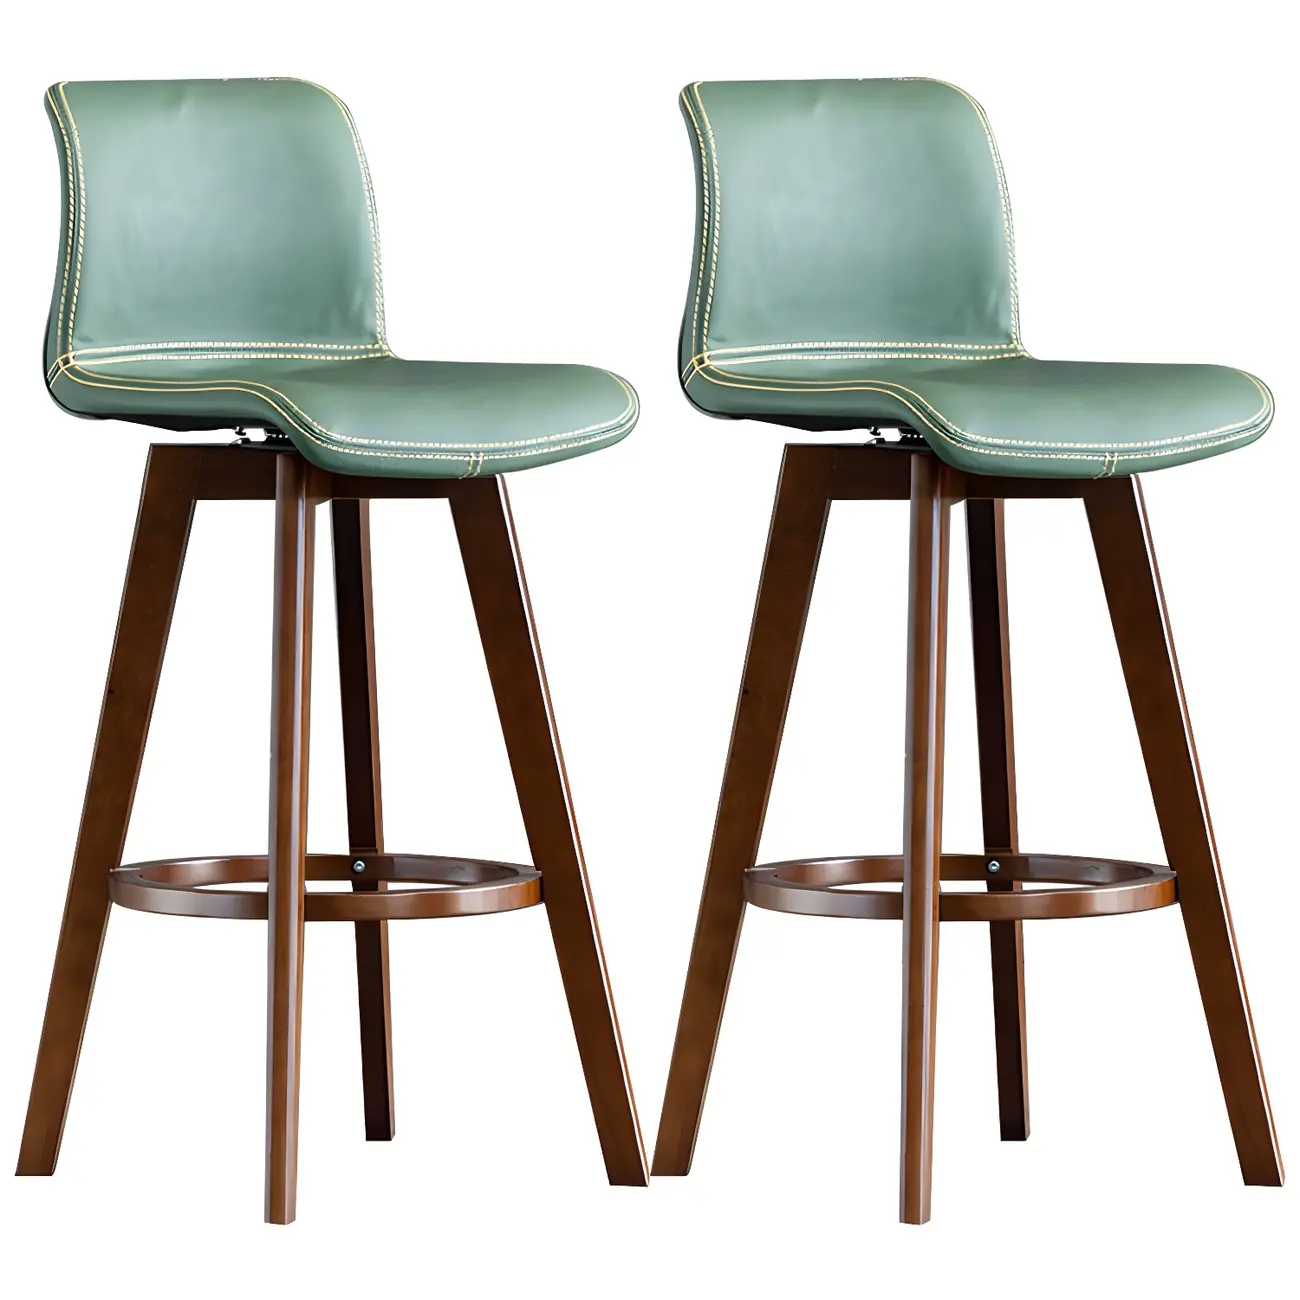
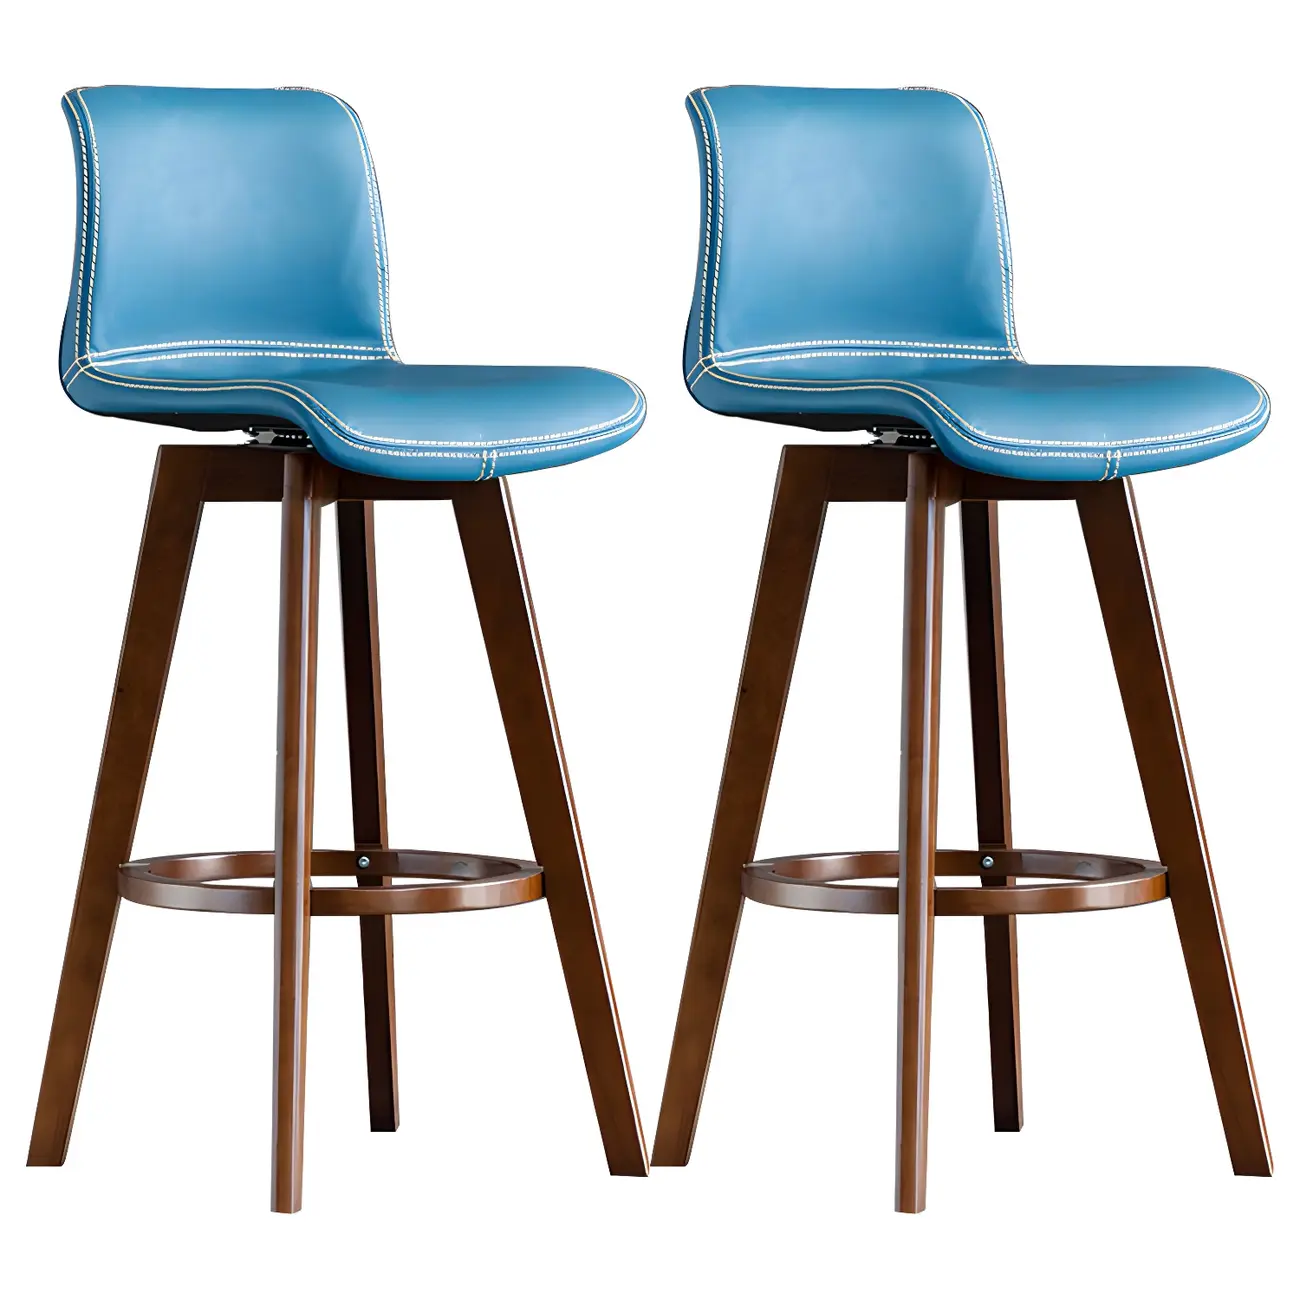
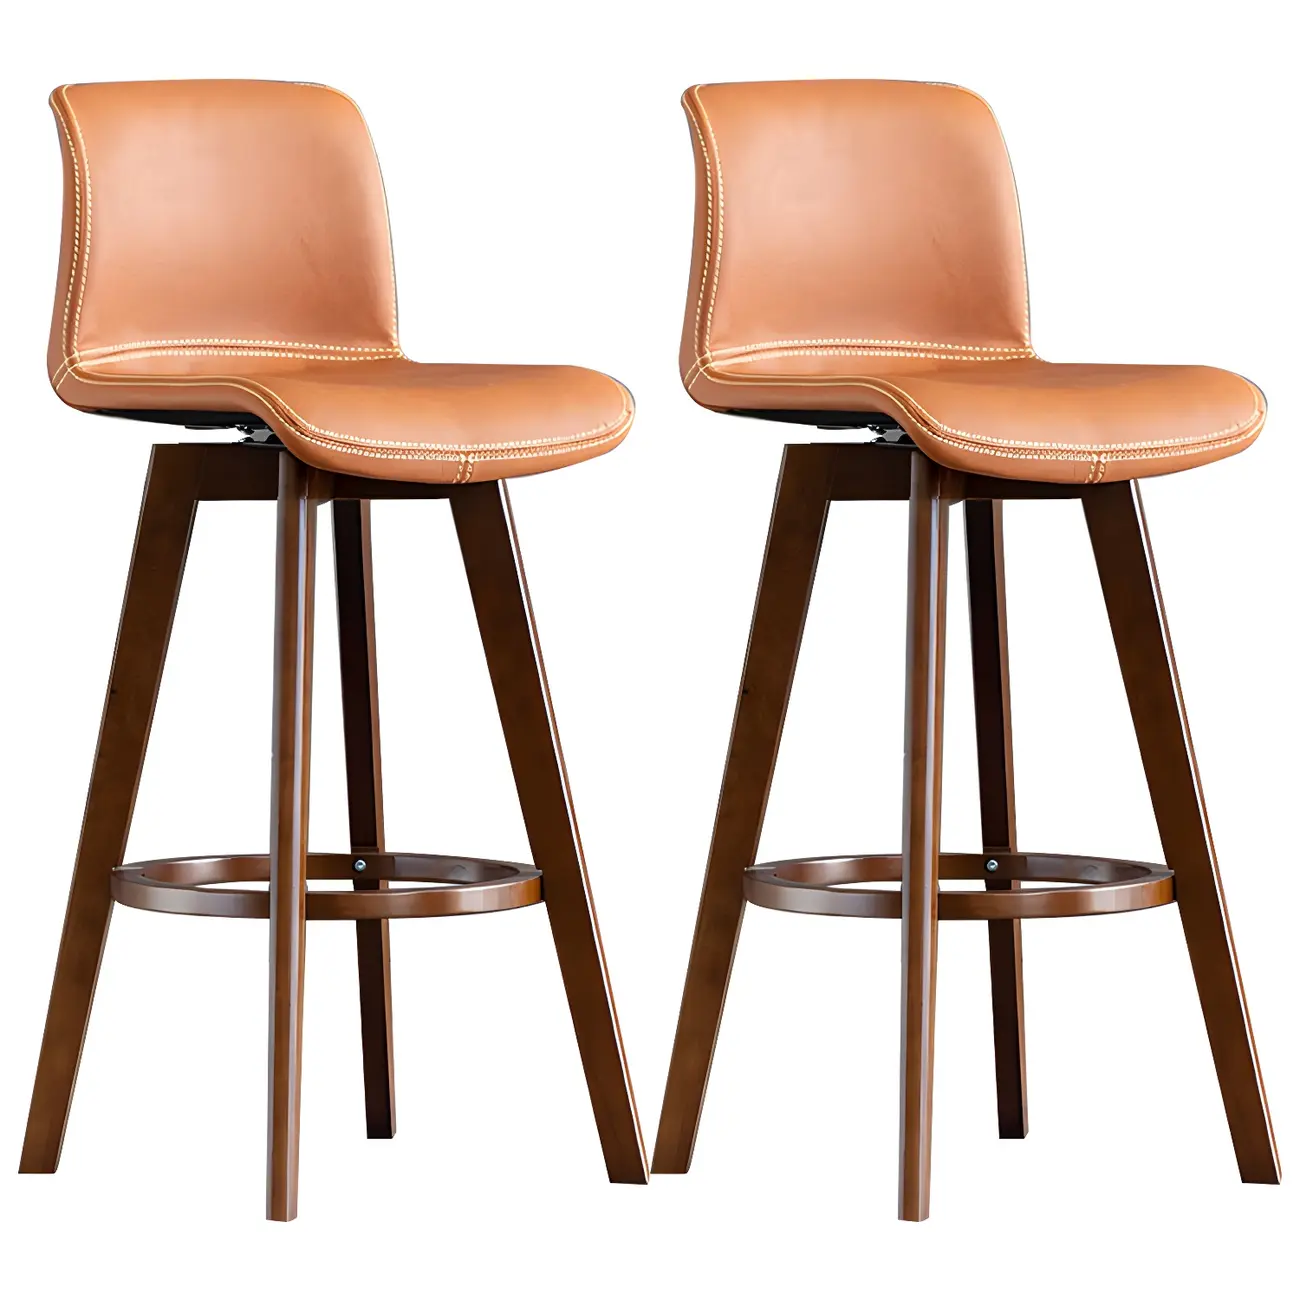

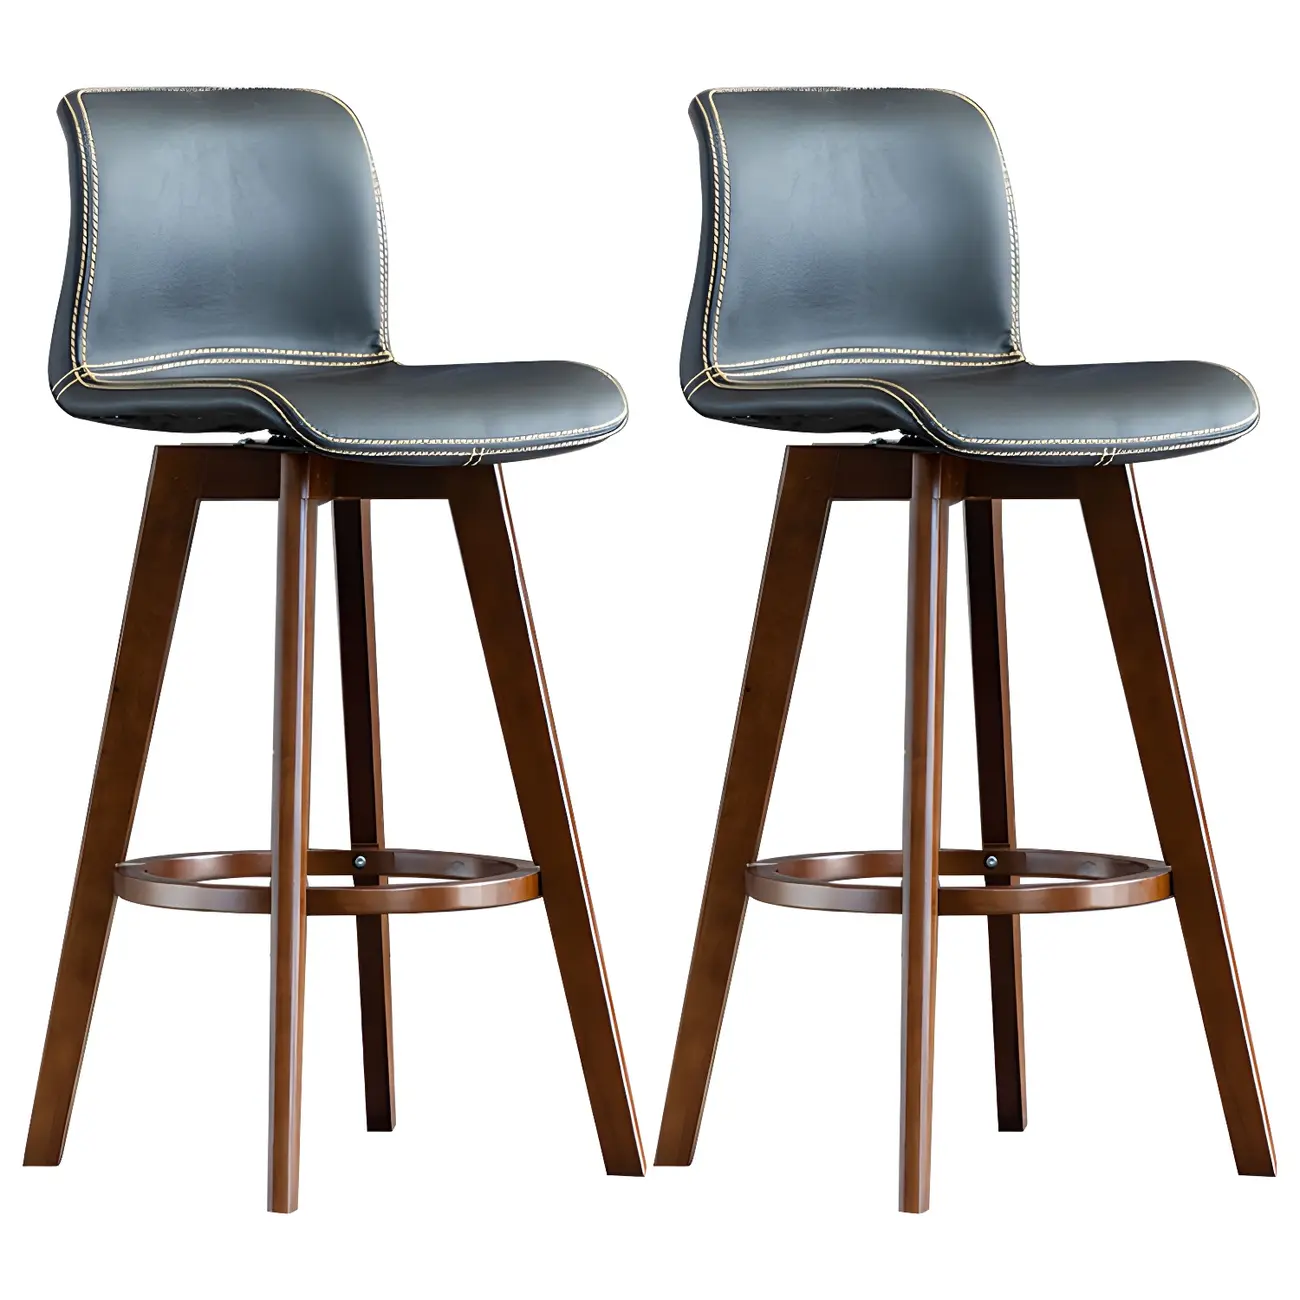

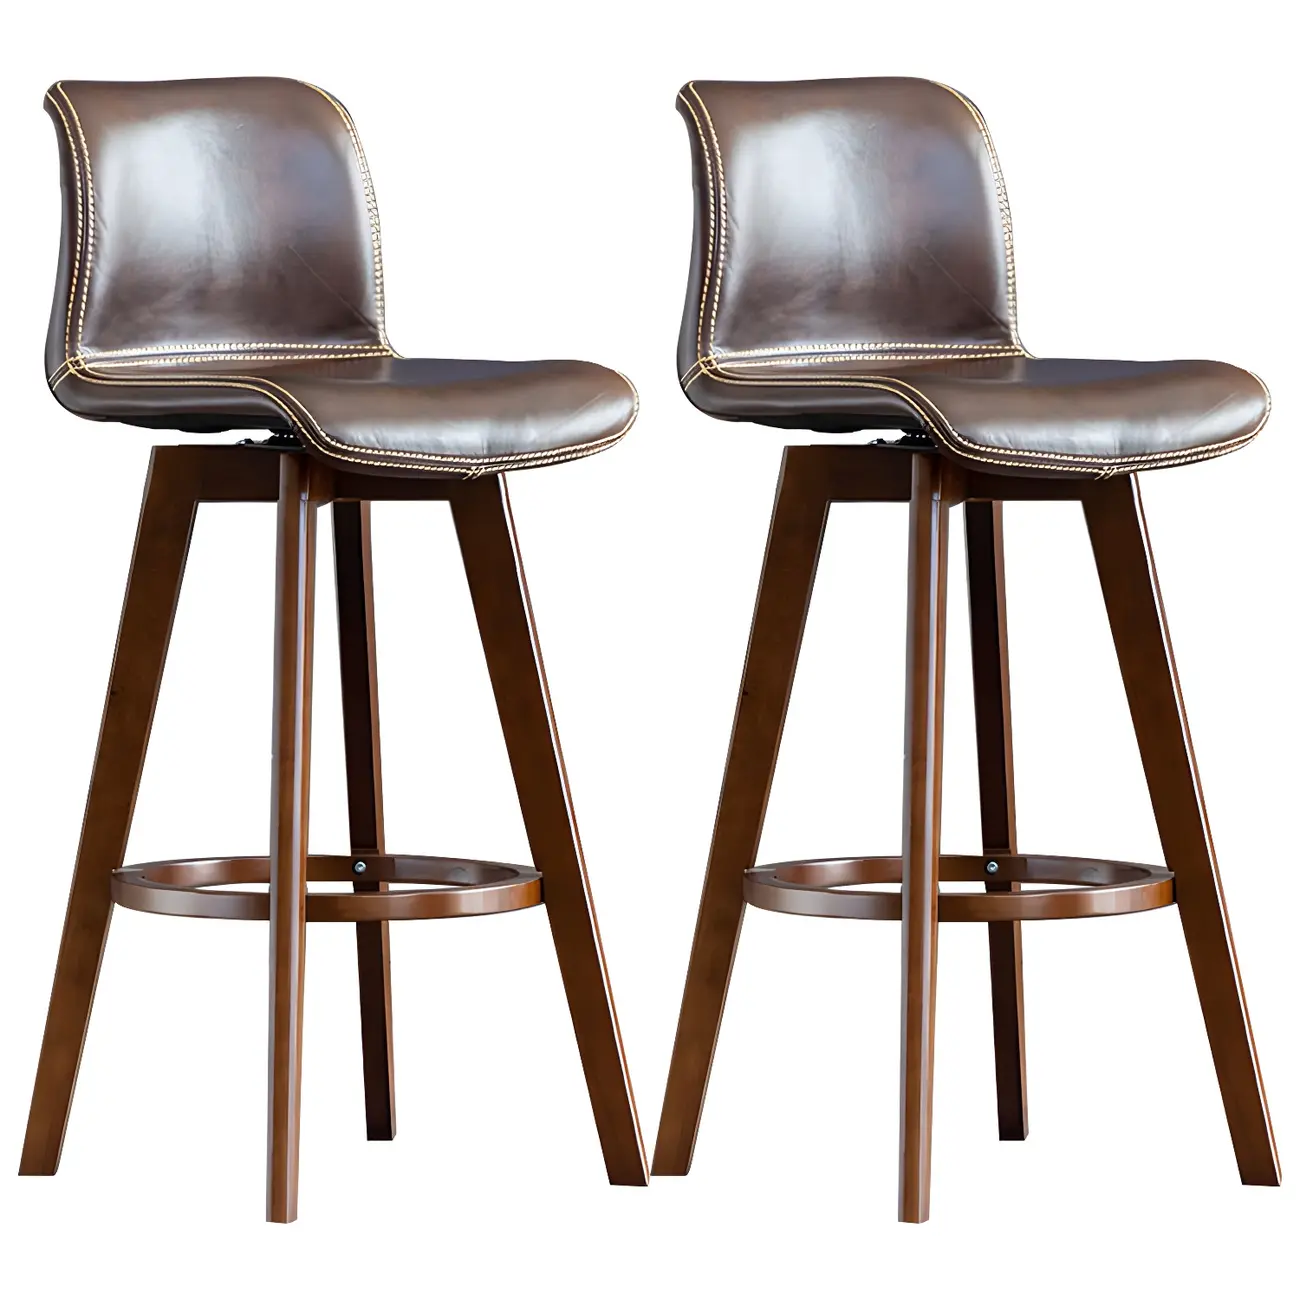
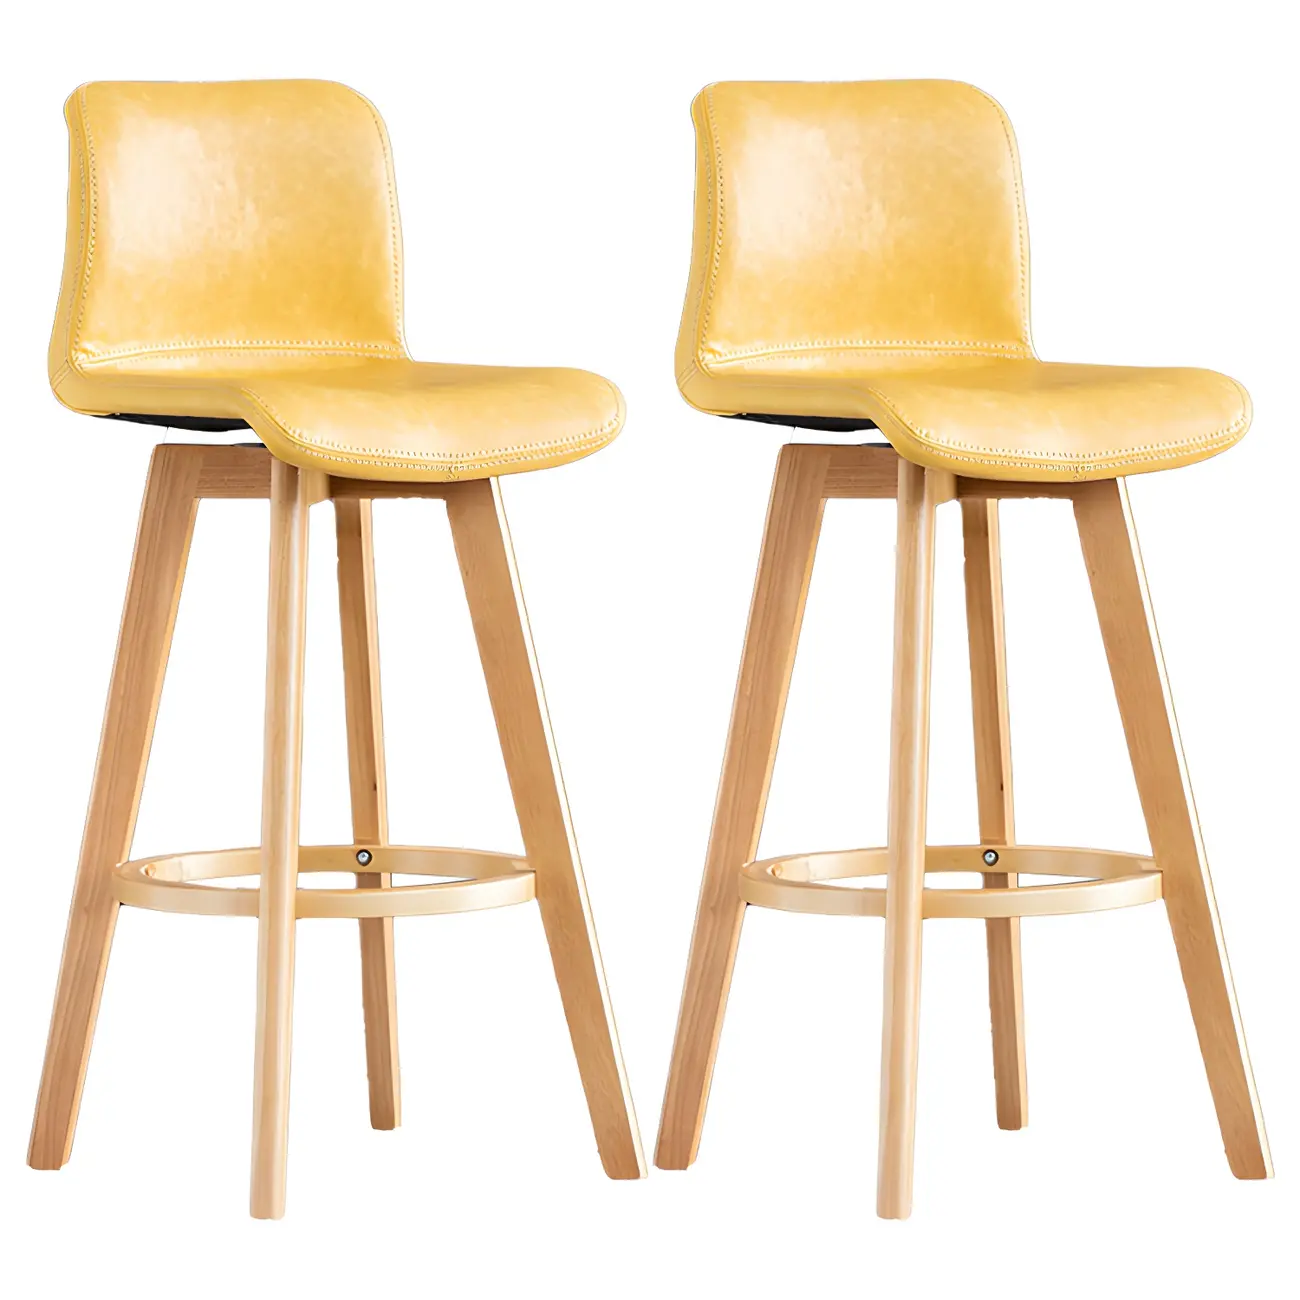
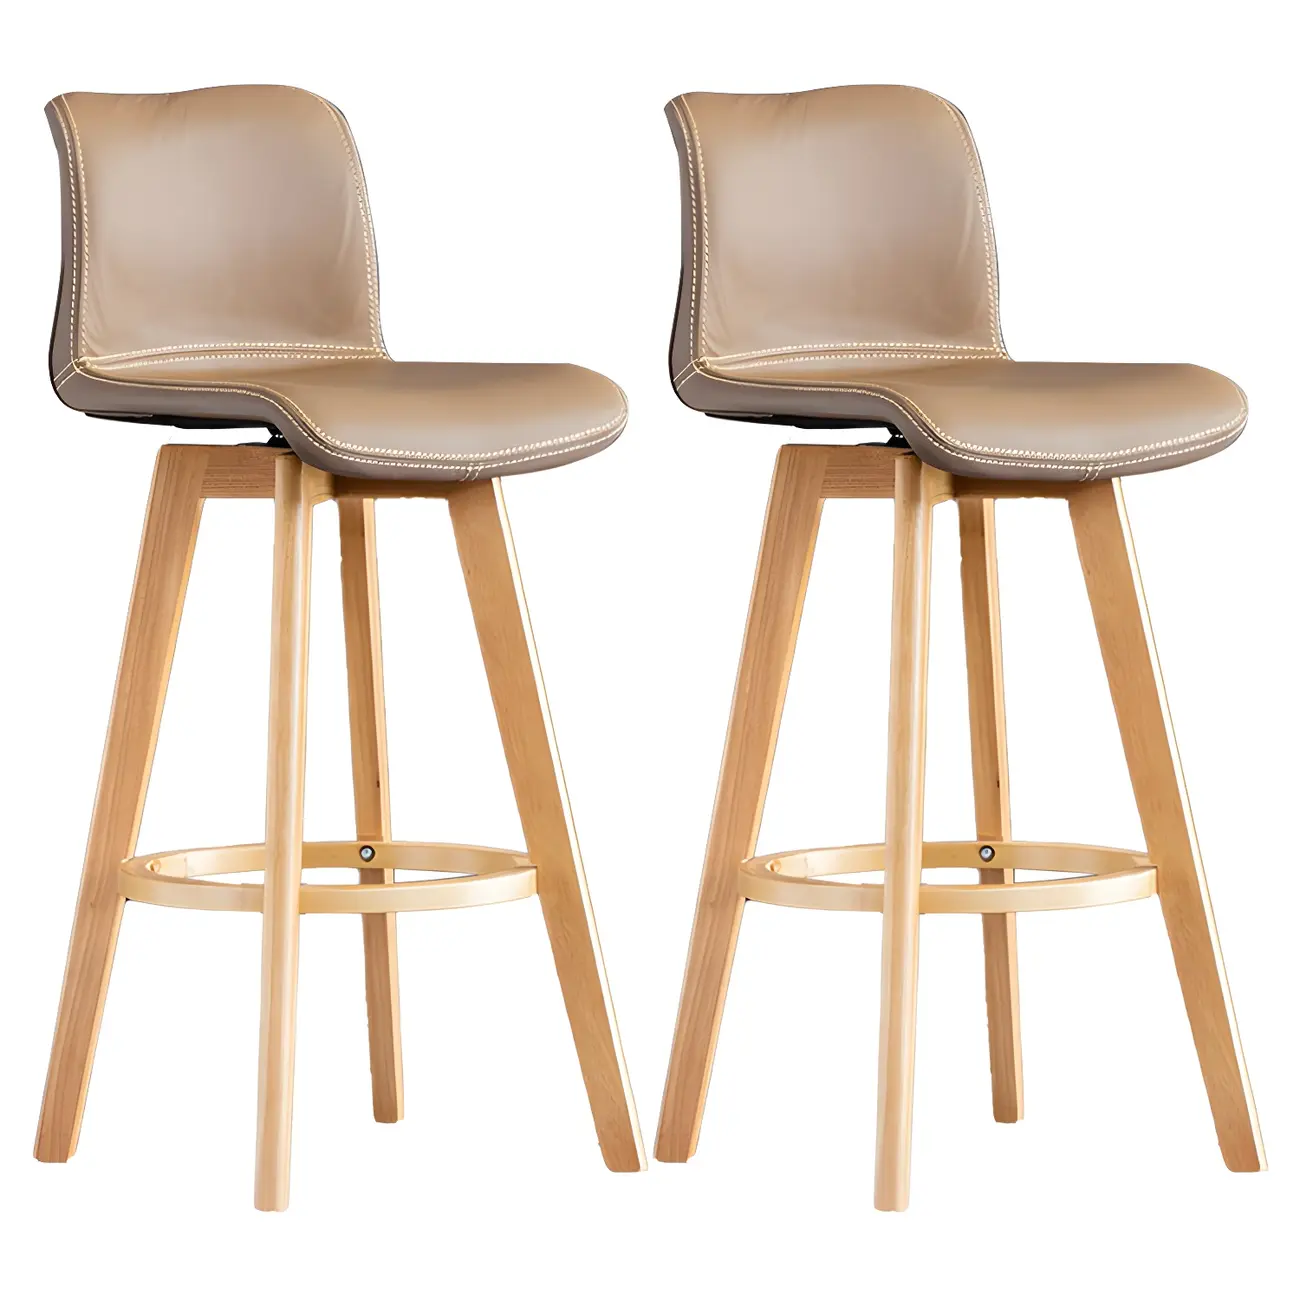
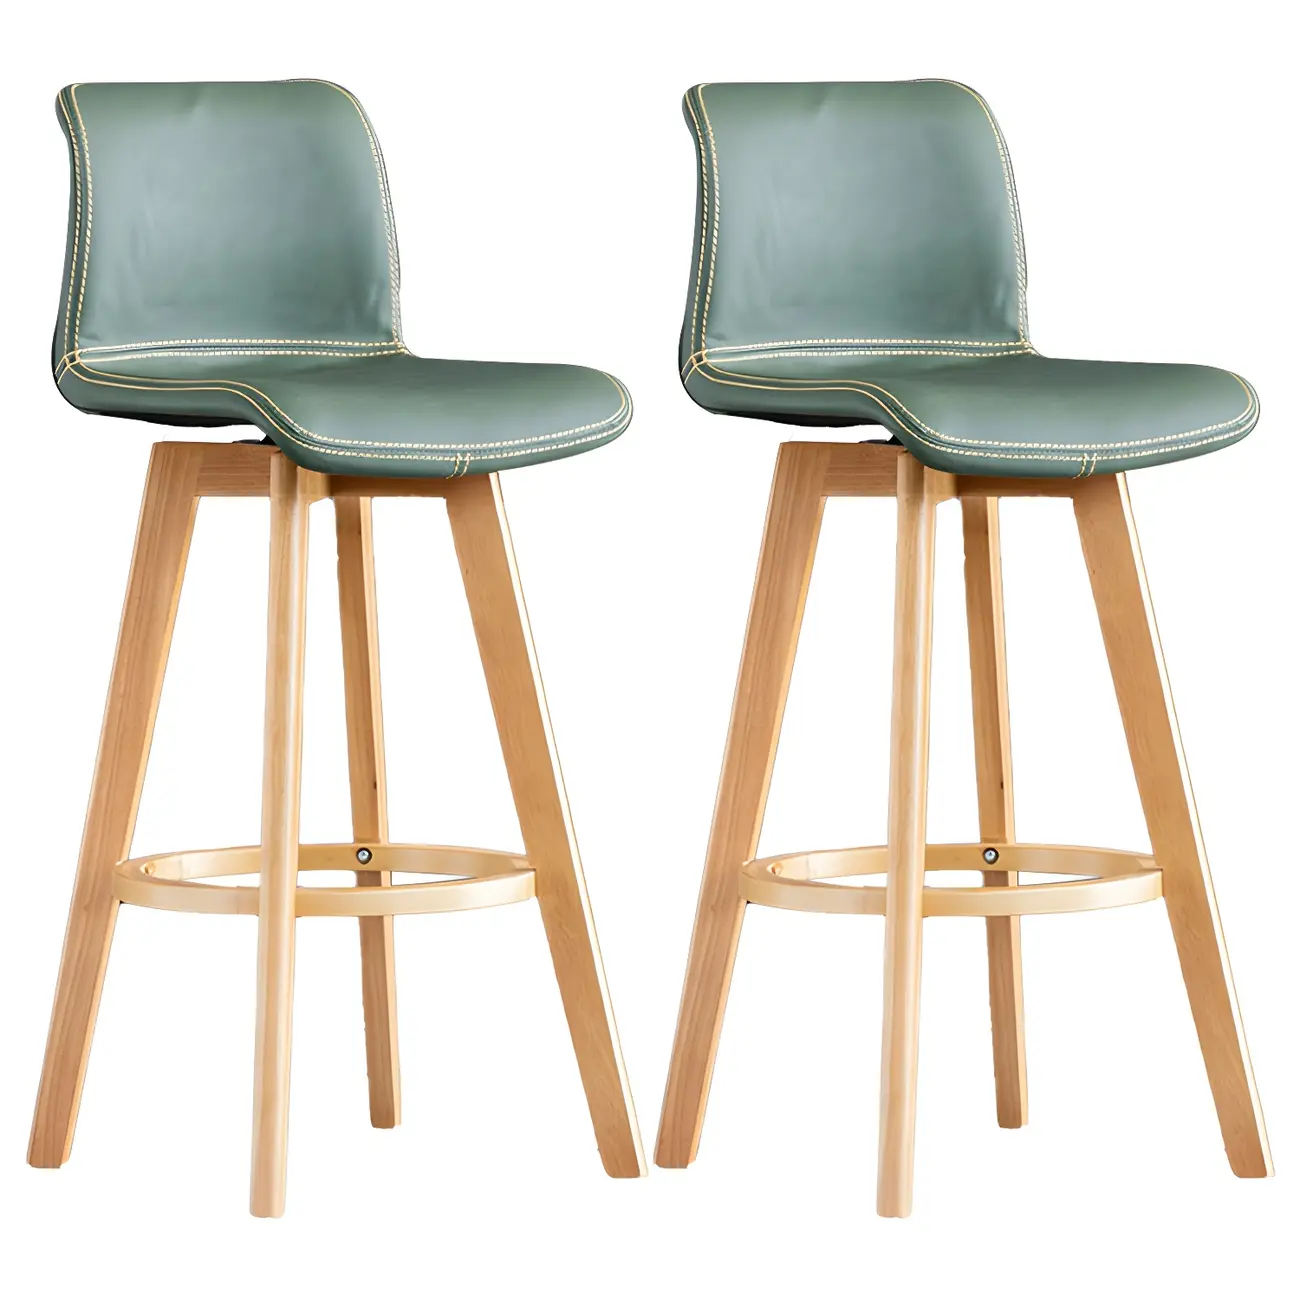

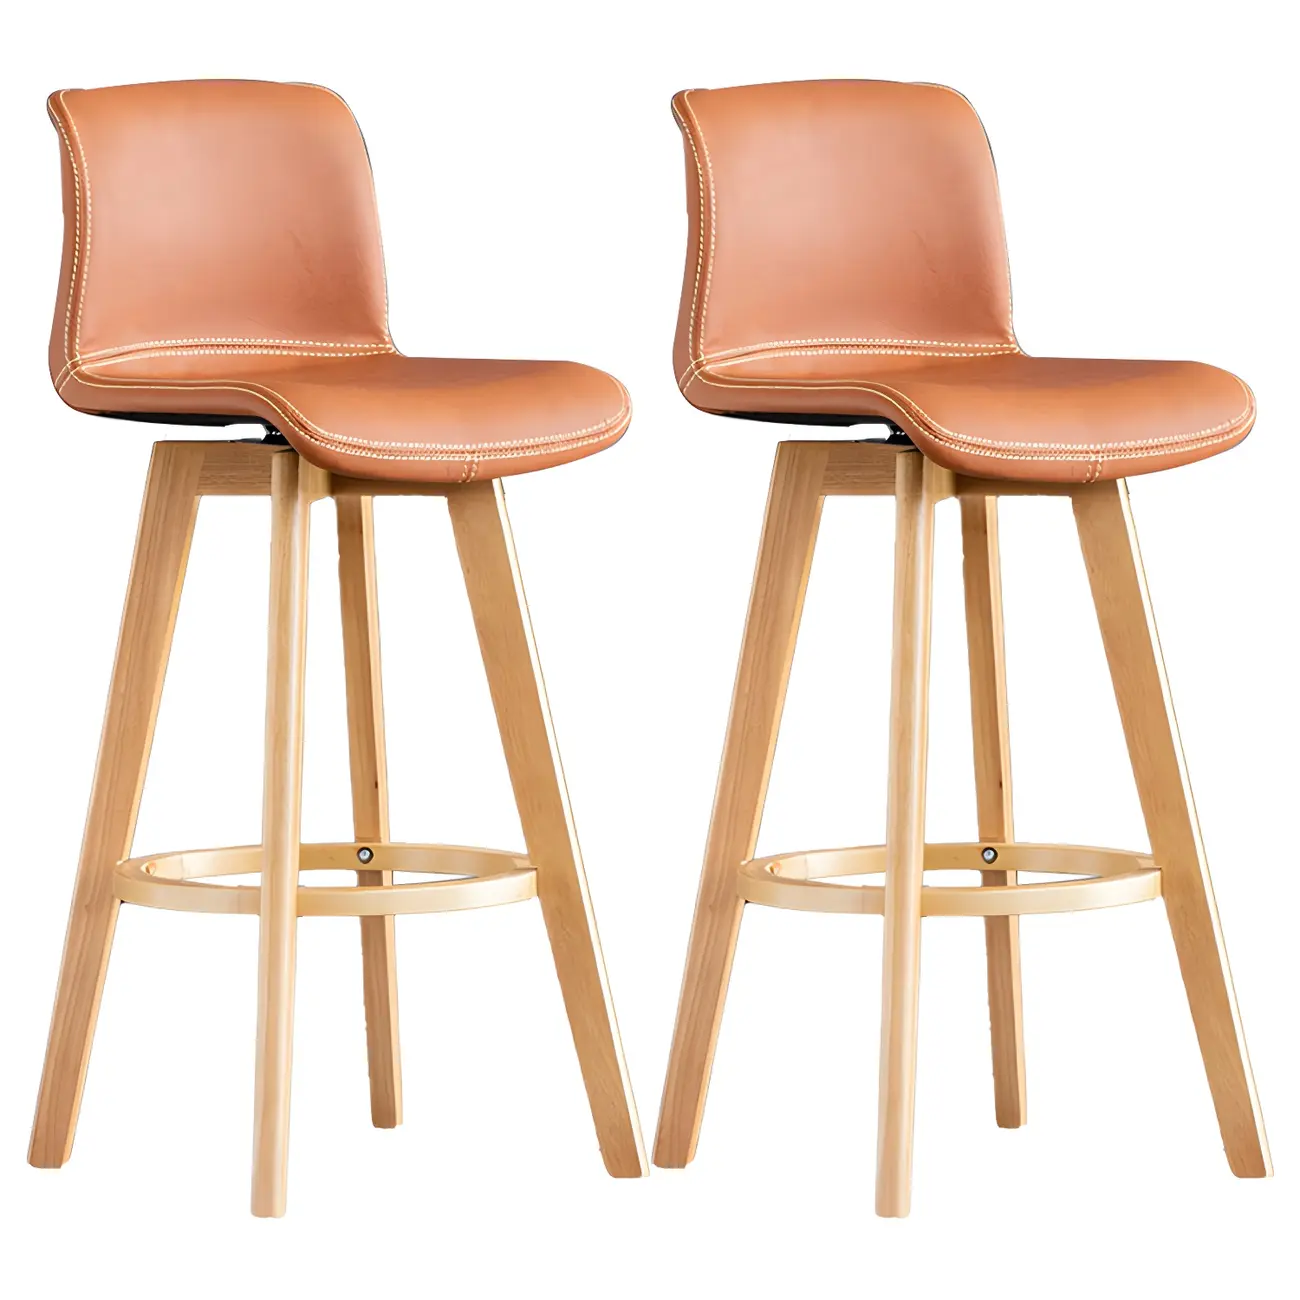


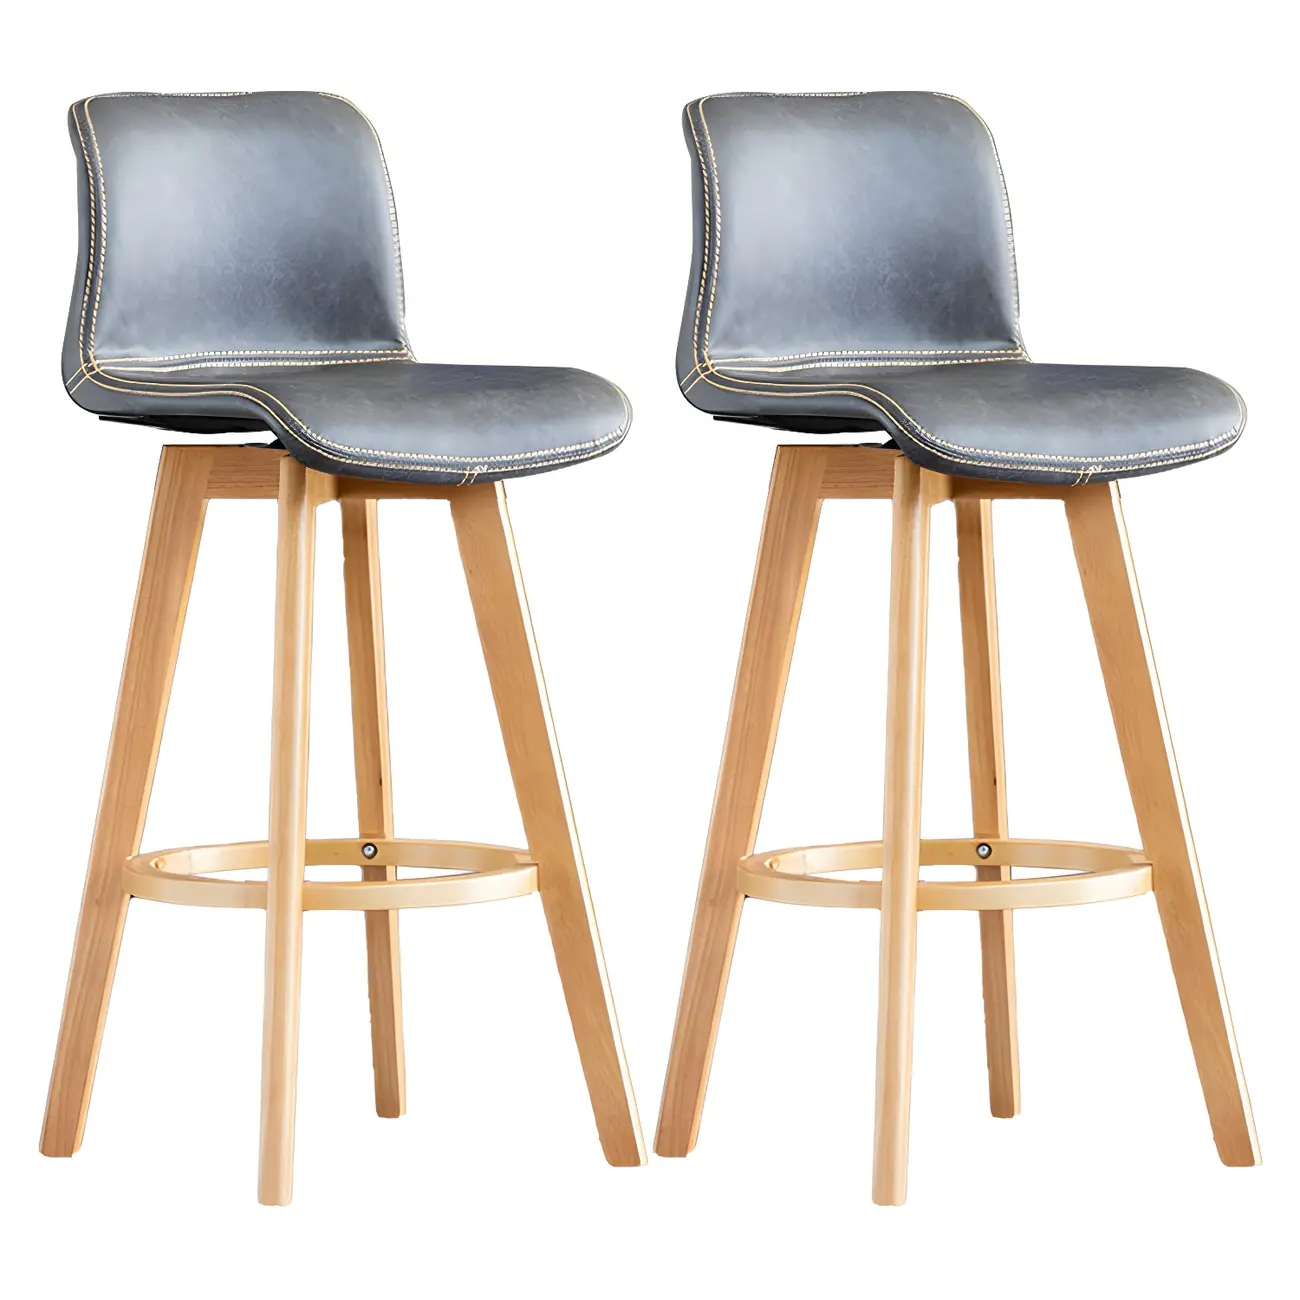
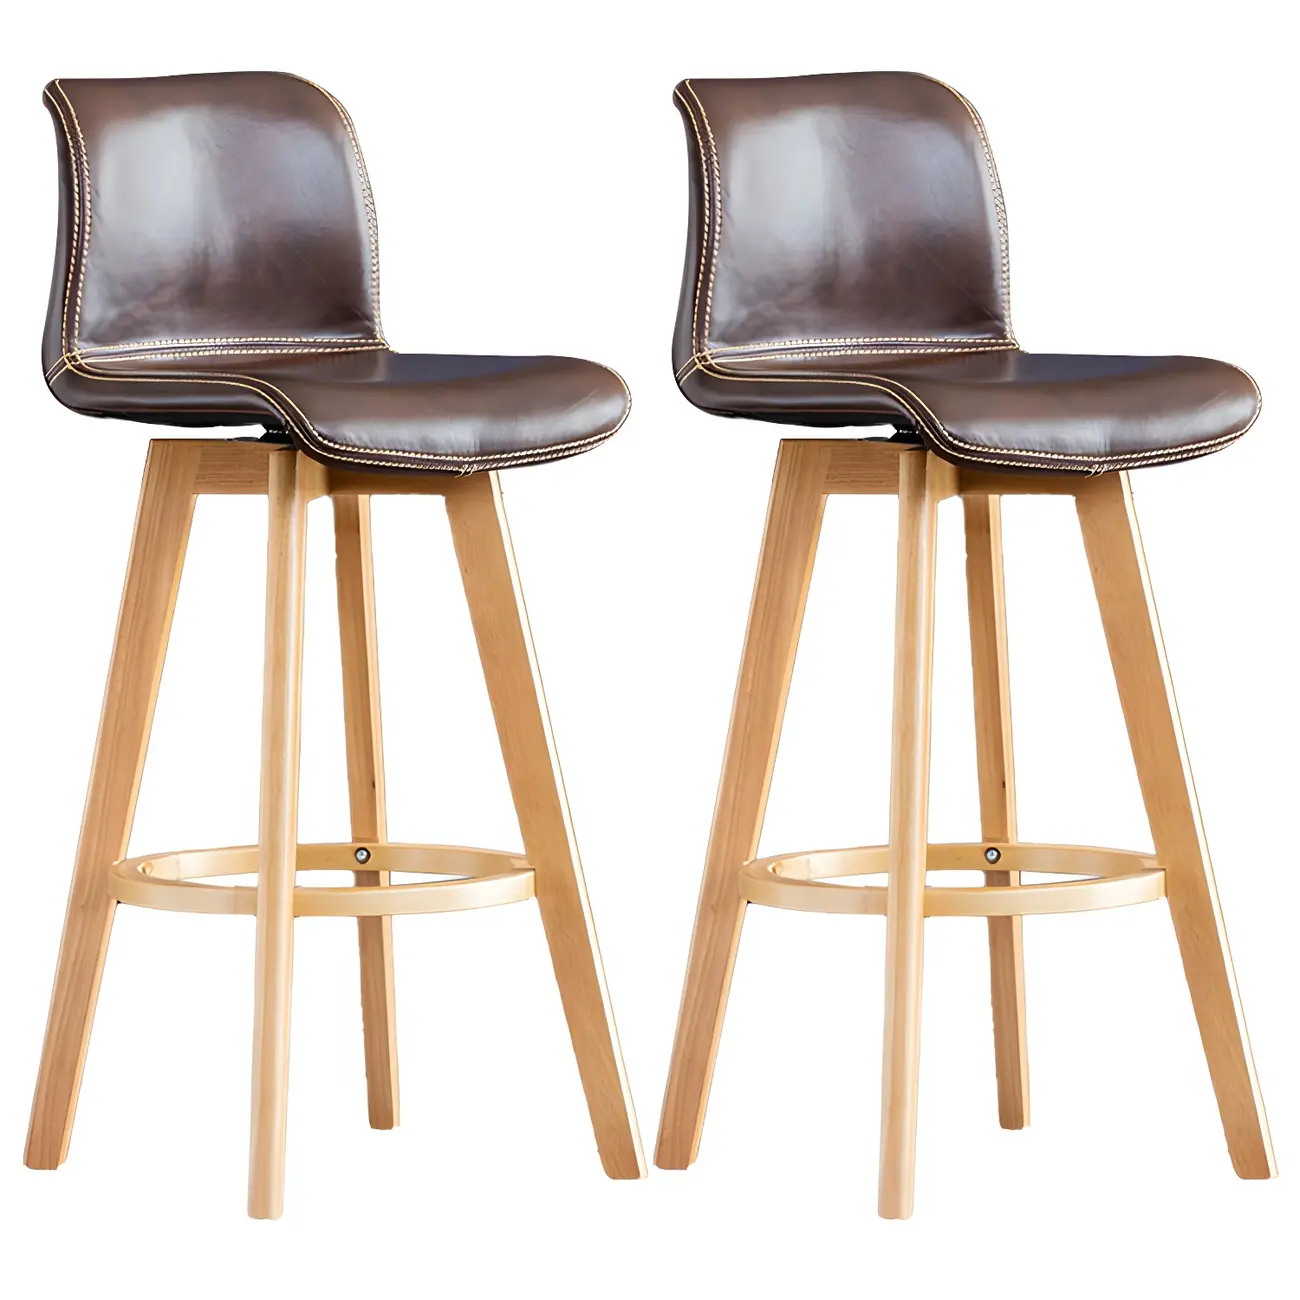
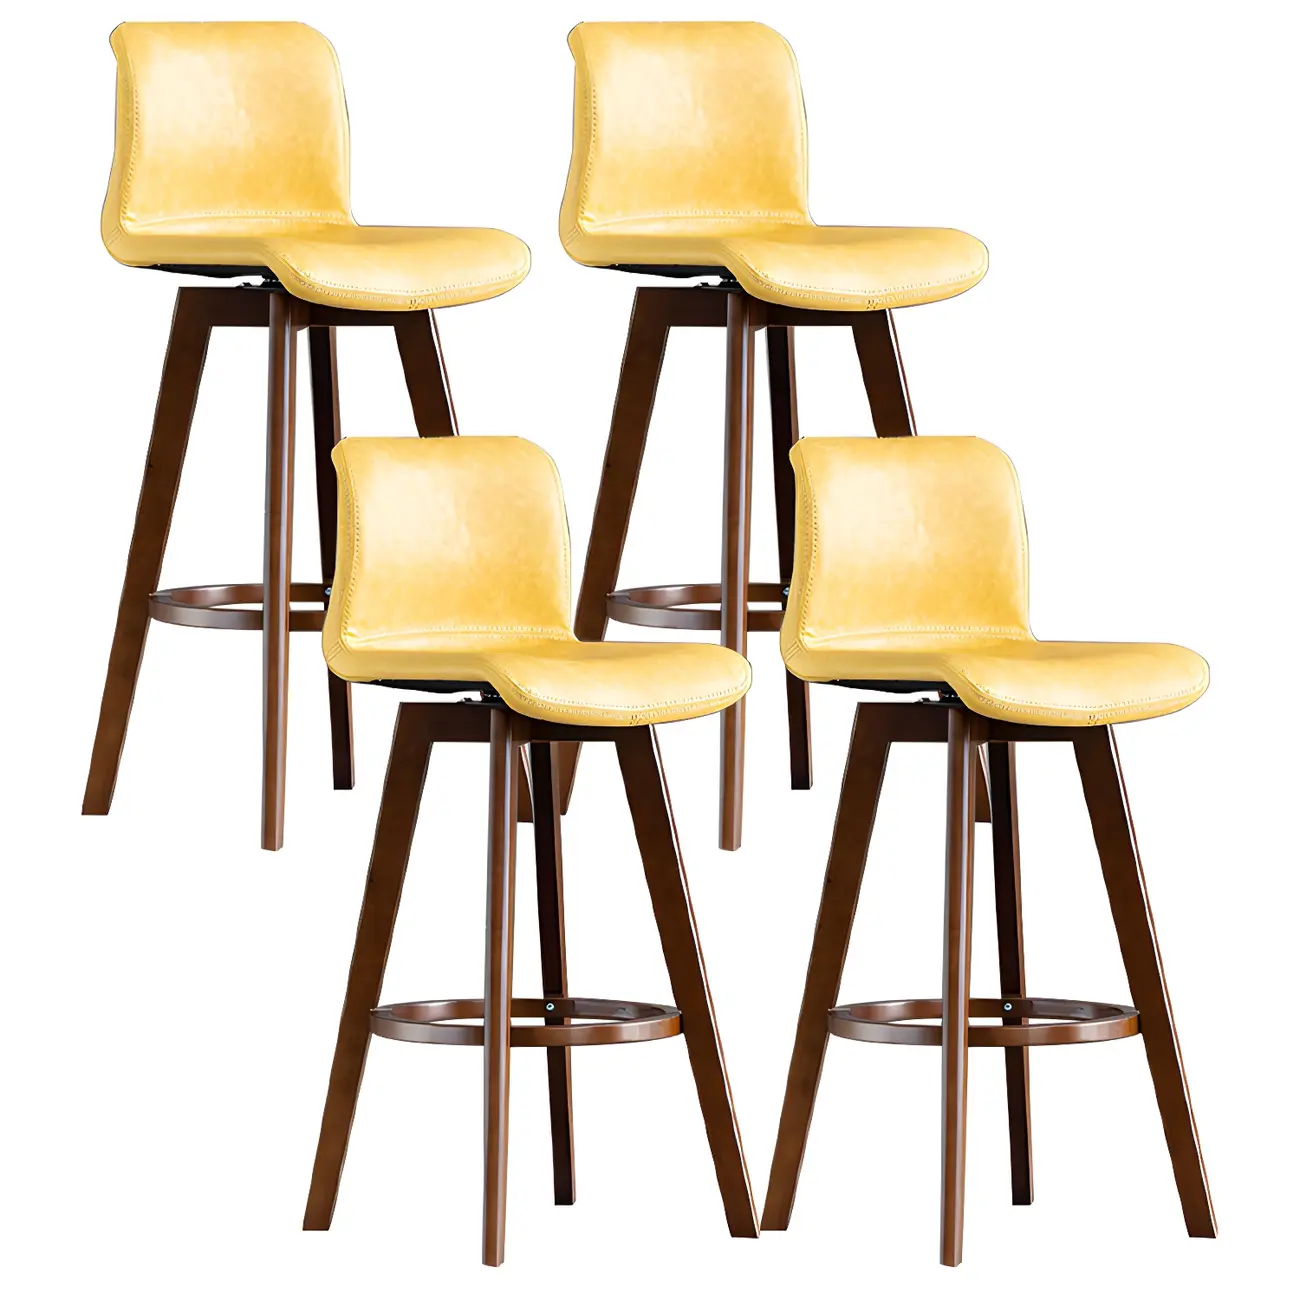
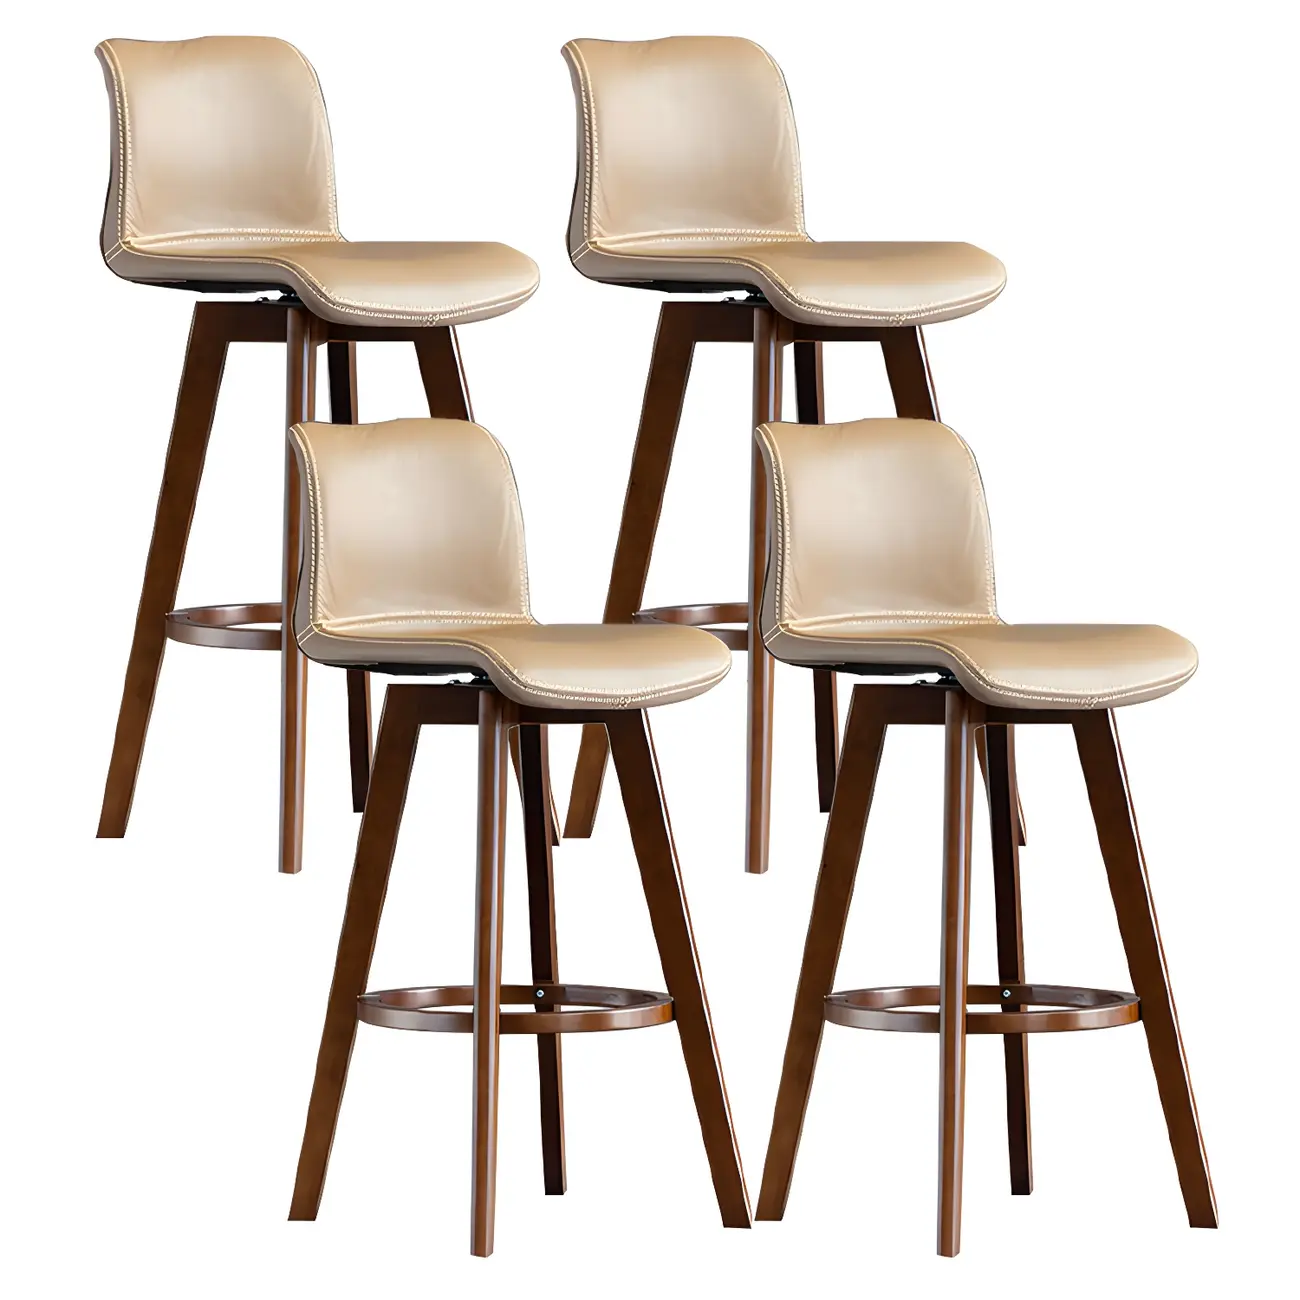
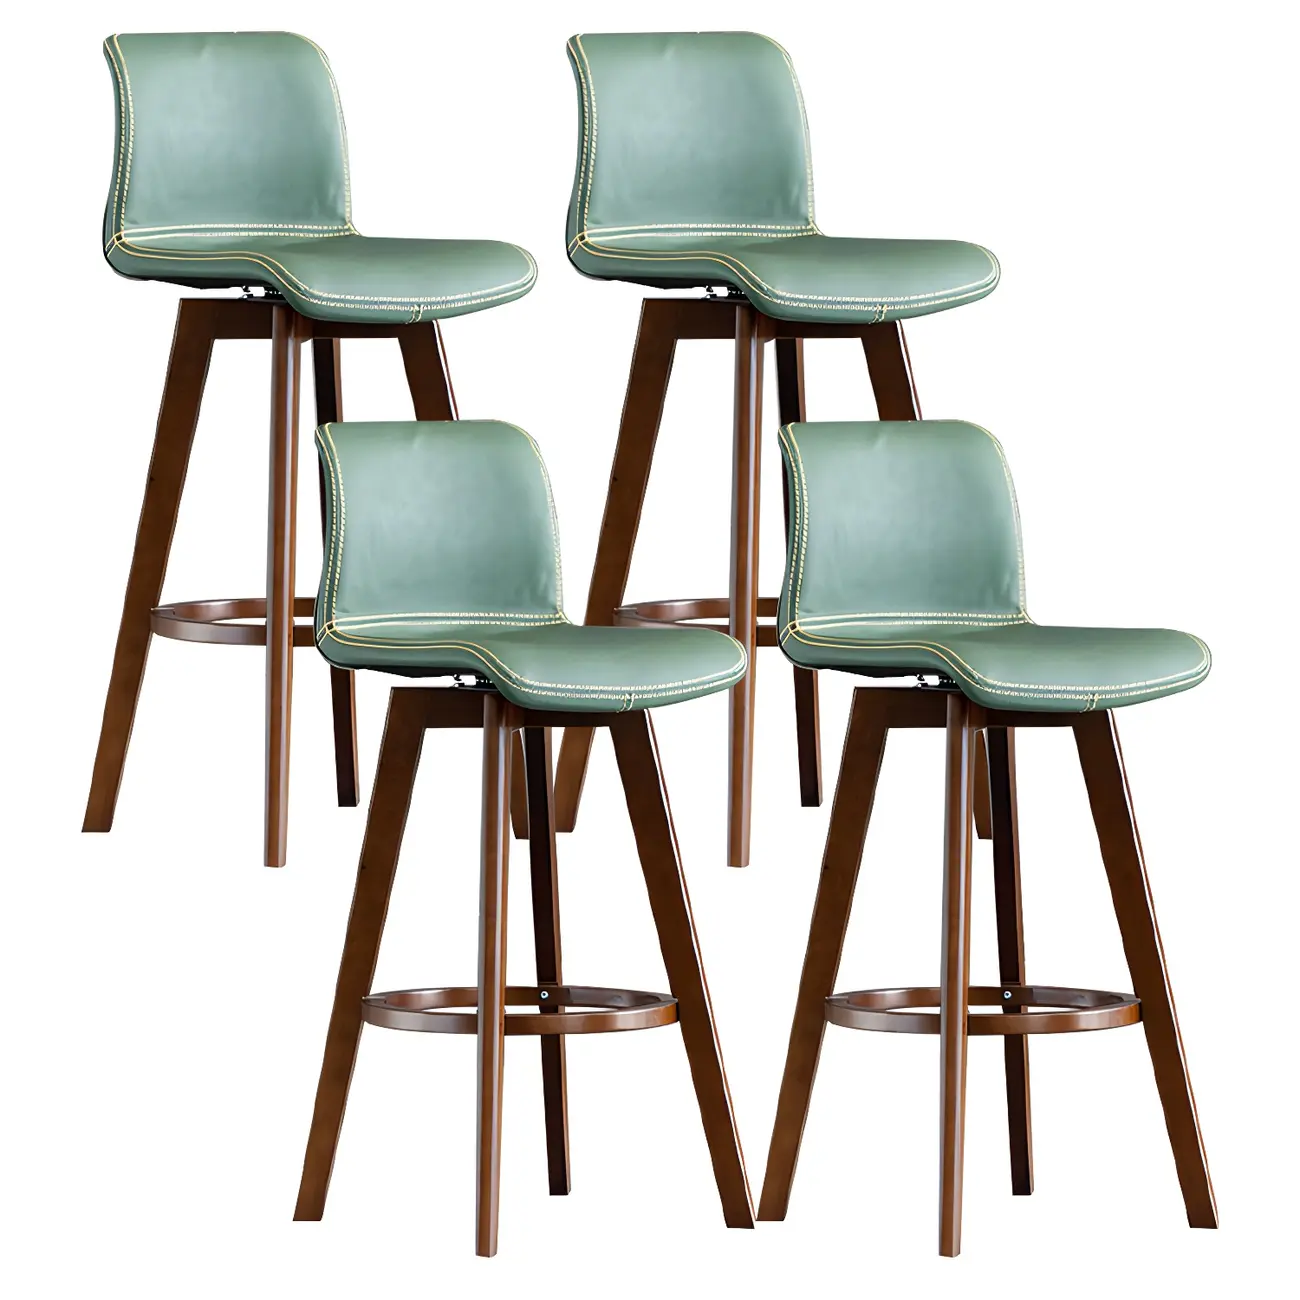
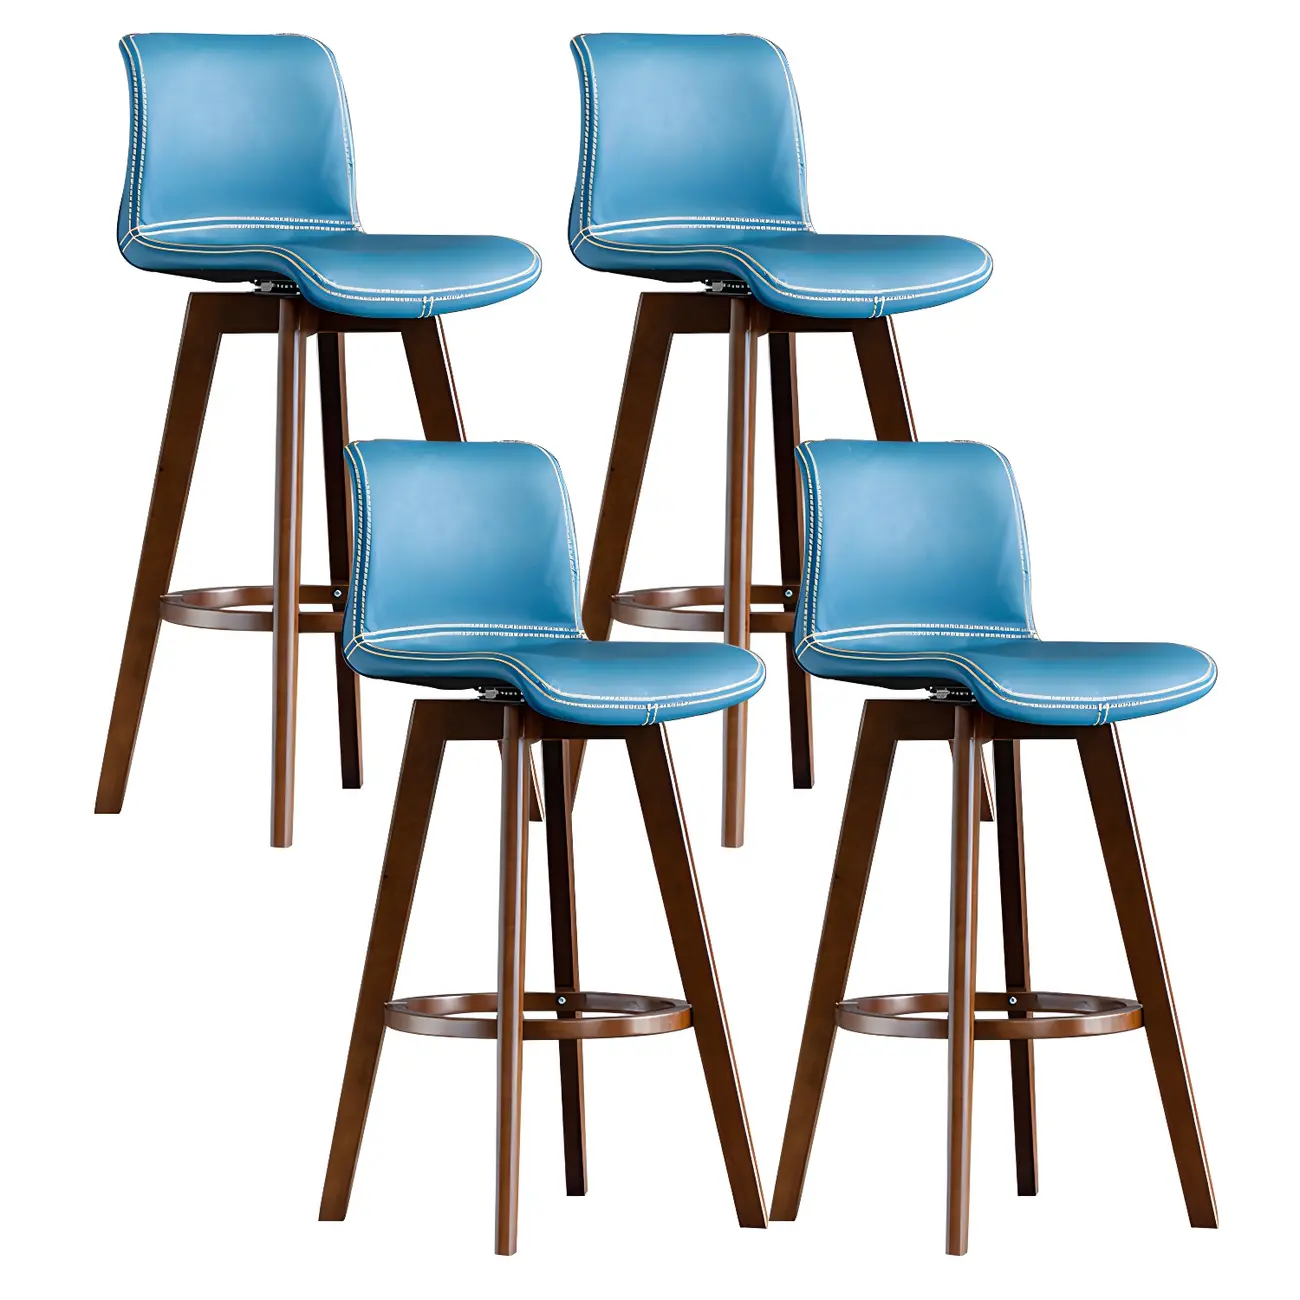
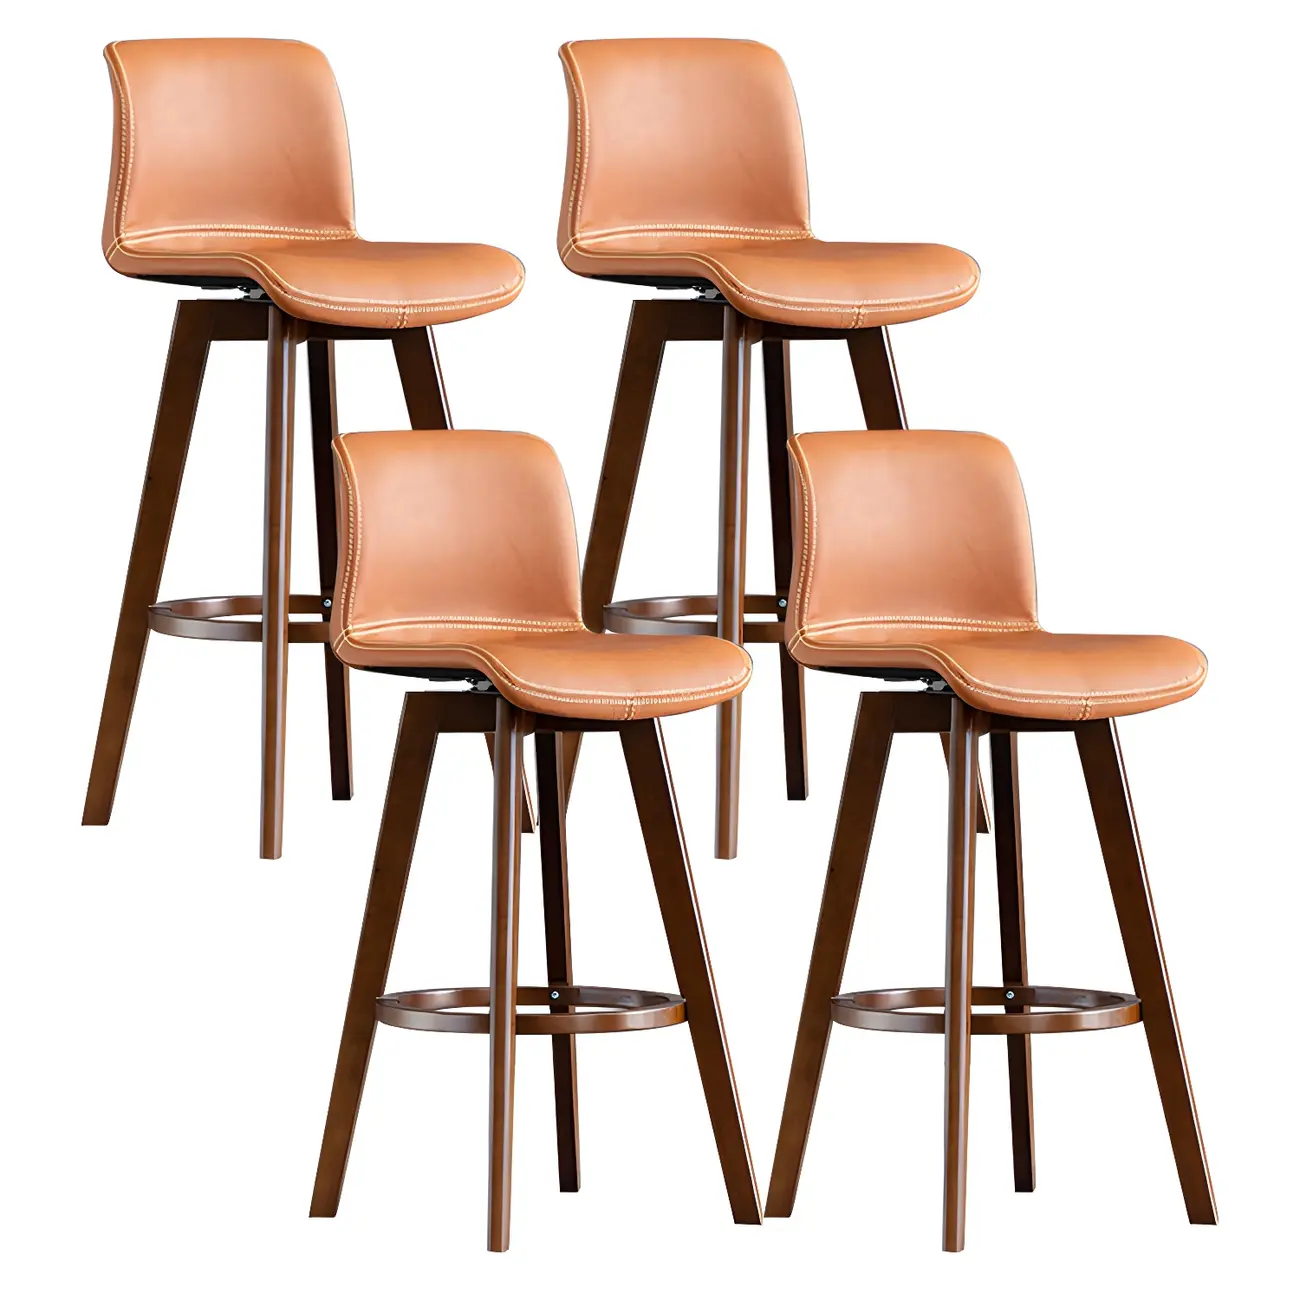


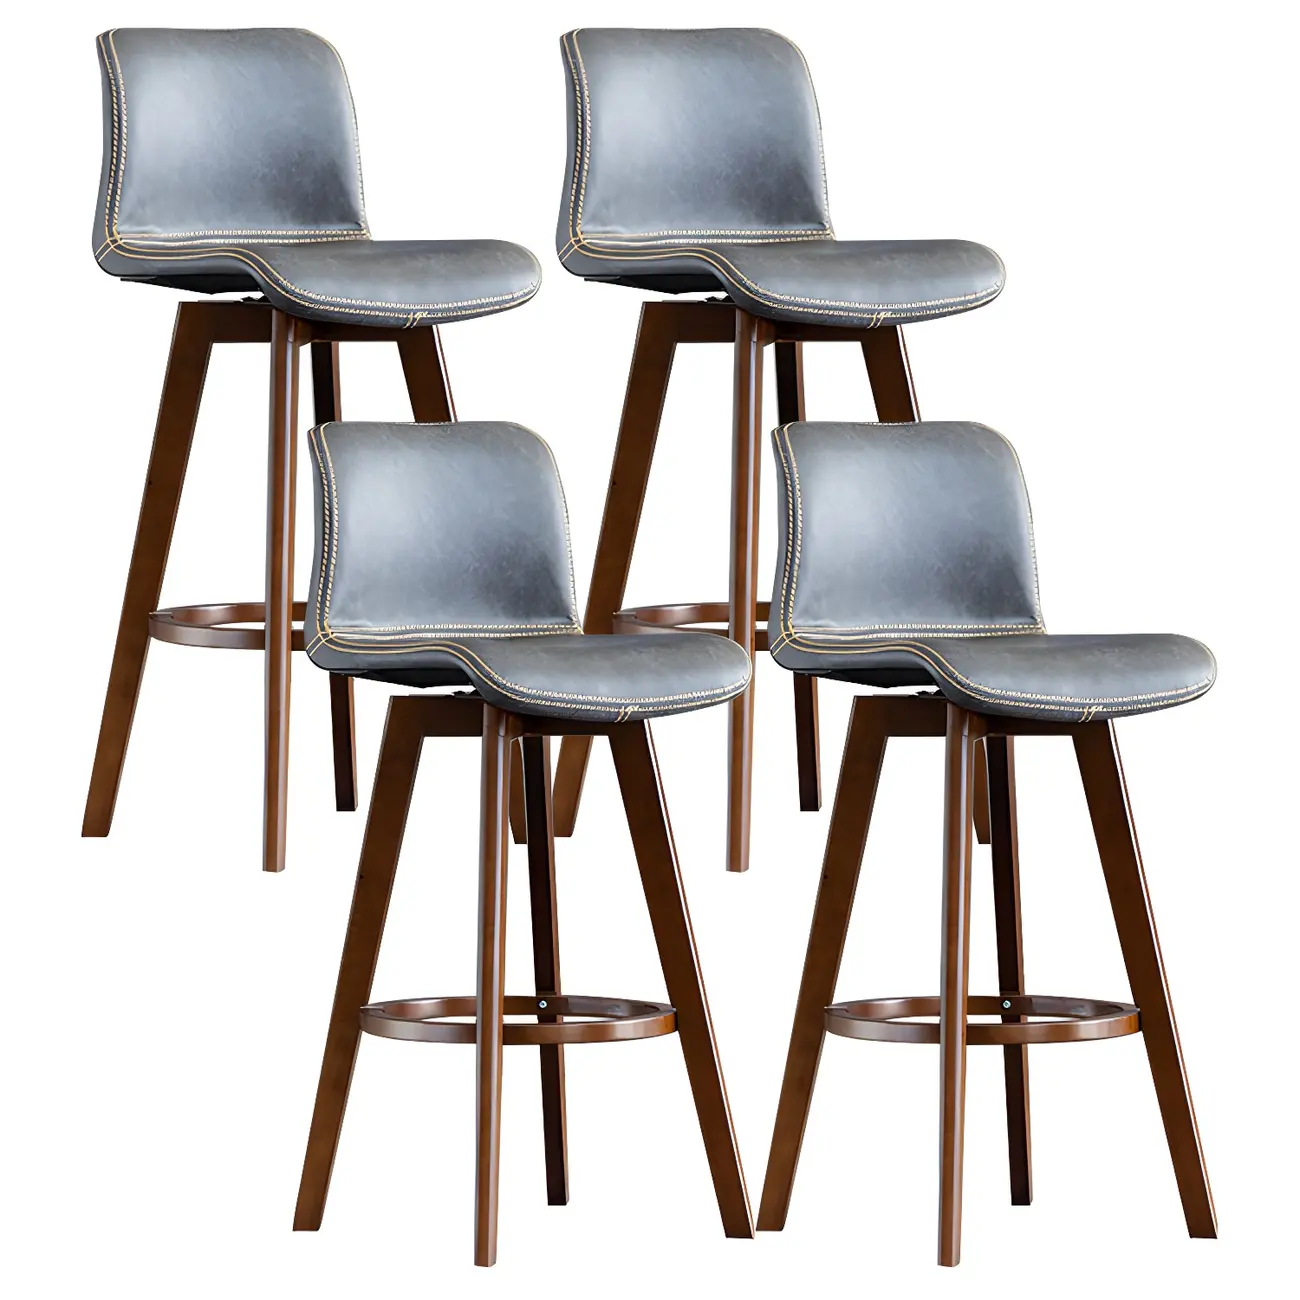
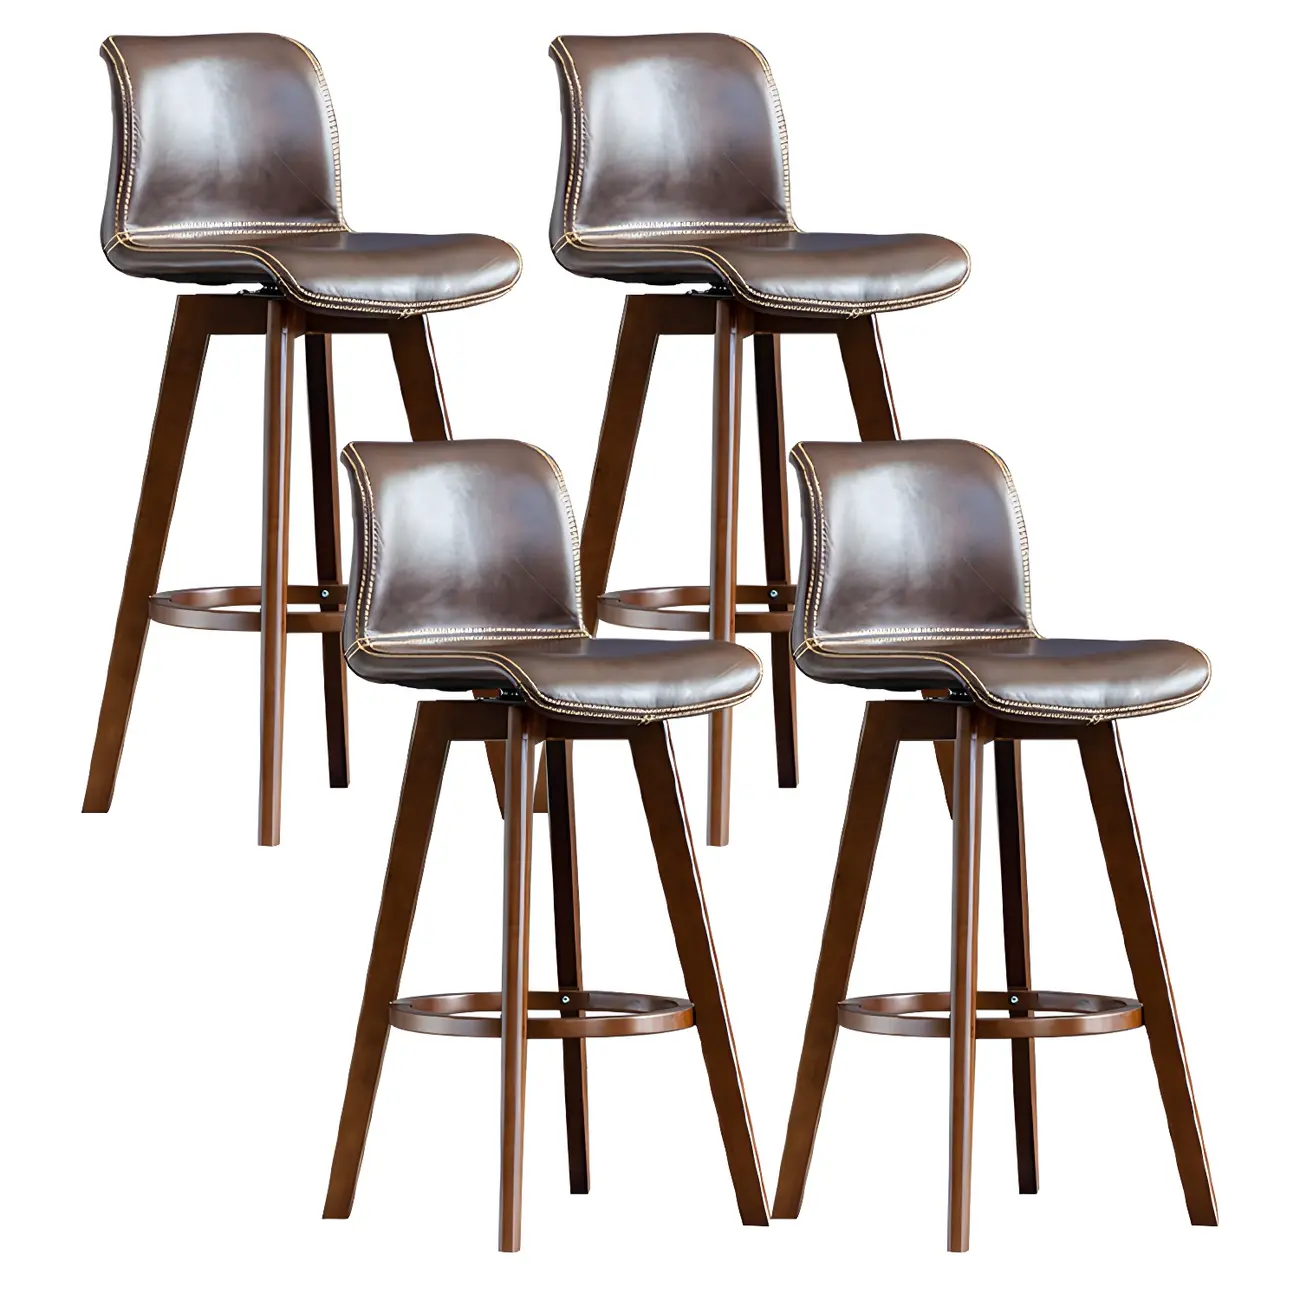

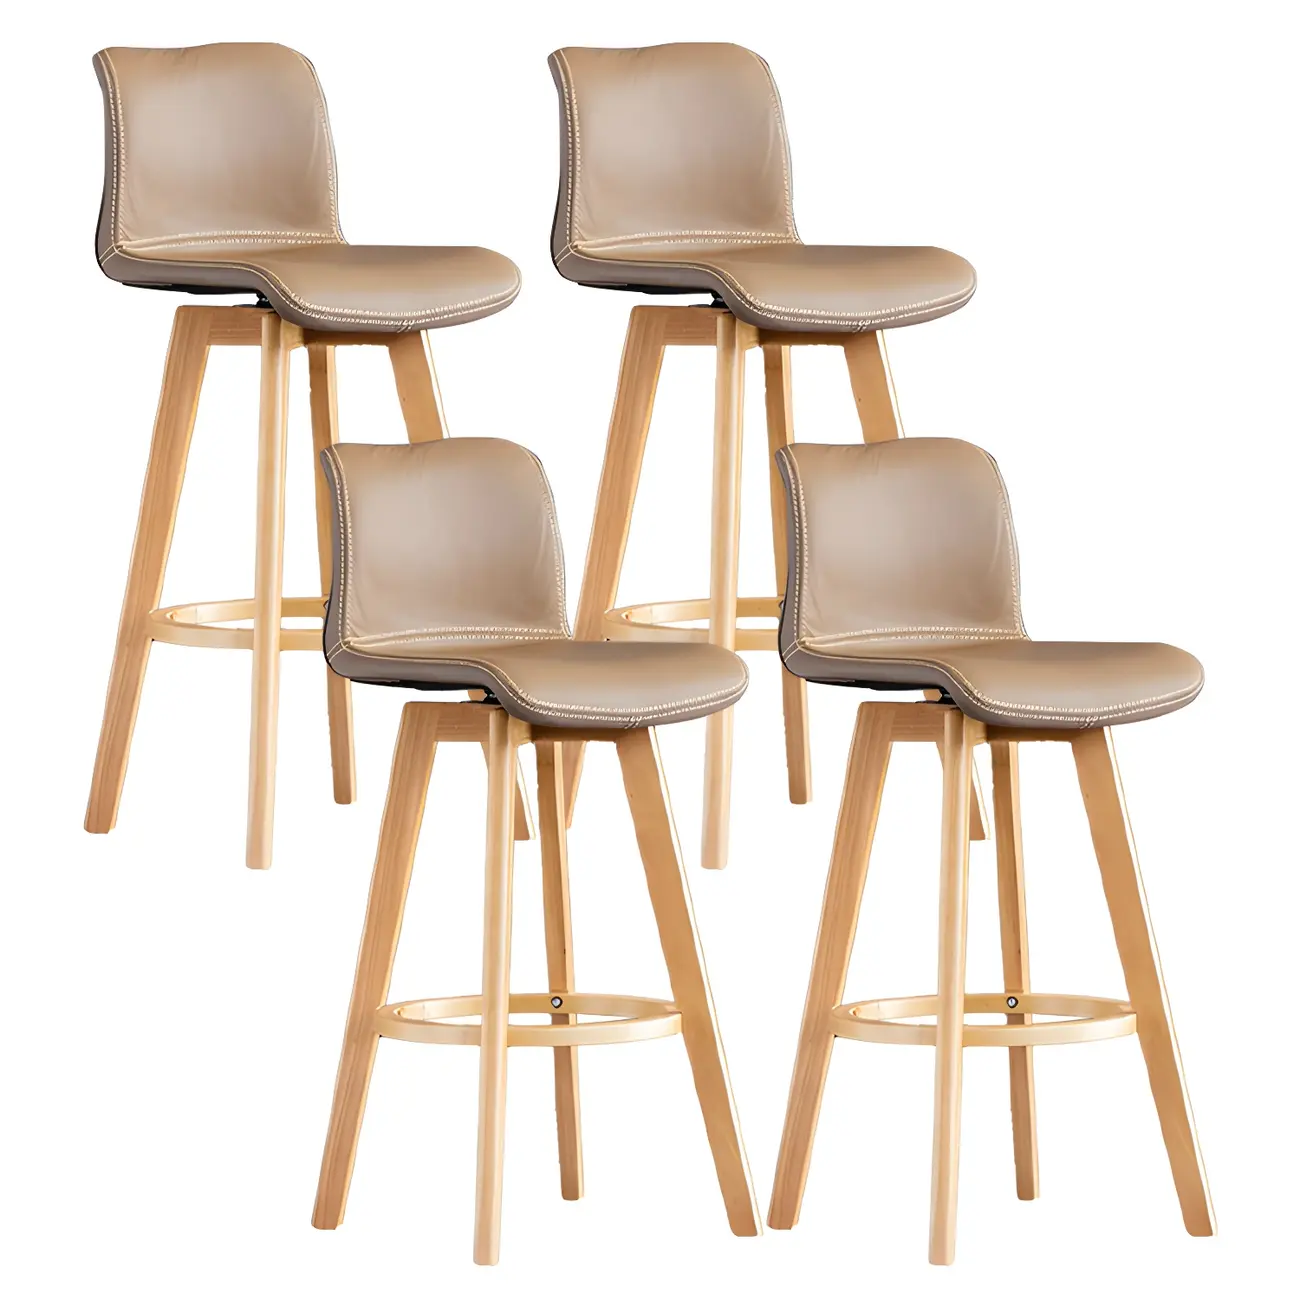
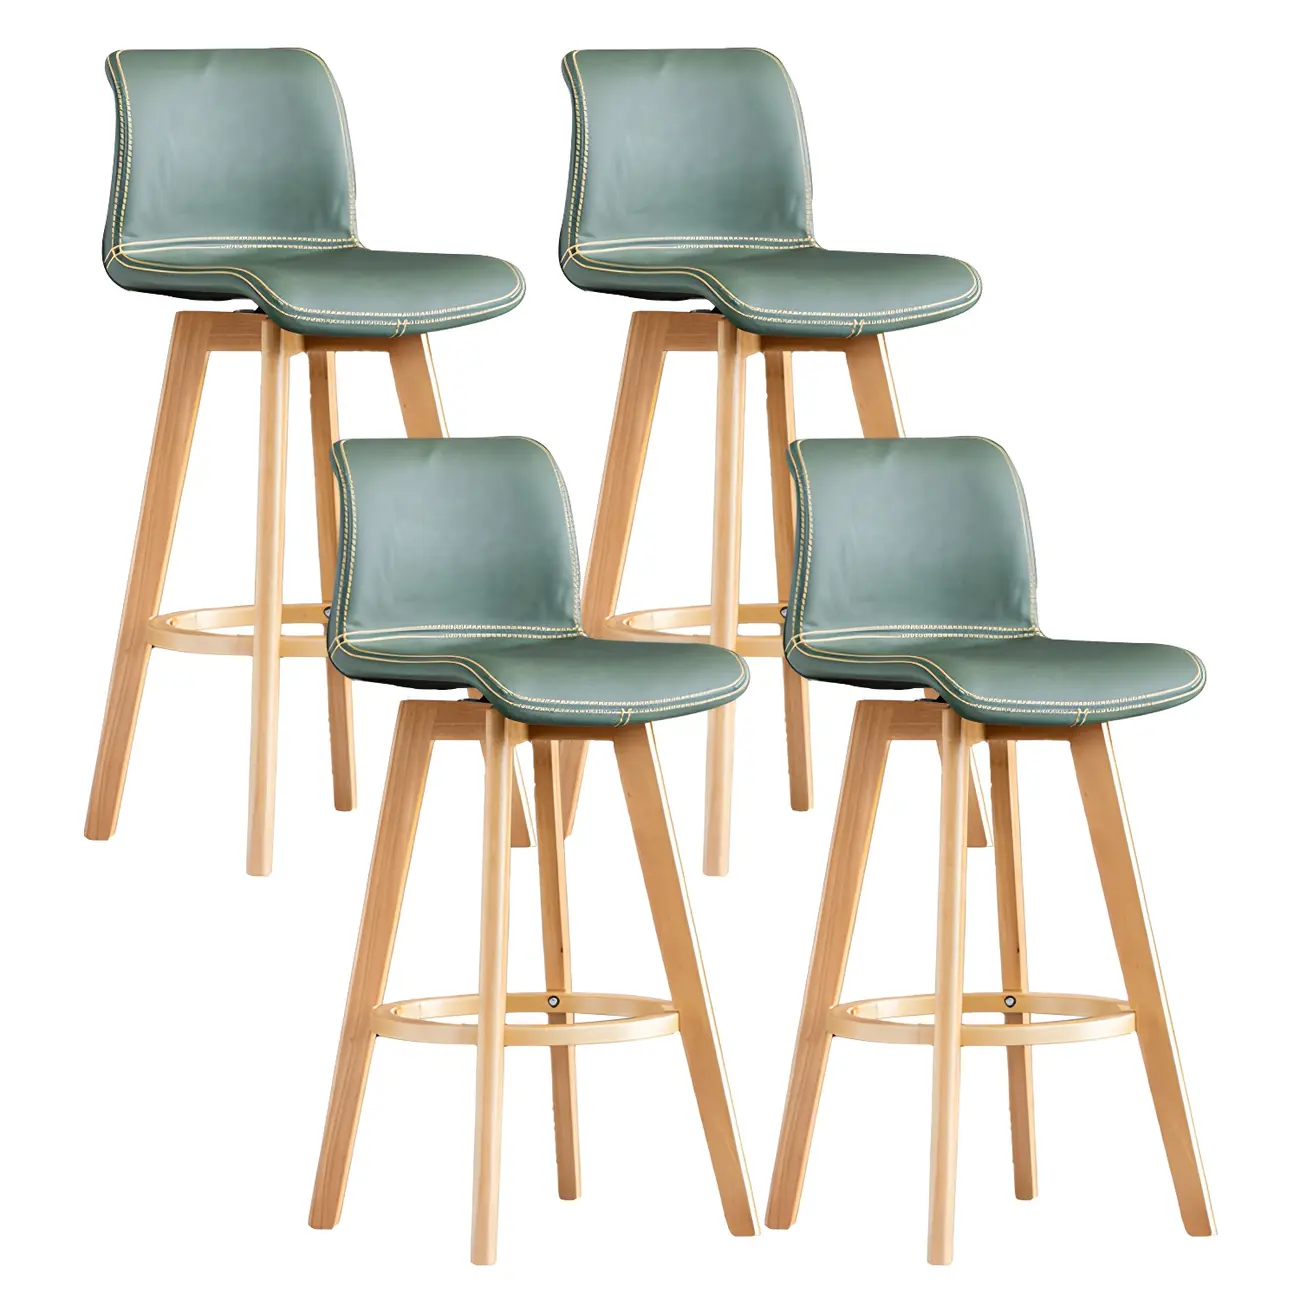

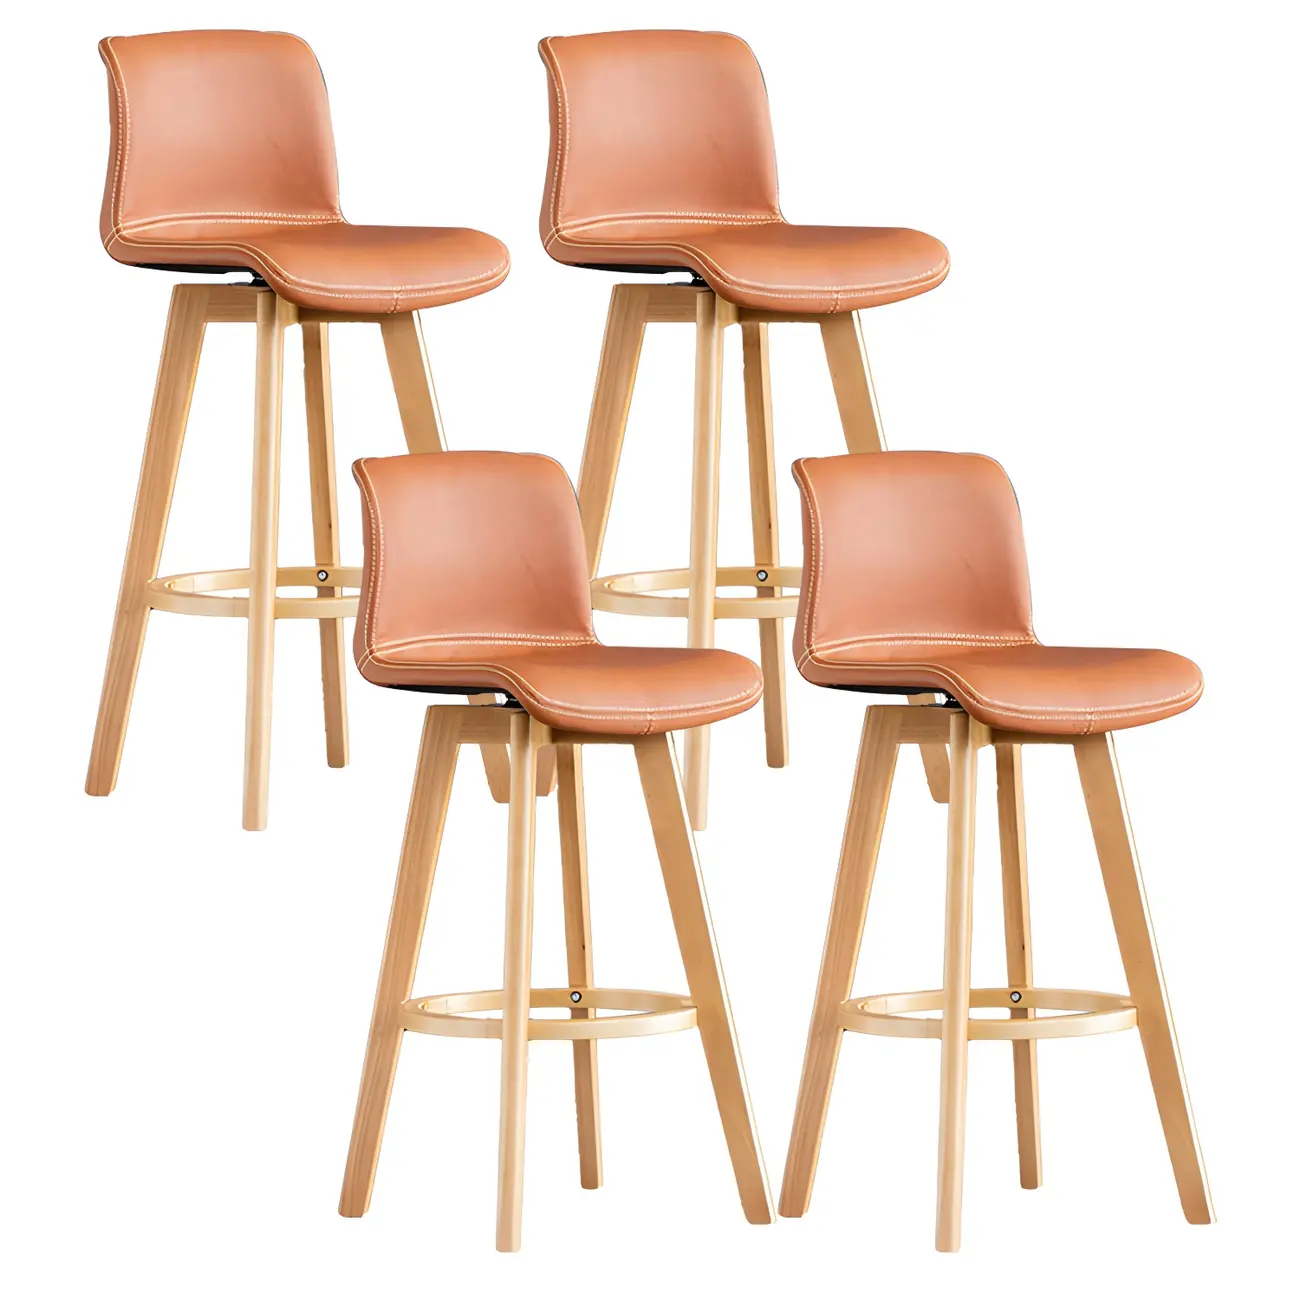
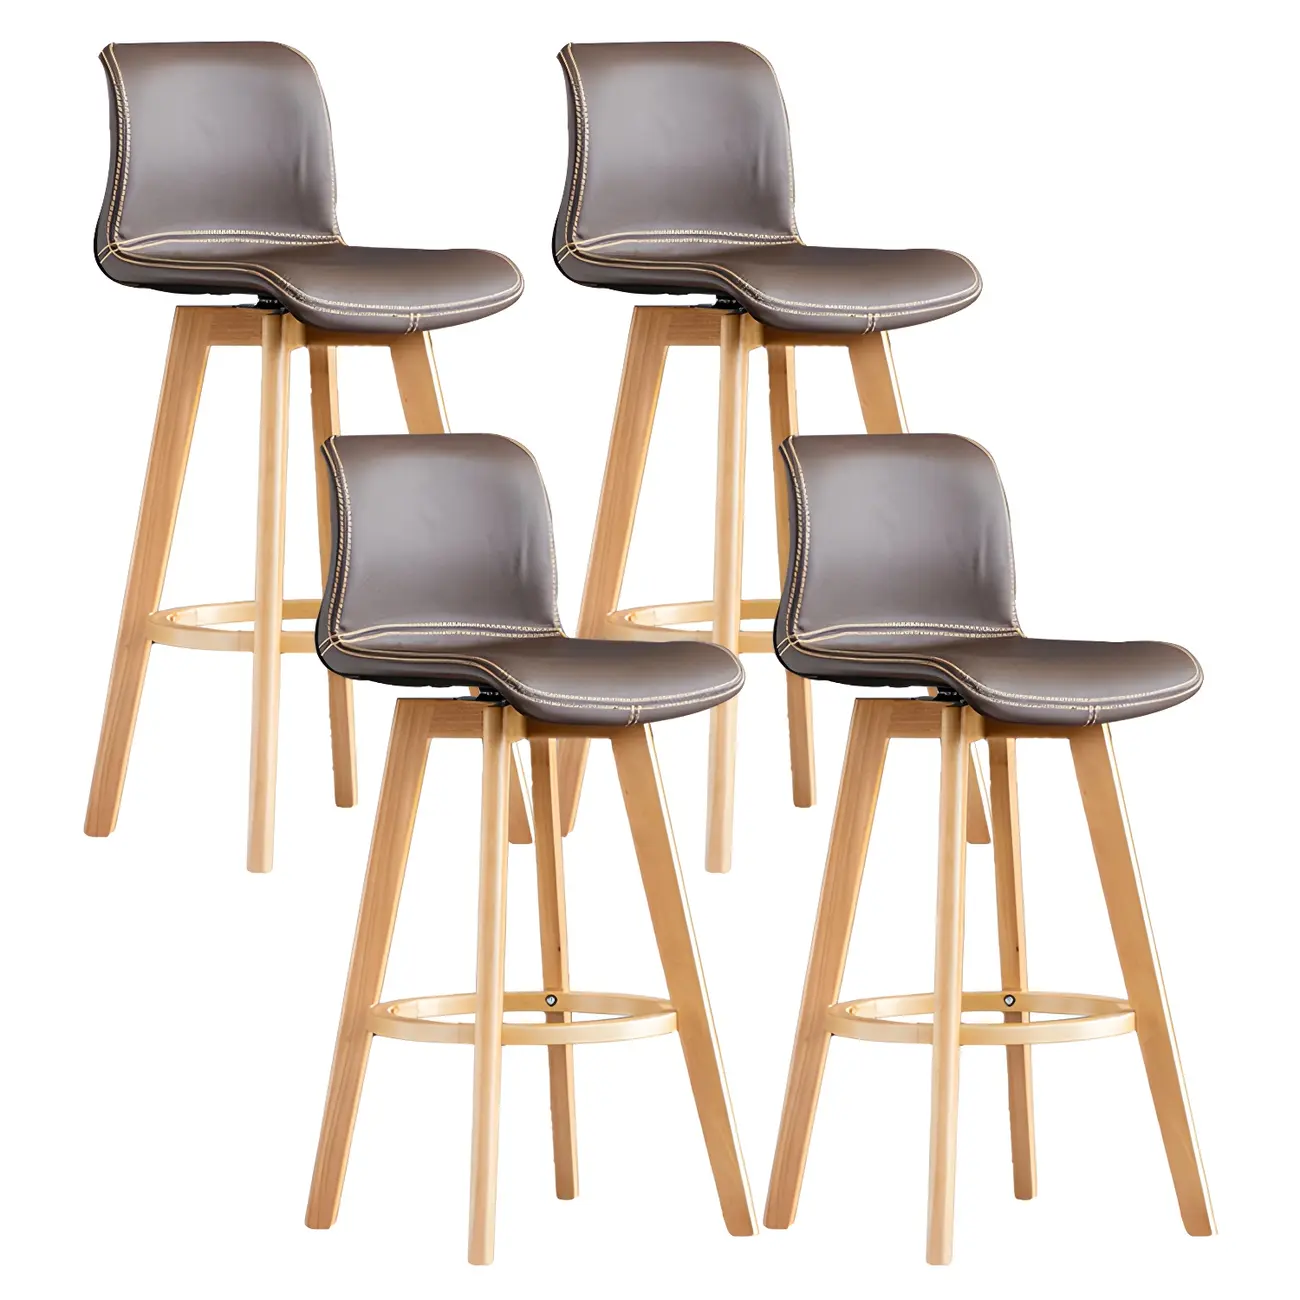
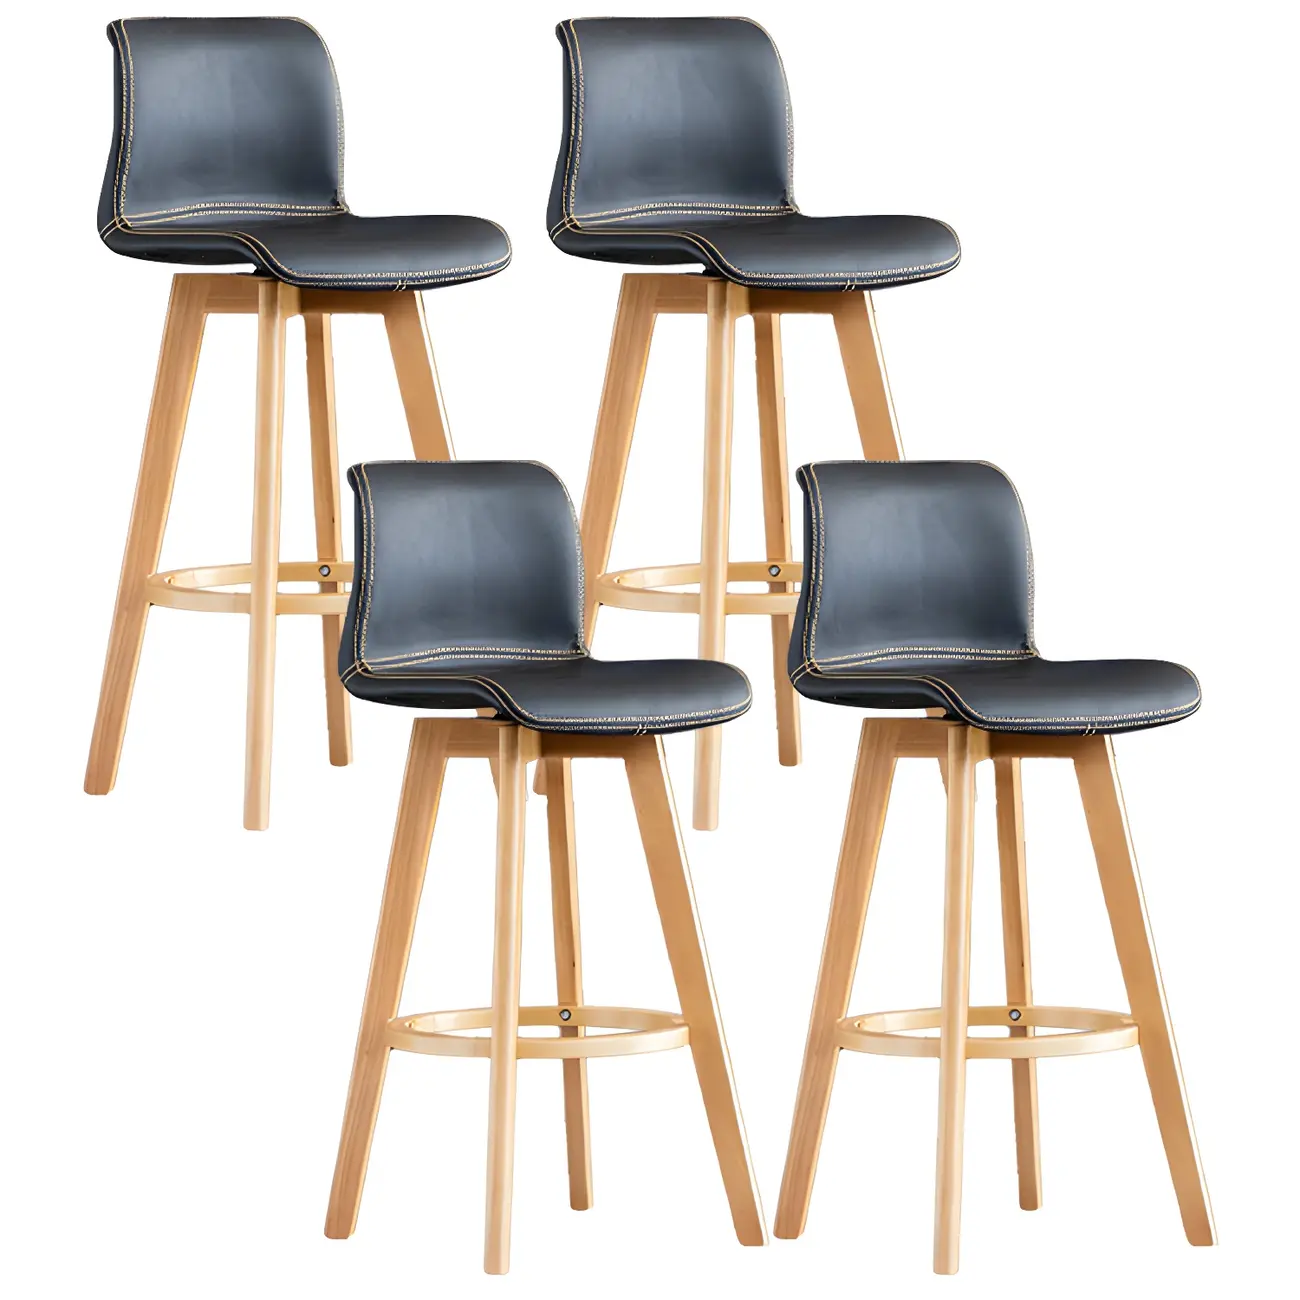
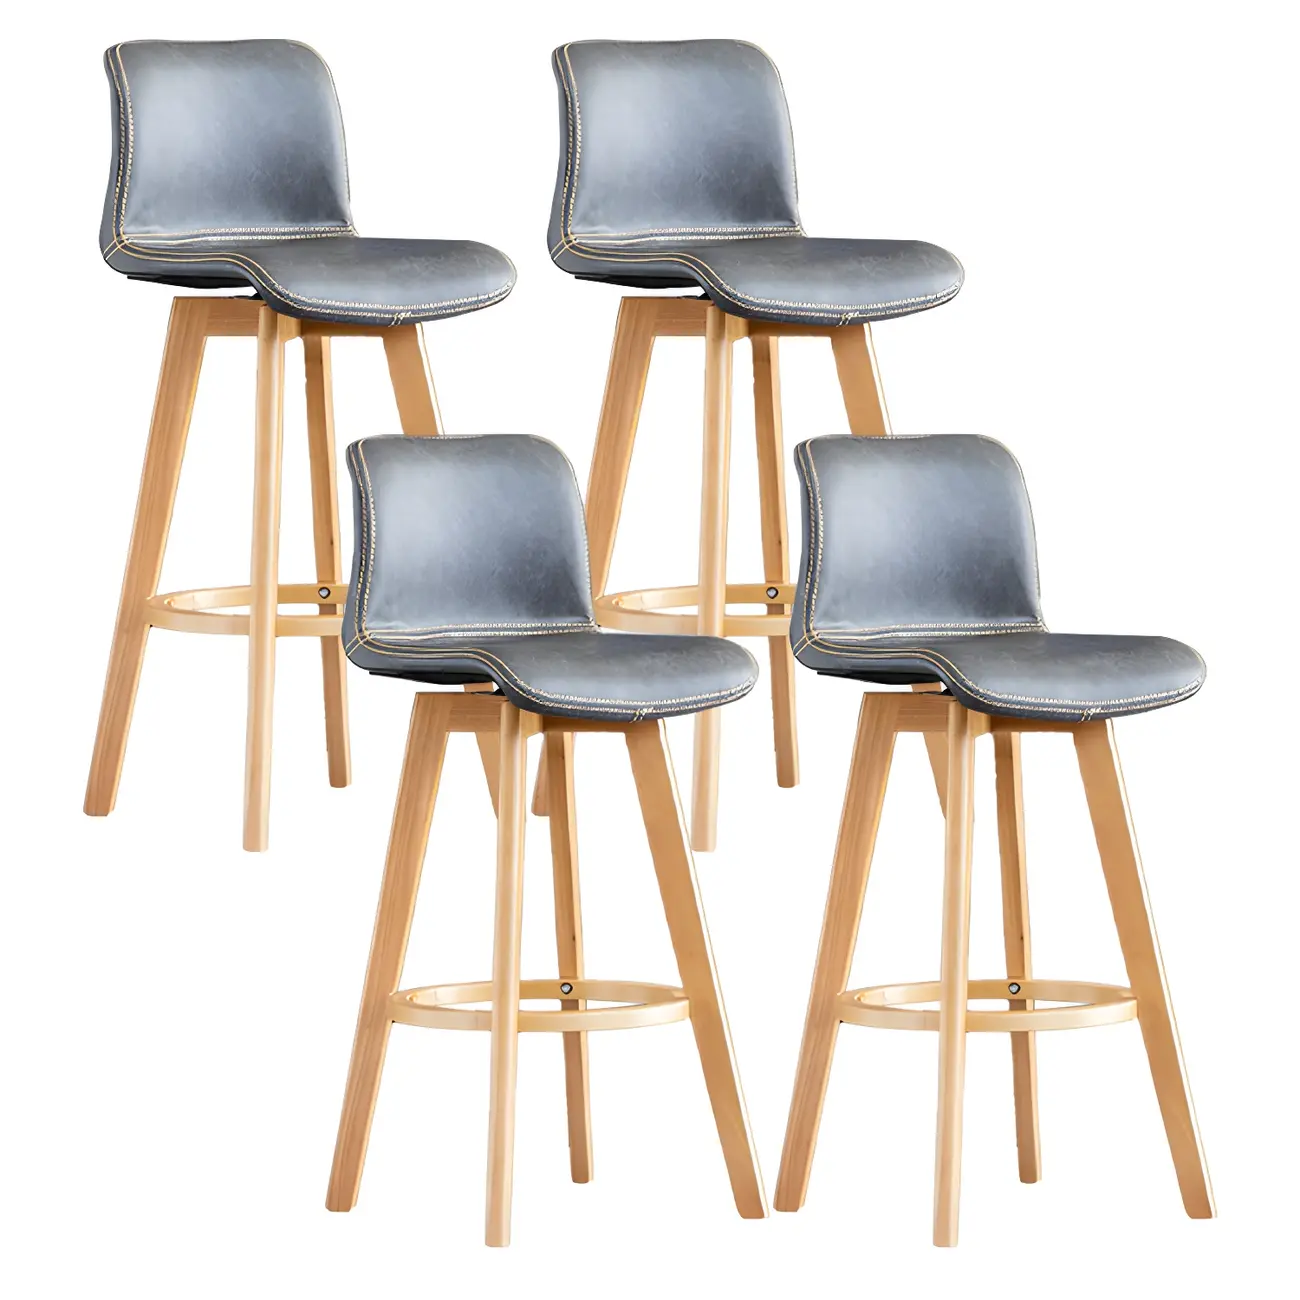

Mid-Century Distressed Leather Swivel Bar Stool with Back
Claim $116.62 Coupon

-
30-Day Return
-
Shipping Protection
Shipping Protection FAQ
Q1: What is Shipping Protection?
A1: When purchasing from Xcotton-partnered stores, you may opt for Shipping Protection to safeguard your order against loss, damage, or misdelivery during transit.
Q2: When am I eligible to file a claim?
A2: You may submit a claim under the following circumstances:
- Domestic orders undelivered after 30 days or international orders undelivered after 60 days from the shipment date.
- Visible damage to the delivered package.
- Package marked "delivered" but not received (requires supporting documentation, e.g., police report or security footage).
- Misdelivery to an incorrect address due to system/processing errors (provided the correct address was submitted at checkout).
Q3: How do I file a claim?
A3: To report lost, damaged, or misdelivered packages, you have two convenient options:
- Reach out to our team first via email at service@homeyfad.com for priority support
- Or submit your request directly through the Xcotton Resolution Center
Note: All claims must be submitted within 90 days of the order date.
Q4: Can I cancel Shipping Protection?
Pre-shipment: Contact the merchant directly for a refund.
Post-shipment: Non-refundable once the order is shipped.
-
7-Day Refund
-
1-Year Warranty
Description
SPU : SPU21241443
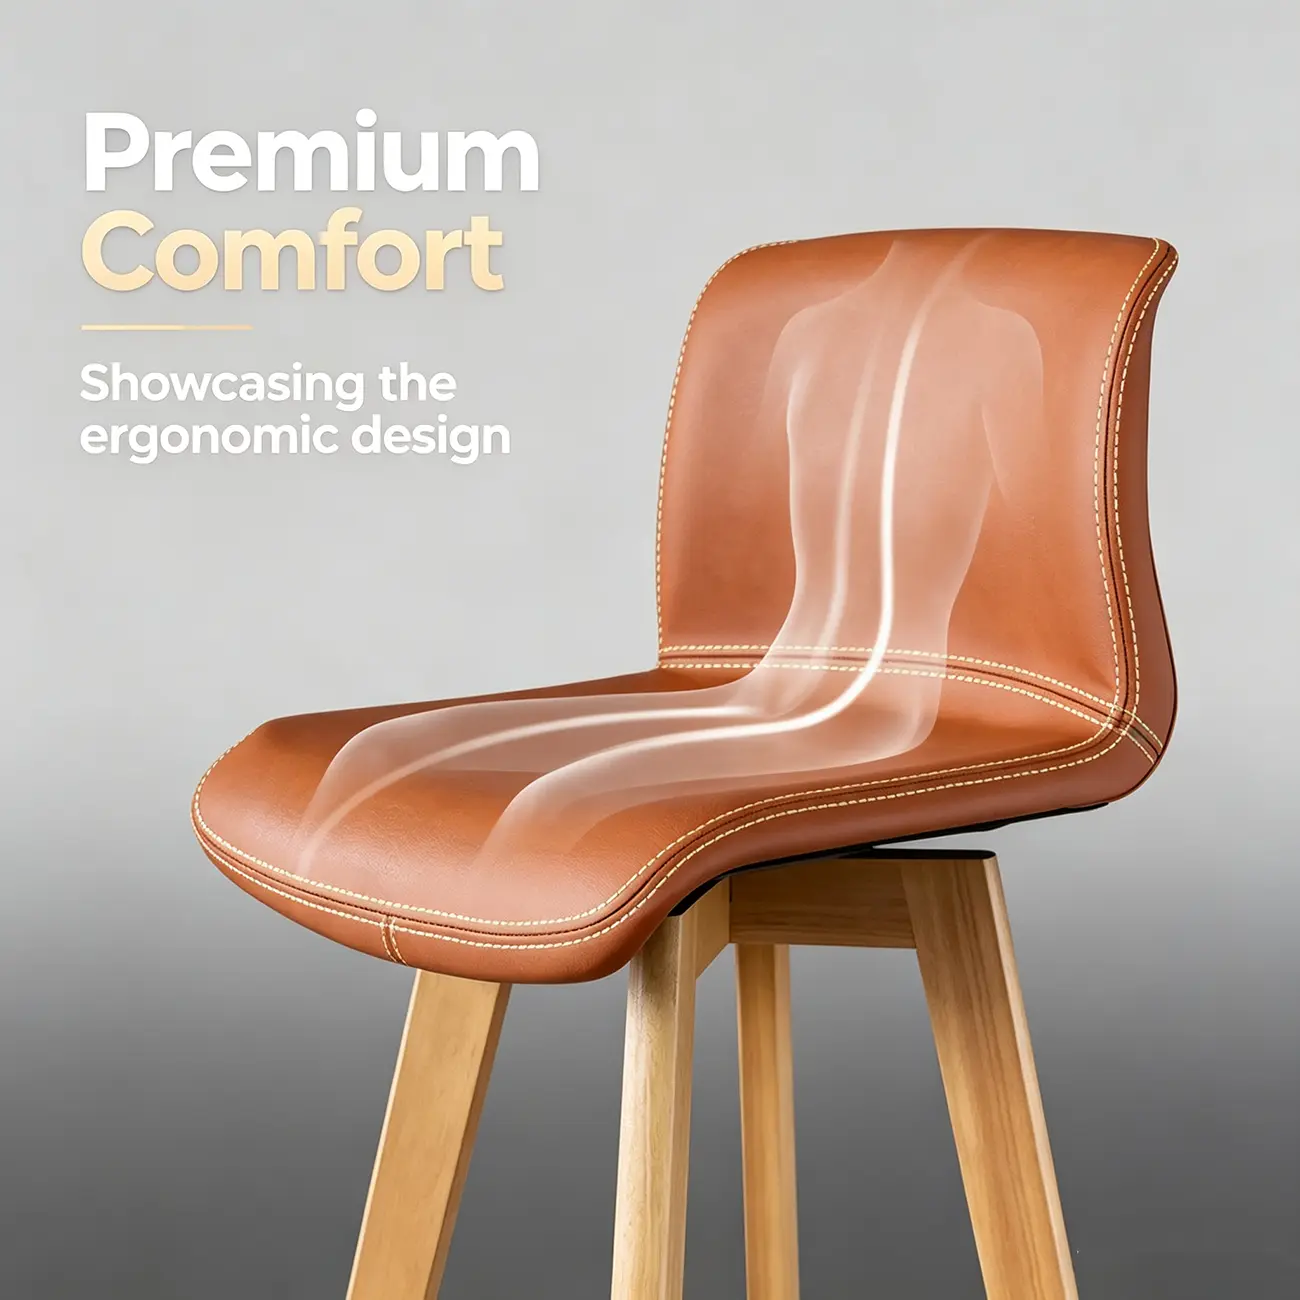
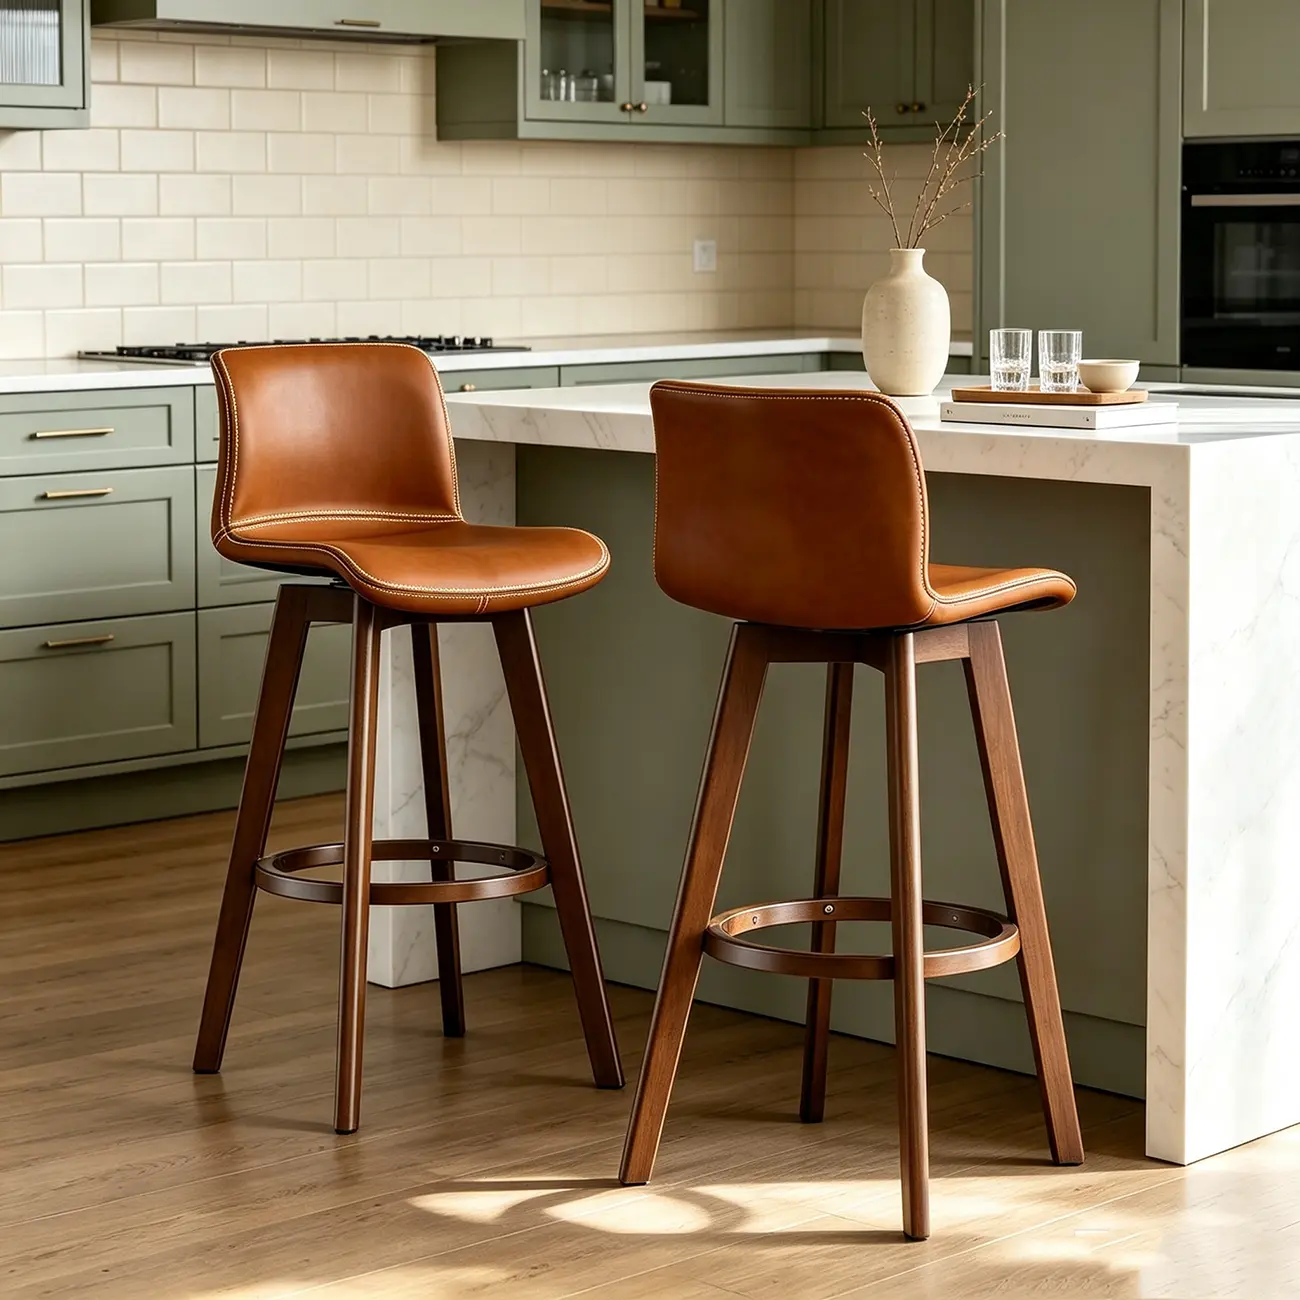
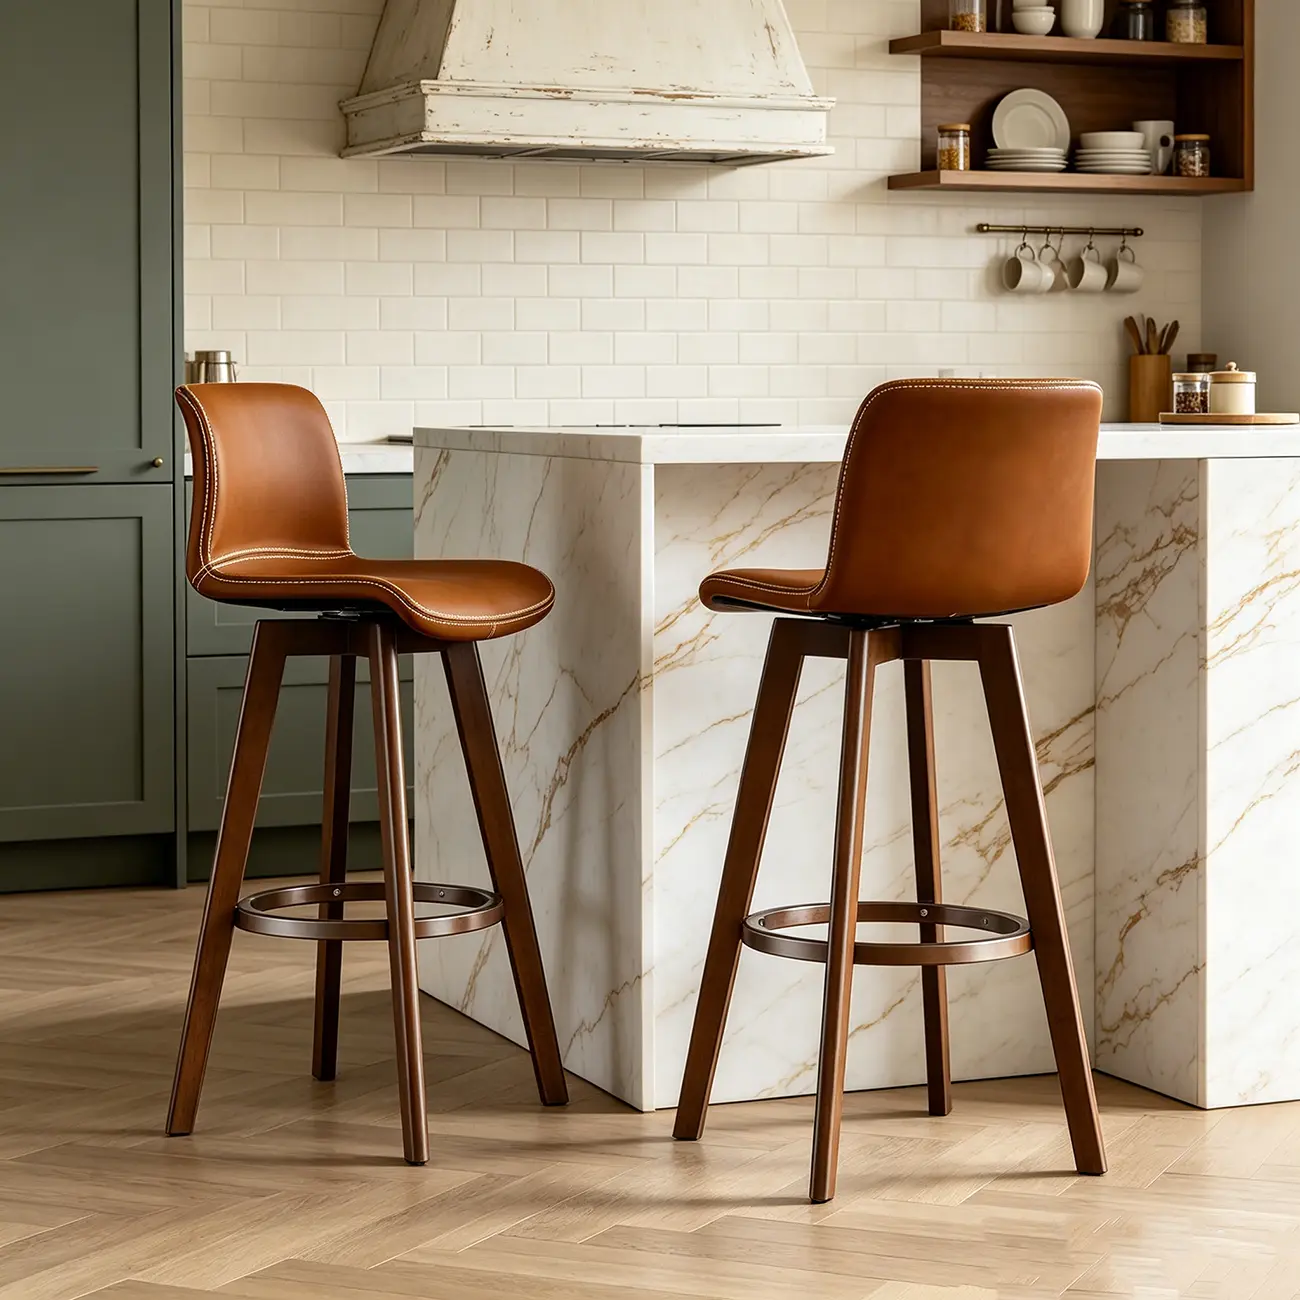
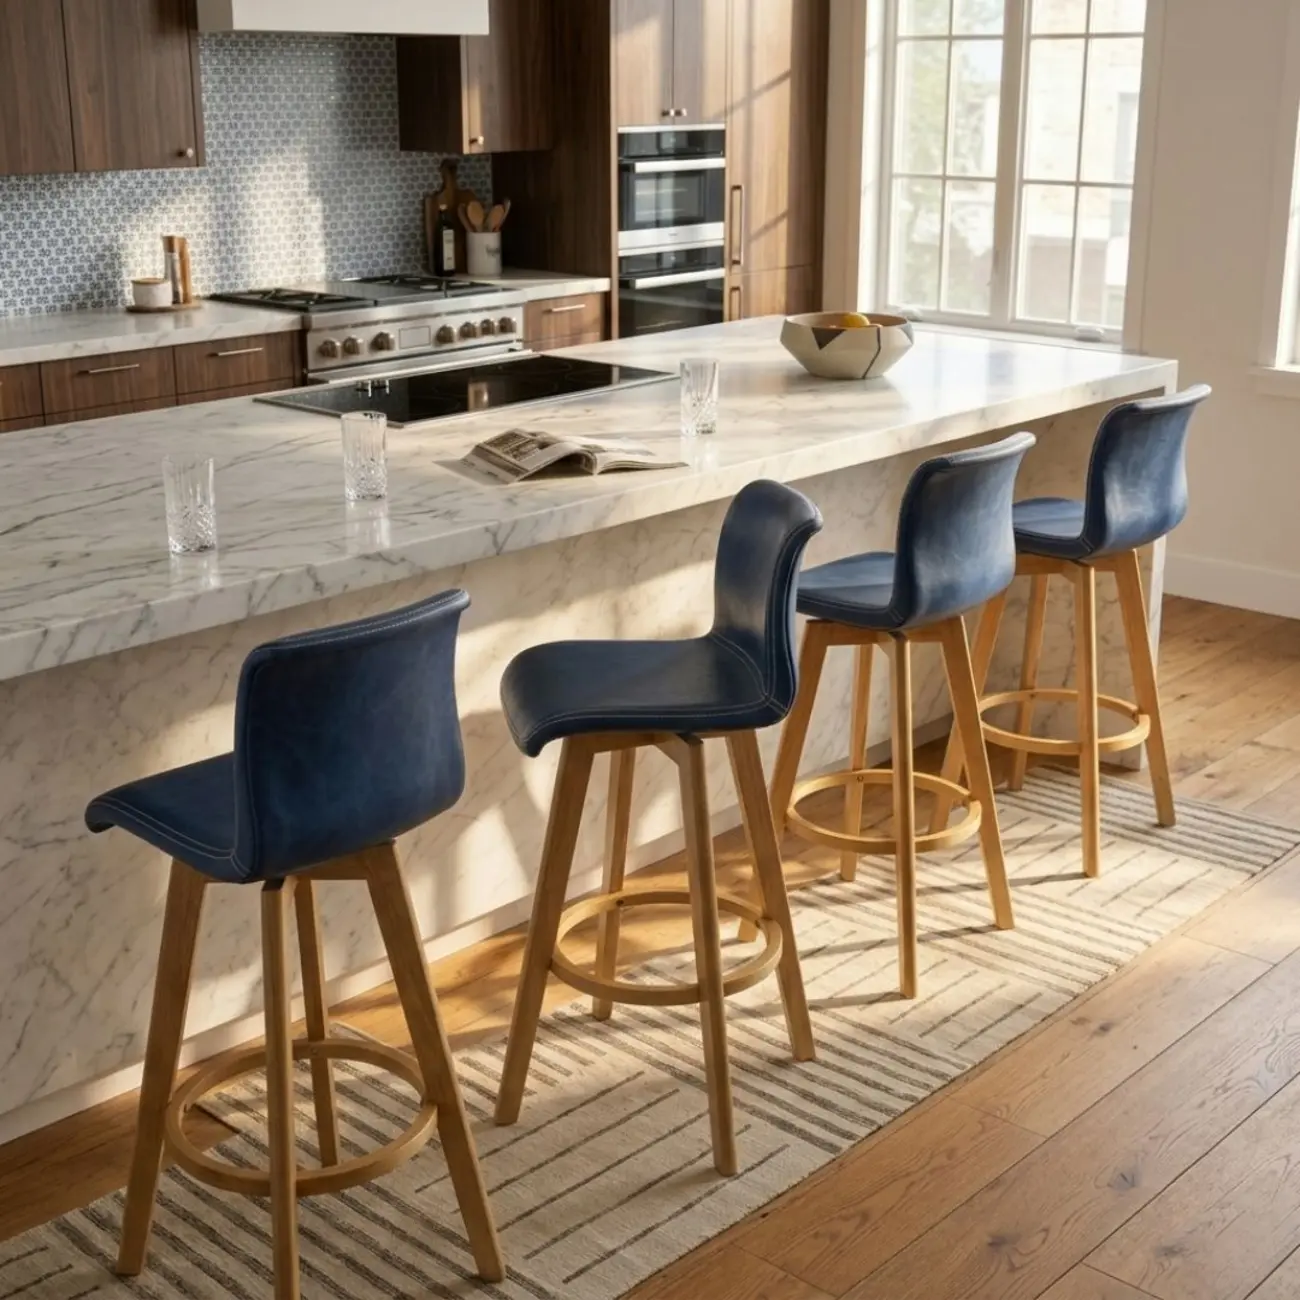
Rendered with distressed leather and a mid-century-inspired Scandinavian design, this bar stool adds an upscale touch to any kitchen or bar area.
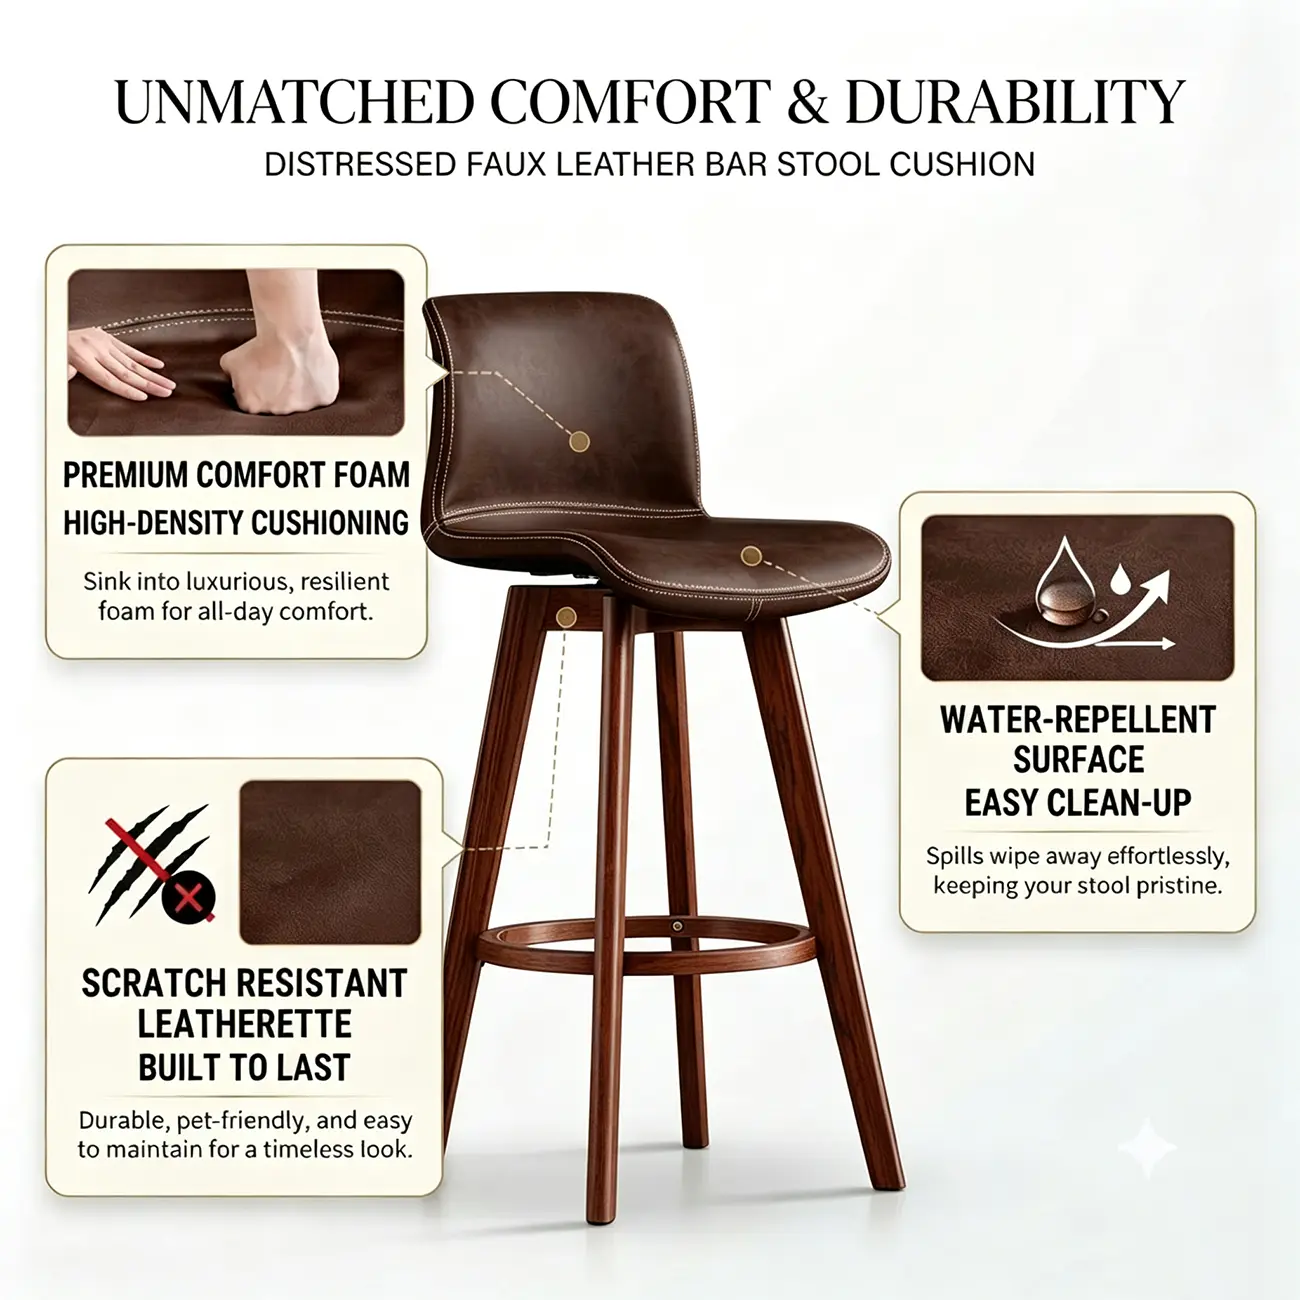
- Premium Leather Material: Made of carefully selected premium leather, it provides an excellent soft touch and visual luxury, ensuring long-lasting use value.
- Comfortable sitting feeling: The seat is filled with thick high-density sponge, which feels soft and has good support. It is comfortable and not tiring to use for a long time.
- Easy to clean: The leather material is waterproof and stain-resistant, and can be kept clean by simply wiping it, making it easy to maintain.
- Ergonomic design: The low backrest design fits the human body curve, supports the waist, and makes sitting more comfortable.
- Rotation function: 360-degree smooth rotation makes it easy to take and talk, improving the convenience of use.
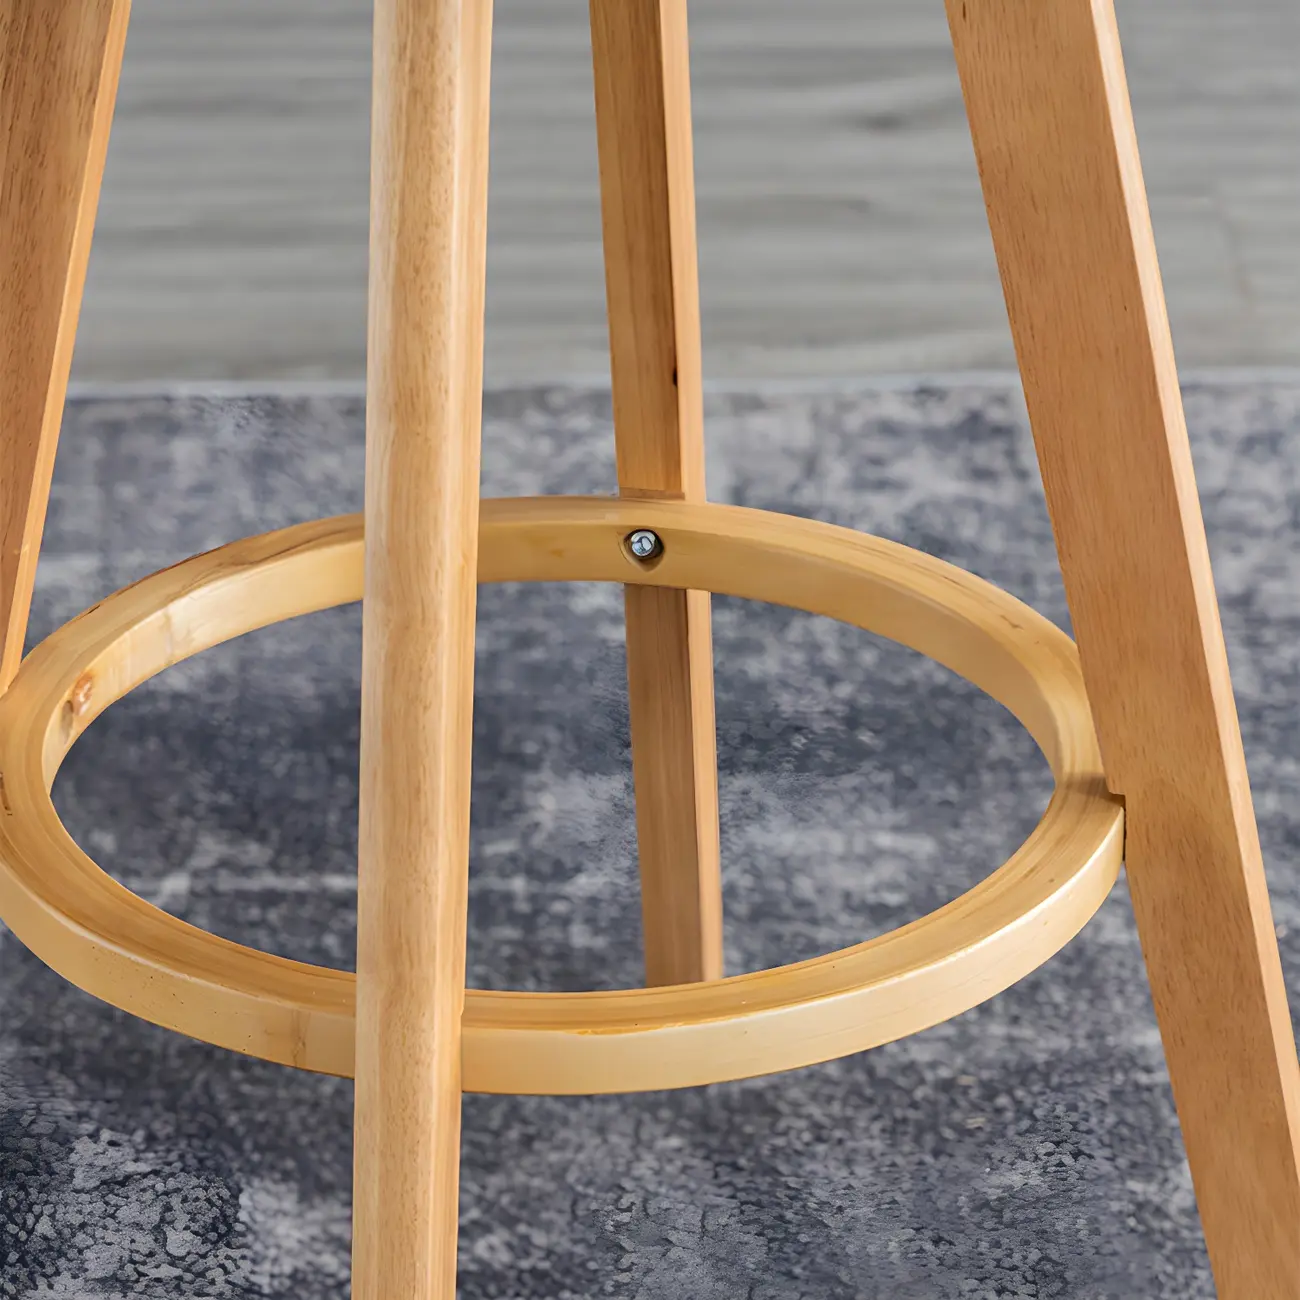
- Stable structure: The chair legs are made of sturdy solid wood structure, the base is stable, and it is equipped with anti-slip protection to provide reliable safety during use.
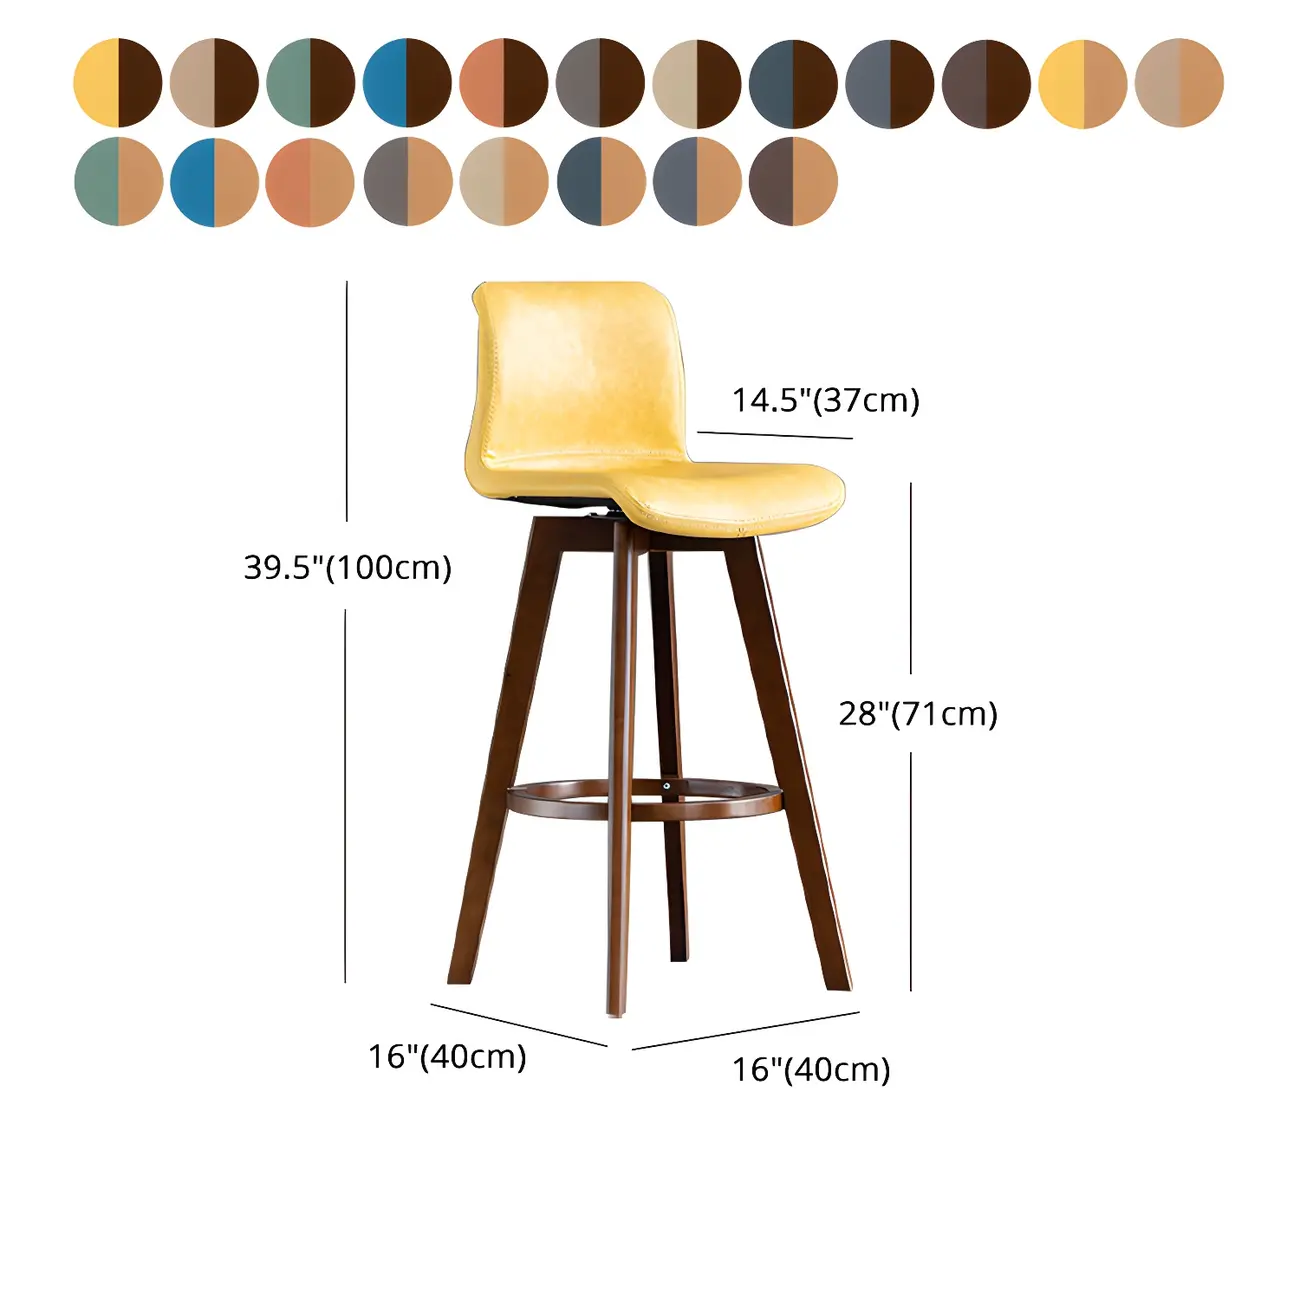
- Multiple color options: Available in black, brown, blue, gray, green, yellow, and other colors, easy to match with different decoration styles.
- Perfect Height Match: The seat height is 28 inches, ideal for standard bar counters and kitchen islands, ensuring ease of use.
- Easy Assembly: Clear assembly instructions are provided, making the installation process simple and quick, with no need for professional tools.
Weights & Dimensions

| Overall Height - Top to Bottom | 39" (100 cm) |
| Overall Width - Front to Back | 16" (40 cm) |
| Overall Width - Side to Side | 16" (40 cm) |
| Seat Height - Floor to Seat | Bar 28" (71 cm) |
| Seat Length - Side to Side | 16" (40 cm) |
| Seat Width - Front to Back | 14.5" (37 cm) |
Specifications
| Full or Limited Warranty | Limited |
| Level of Assembly | Partial Assembly |
| Product Warranty | Product Warranty Included |
| Warranty Length | 1 Year |
| Arms Included | Armless |
| Foldable | Non-Foldable |
| Footrest Included | With Footrest |
| Height Adjustable | Non-Adjustable Height |
| Popular Sizes | 29 inches |
| Stackable | Non-Stackable |
| Swivel | Swivel |
| Feature | Swivel |
| Maximum Weight Capacity | 660 lbs |
| Seat Back | With Back |
| Back Heights | Low Back |
| Base Color | Brown,Natural |
| Base Type | Four Legs |
| Color | Blackish Green,Coffee,Dark Brown (Genuine Leather),Dark Khaki (Genuine Leather),Grey,Light Brown,Matte Black,Royal Blue,Yellow |
| Frame Material | Wood |
| Frame Wood Species | Solid + Manufactured Wood |
| Number of Items Included | 1 Piece,2 Piece Set,4 Piece Set |
| Purposeful Distressing Type | Distressed Leather |
| Seat Style | Rectangle |
| Seating Color | Black,Blue,Brown,Gray,Green,Yellow |
| Seating Material | Leather |
| Style | Scandinavian |
| Upholstery Material | Leather |
| Wood Tone | Espresso Wood,Light Wood |
Return Policy
You can initiate a return within 30 days of receipt whenever you are not satisfied with the item.
- For most new and unused items
- Professional return guidance and customer service